LibGDX重建Flappy Bird——(7) 添加GUI信息
作者:互联网
原文链接:https://my.oschina.net/u/2432369/blog/610407
 接下来为Bird添加最高分数的永久保存方法。 首先为Constants类添加两个常量:
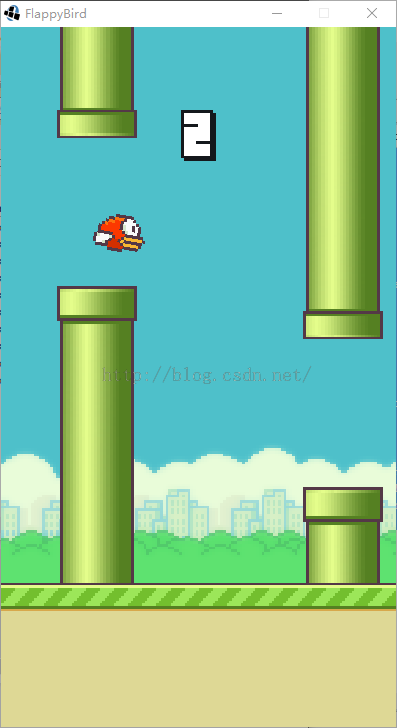
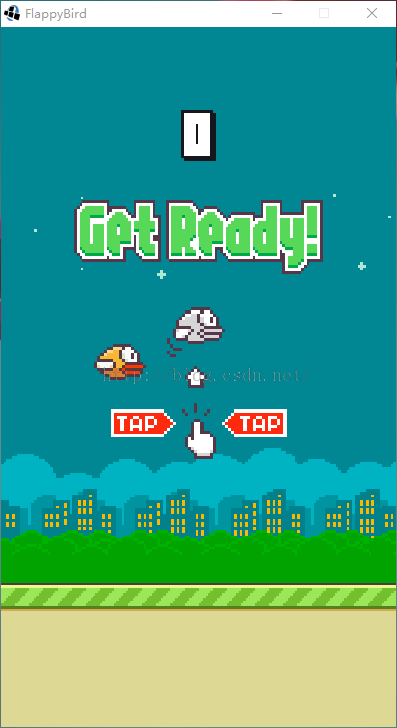
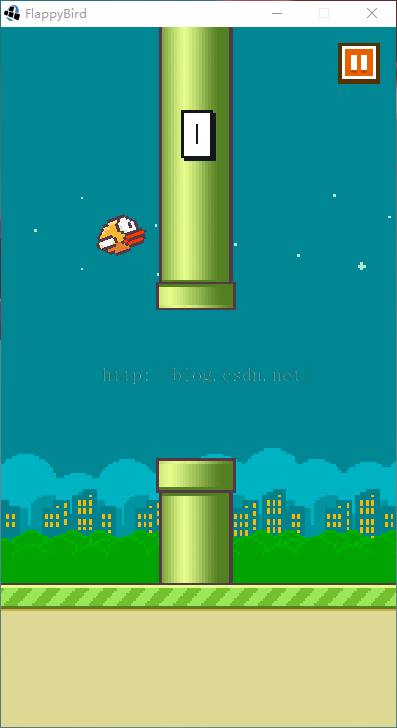
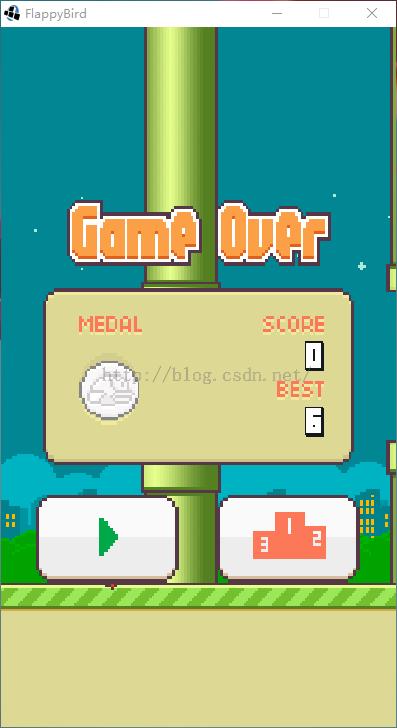
说了这么多,该是测试的时候了:

 很高兴,我们三个界面都完美的显示了。本章内容到此结束,下章将为应用添加声音资源和启动画面等。
由于时间较为紧迫,写的比较粗糙,文中难免有所疏漏,望读者见谅,如果什么问题,可以尽管提问,我会及时解答,如果你有更佳的实现技术,请不吝赐教!
本章源码链接:http://pan.baidu.com/s/1hruBkgc密码:94iq
上一章介绍我们基本已经完成FlappyBird的游戏逻辑,接下来在本章将添加一些GUI信息,如分数、按钮等。
分数GUI
首先我们需要为WorldController维护一个int值表示当前玩家获得的分数。修改WorldController并添加相应的方法:
...
public class WorldController extends InputAdapter implements Disposable {
    ...
    public int score;
    ...
    private void init() {
    	...
    	score = 0;
    	isStart = false;
    	...
    }
    ...
    // 计算分数
	private void calculateScore () {
		for(Pipe pipe : pipes.pipes) {
			if(pipe.position.x < bird.position.x) {
				if(pipe.getScore() == 1) {
					score += 1;
					Gdx.app.debug(TAG, "Your current score:" + score);
				}
			}
		}
	}

    public void update(float deltaTime) {
    	...
    	calculateScore();
    }
...
}// 游戏GUI渲染方法
private void renderGui(SpriteBatch batch) {
batch.setProjectionMatrix(camera.combined);
batch.begin();
renderScore(batch);
batch.end();
}
// 分数
private void renderScore(SpriteBatch batch) {
int[] score = Tools.splitInteger(worldController.score);
float h = 4.5f;
float w = 0, totalWidth = 0;
for(int i = 0; i < score.length; i++) {
AtlasRegion reg = Assets.instance.number.numbers_font.get(score[i]);
w = h * reg.getRegionWidth() / reg.getRegionHeight();
totalWidth += w;
}
float x = -totalWidth / 2;
float y = Constants.VIEWPORT_HEIGHT / 2 * 0.6f;
w = 0;
for(int i = 0; i < score.length; i++) {
AtlasRegion reg = Assets.instance.number.numbers_font.get(score[i]);
w = h * reg.getRegionWidth() / reg.getRegionHeight();
batch.draw(reg.getTexture(), x, y, w/2, h/2, w, h, 1, 1, 0,
reg.getRegionX(), reg.getRegionY(),
reg.getRegionWidth()-(i != (score.length - 1) ? 3 : 0),
reg.getRegionHeight(),false, false);
x += w;
}
}package com.art.zok.flappybird.util;
public class Tools {
public static int[] splitInteger(int i) {
char[] chars = Integer.toString(i).toCharArray();
int[] result = new int[chars.length];
for(int j = 0; j < chars.length; j++) {
result[j] = chars[j]- 48;
}
return result;
}
} 接下来为Bird添加最高分数的永久保存方法。 首先为Constants类添加两个常量:
// best score file
	public static final String BEST_SCORE_FILE = "BestScoreFile";
	// best score key
public static final String BEST_SCORE_KEY = "best_score_key";public class WorldController extends InputAdapter implements Disposable {
...
public Preferences prefs;
...
private void init() {
...
prefs = Gdx.app.getPreferences(Constants.BEST_SCORE_FILE);
}
...
private void saveBestScore() {
int bestScore = prefs.getInteger(Constants.BEST_SCORE_KEY);
if(bestScore < score) {
prefs.putInteger(Constants.BEST_SCORE_KEY, score);
prefs.flush();
}
}
public void update(float deltaTime) {
if(!isGameOver) {
if(isGameOver = bird.isGameOver()) {
saveBestScore();
Gdx.app.debug(TAG, "GAME OVER!");
}
}
...
}
}package com.art.zok.flappybird.game.UI;
import com.badlogic.gdx.graphics.g2d.Batch;
import com.badlogic.gdx.graphics.g2d.TextureAtlas.AtlasRegion;
import com.badlogic.gdx.scenes.scene2d.ui.Button;
import com.badlogic.gdx.scenes.scene2d.utils.TextureRegionDrawable;
public class CustomButton extends Button {
AtlasRegion region;
public CustomButton(AtlasRegion reg) {
super(new TextureRegionDrawable(reg));
this.region = reg;
}
@Override
public void draw(Batch batch, float parentAlpha) {
if(isPressed()) {
batch.draw(region, getX(), getY() - 2f, getWidth(), getHeight());
} else {
super.draw(batch, parentAlpha);
}
}
}package com.art.zok.flappybird.game.UI;
import com.art.zok.flappybird.game.Assets;
import com.art.zok.flappybird.util.Tools;
import com.badlogic.gdx.Gdx;
import com.badlogic.gdx.graphics.g2d.Batch;
import com.badlogic.gdx.graphics.g2d.TextureAtlas.AtlasRegion;
import com.badlogic.gdx.scenes.scene2d.Actor;
import com.badlogic.gdx.utils.Array;
public class ScoreActor extends Actor {
private int score;
private Array<AtlasRegion> allRegs;
private float duration;
private int curScore;
private int[] curScores;
private boolean isStatic;
private float x, y;
public ScoreActor(int i, float x, float y, boolean isSatic) {
this.score = i;
this.x = x;
this.y = y;
this.isStatic = isSatic;
allRegs = Assets.instance.number.numbers_font;
curScores = Tools.splitInteger(i);
}
public void update () {
duration += Gdx.graphics.getDeltaTime();
if(duration > 0.1f) {
duration = 0;
curScore += 1;
if(curScore > score) {
return;
} else {
curScores = Tools.splitInteger(curScore);
}
}
}
@Override
public void draw(Batch batch, float parentAlpha) {
if(!isStatic) {
update();
}
float w = 0, all = 0;
for(int i = curScores.length - 1; i >= 0; i--) {
AtlasRegion reg = allRegs.get(curScores[i]);
w = 45 * reg.getRegionWidth() / reg.getRegionHeight();
all += w;
batch.draw(reg, x - all, y, w, 45);
}
}
}// GUI视口宽度
public static final float VIEWPORT_GUI_WIDTH = 480f;
// GUI视口高度
public static final float VIEWPORT_GUI_HEIGHT = 854f;package com.art.zok.flappybird.game.UI;
import com.art.zok.flappybird.game.Assets;
import com.art.zok.flappybird.game.WorldController;
import com.art.zok.flappybird.util.Constants;
import com.badlogic.gdx.scenes.scene2d.Action;
import com.badlogic.gdx.scenes.scene2d.InputEvent;
import com.badlogic.gdx.scenes.scene2d.InputListener;
import com.badlogic.gdx.scenes.scene2d.Stage;
import com.badlogic.gdx.scenes.scene2d.actions.Actions;
import com.badlogic.gdx.scenes.scene2d.actions.DelayAction;
import com.badlogic.gdx.scenes.scene2d.ui.Button;
import com.badlogic.gdx.scenes.scene2d.ui.Image;
import com.badlogic.gdx.scenes.scene2d.utils.TextureRegionDrawable;
import com.badlogic.gdx.utils.viewport.StretchViewport;
public class GameDialog extends Stage {
WorldController worldController;
public GameDialog(WorldController worldController) {
super(new StretchViewport(Constants.VIEWPORT_GUI_WIDTH,
Constants.VIEWPORT_GUI_HEIGHT));
this.worldController = worldController;
}
public void startView() {
clear();
// tutorial
Image tutorial = new Image(Assets.instance.assetUI.tutorial);
tutorial.setBounds(134, 327, 213, 185);
// get ready
Image textReady = new Image(Assets.instance.assetUI.textReady);
textReady.setBounds(89, 553, 302, 90);
addActor(tutorial);
addActor(textReady);
}
public void gameView() {
clear();
// pause 按钮
Button pause = new Button(new TextureRegionDrawable(Assets.instance.assetUI.buttonPause),
new TextureRegionDrawable(Assets.instance.assetUI.buttonResume),
new TextureRegionDrawable(Assets.instance.assetUI.buttonResume));
pause.setBounds(410, 784, 50, 50);
pause.addListener(new InputListener() {
@Override
public boolean touchDown(InputEvent event, float x, float y, int pointer, int button) {
return true;
}
@Override
public void touchUp(InputEvent event, float x, float y, int pointer, int button) {
worldController.pauseOrResume();
}
});
addActor(pause);
}
public void endView() {
clear();
// 奖牌
int medalLevel = (worldController.score < 10) ? 0 :
(worldController.score < 100) ? 1 :
(worldController.score < 1000) ? 2 : 3;
final Image medal = new Image(Assets.instance.assetUI.medals.get(medalLevel));
medal.setBounds(93, 375, 75, 72);
// 分数动画
final ScoreActor scoreActor = new ScoreActor(worldController.score, 393, 430, false);
// 最高分数
int bestScore = worldController.prefs.getInteger(Constants.BEST_SCORE_KEY);
final ScoreActor bestScoreActor = new ScoreActor(bestScore, 393, 350, true);
// game over 文本
Image textGameOver = new Image(Assets.instance.assetUI.textGameOver);
textGameOver.setBounds(80, 563, 321, 80);
// actions
Action textGameAlphaAction = Actions.fadeIn(0.3f);
Action textGameOverSeqAction = Actions.sequence(Actions.moveTo(80, 580, 0.1f), Actions.moveTo(80, 563, 0.1f));
Action textGameOverParAction = Actions.parallel(textGameAlphaAction, textGameOverSeqAction);
textGameOver.addAction(textGameOverParAction);
// score 面板
Image scorePanel = new Image(Assets.instance.assetUI.scorePanel);
scorePanel.setBounds(51, -215, 378, 215);
// actions
Action endRunAction = Actions.run(new Runnable() {
@Override public void run() {
addActor(medal);
addActor(scoreActor);
addActor(bestScoreActor);
}
});
Action scorePanelDelayAction = Actions.delay(0.5f);
Action scorePanelSeqAction = Actions.sequence(
scorePanelDelayAction,
Actions.moveTo(51, 320, 0.3f),
endRunAction);
scorePanel.addAction(scorePanelSeqAction);
// play 按钮
CustomButton play = new CustomButton(Assets.instance.assetUI.buttonPlay);
play.setBounds(43, -108, 173, 108);
// actions
Action playDelayAction = Actions.delay(1f);
Action playSeqAction = Actions.sequence(playDelayAction, Actions.moveTo(43, 175, 0));
play.addAction(playSeqAction);
play.addListener(new InputListener() {
@Override
public boolean touchDown(InputEvent event, float x, float y, int pointer, int button) {
return true;
}
@Override
public void touchUp(InputEvent event, float x, float y, int pointer, int button) {
worldController.restart();
}
});
// score 按钮
CustomButton score = new CustomButton(Assets.instance.assetUI.buttonScore);
score.setBounds(263, -108, 173, 108);
// actions
DelayAction scoreDelayAction = Actions.delay(1f);
Action scoreSeqAction = Actions.sequence(scoreDelayAction, Actions.moveTo(263, 175, 0));
score.addAction(scoreSeqAction);
addActor(textGameOver);
addActor(scorePanel);
addActor(play);
addActor(score);
}
}- Stage:Stage称为舞台类,该类在LibGDX是承载各个组件,如Button、Image等等的工具,该类可以获得输入并分发到各个组件中,重要的一点是,该类是以屏幕左下角为原点的。
- Image:一个可以显示一张纹理资源的Actor类。
- Button:包含一张纹理的Actor类,我们可以为该类注册一个监听器,然后当Button被点击时,监听器中对应的代码会被执行。
- Action:动作类,该类用是所用动作类的父类,我们可以使用动作类制作出旋转、移动、淡入淡出的效果。
- RunnableAction:该类也是一个动作类,不过该类有些特殊,他不执行什么特殊的动画,他一般被用于在某些动作类执行完后作出一些特定的操作,比如上述代码中,我们在scorePanel完成动作后使用RunnableAction添加奖牌、分数、最高分数组件。
...
public class WorldController extends InputAdapter implements Disposable {
    ...
    public GameDialog dialog;
    public Preferences prefs;
    public FlappyBirdMain main;
    ...
    public WorldController(FlappyBirdMain main) {
          this.main = main;
         init();
   }

    private void init() {
    	...
    	initDialog();
		InputMultiplexer multiplexer =
				new InputMultiplexer(dialog, this);
		Gdx.input.setInputProcessor(multiplexer);
    	prefs = Gdx.app.getPreferences(Constants.BEST_SCORE_FILE);
    }
    ...
    private void initDialog() {
    	if(dialog == null)
    		dialog = new GameDialog(this);
    	dialog.startView();
    }

    ...
    public void pauseOrResume() {
         main.paused = !main.paused;
    }

    public void restart() {
          if(isGameOver)
           init();
    }

    public void update(float deltaTime) {
    	if(!isGameOver) {
    		if(isGameOver = bird.isGameOver()) {
    			saveBestScore();
    			dialog.endView();
    			Gdx.app.debug(TAG, "GAME OVER!");
    		}
    	}
    	...
    }

    @Override
    public boolean touchDown(int screenX, int screenY, int pointer, int button) {
    	if (button == Buttons.LEFT) {
			if(!isStart) {
				isStart = true;
				dialog.gameView();
				bird.beginToSimulate(world);
				land.beginToSimulate(world);
			}

			bird.setJumping();
		}
		return true;
    }

    @Override
    public void dispose() {
    	world.dispose();
    	dialog.dispose();
    }
}public class WorldRenderer implements Disposable {
...
// 游戏GUI渲染方法
private void renderGui(SpriteBatch batch) {
if(!worldController.isGameOver) {
batch.setProjectionMatrix(camera.combined);
batch.begin();
renderScore(batch);
batch.end();
}
worldController.dialog.act();
worldController.dialog.draw();
}
}public class FlappyBirdMain implements ApplicationListener {
...
public boolean paused;
@Override
public void create() {
...
worldController = new WorldController(this);
worldRenderer = new WorldRenderer(worldController);
paused = false;
}说了这么多,该是测试的时候了:


 很高兴,我们三个界面都完美的显示了。本章内容到此结束,下章将为应用添加声音资源和启动画面等。
由于时间较为紧迫,写的比较粗糙,文中难免有所疏漏,望读者见谅,如果什么问题,可以尽管提问,我会及时解答,如果你有更佳的实现技术,请不吝赐教!
转载于:https://my.oschina.net/u/2432369/blog/610407
标签:Flappy,int,GUI,public,score,void,import,com,Bird 来源: https://blog.csdn.net/chikeng6133/article/details/100722958