雷丰阳springboot自定义starters
作者:互联网
- 雷丰阳课件
- 视频跟学
- 如何自定义starters
- 第一:依赖
- 第二:自动配置
- 第三:模式
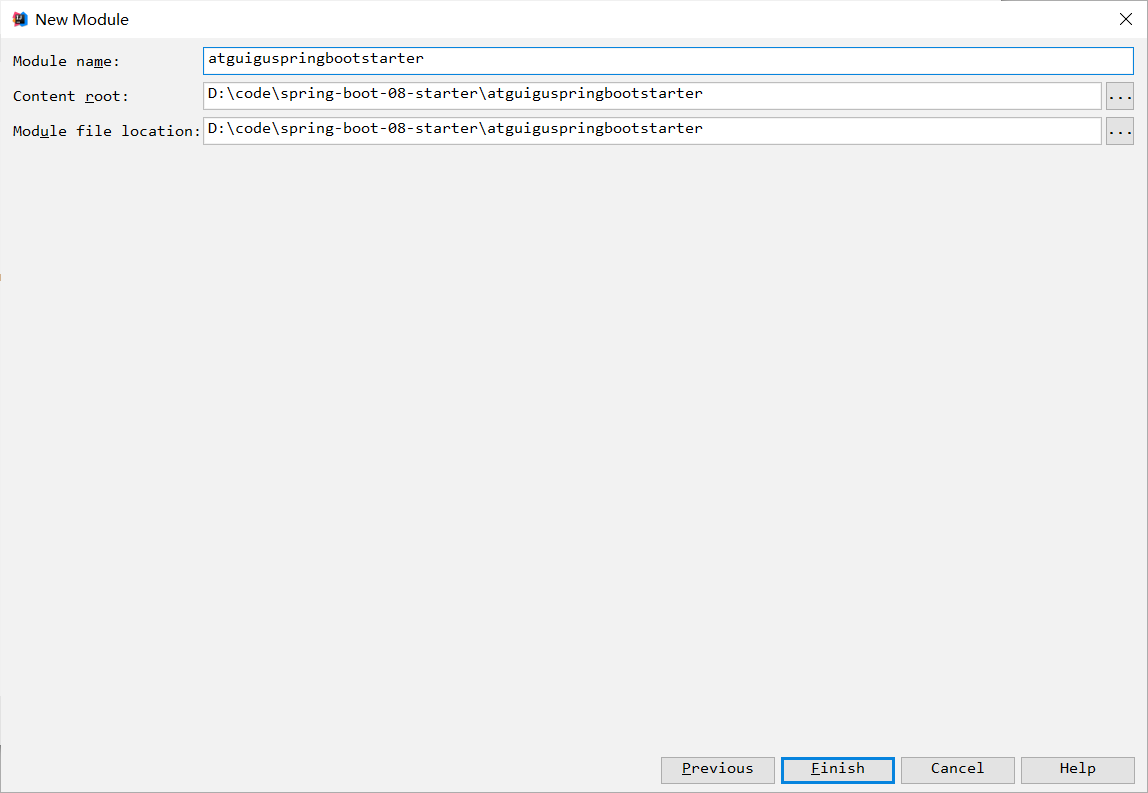
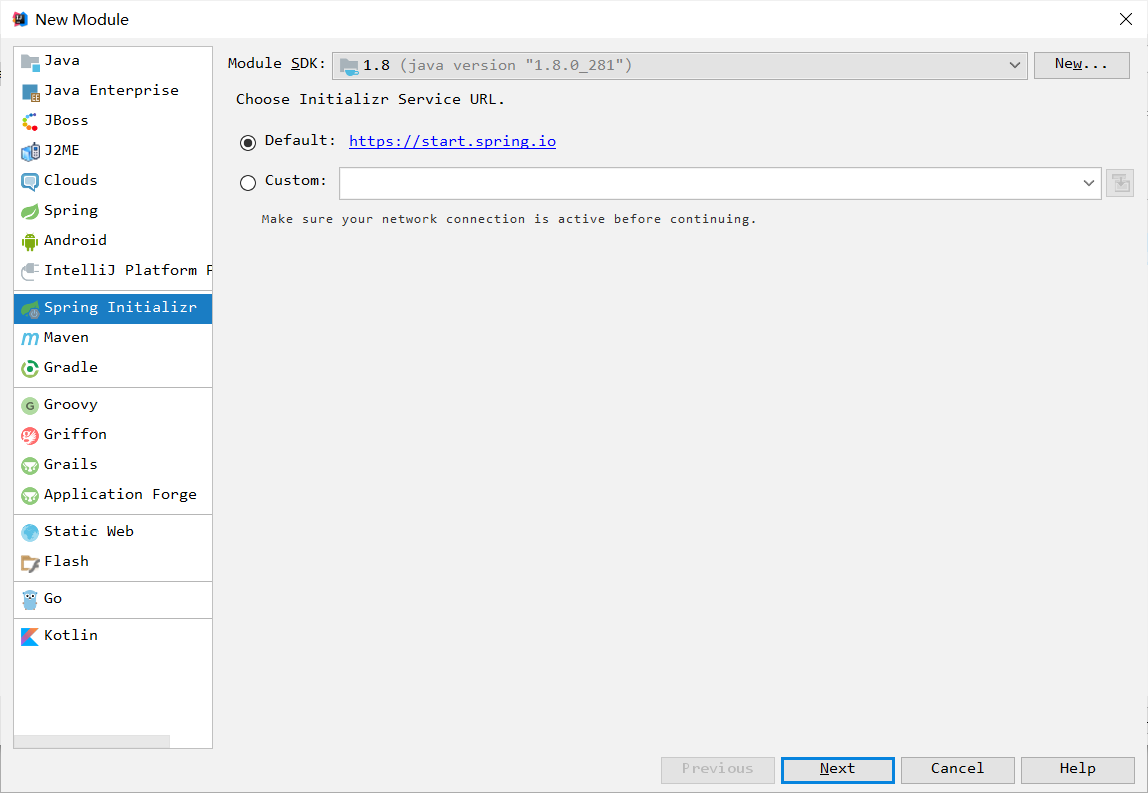
- 创建项目
- 修改autoconfigurer的pom文件
- 修改starter的pom文件
- 编写helloService
- 编写HelloProperties
- 编写自动配置类
- 自动配置类生效的配置
- maven install
- 写一个测试项目
- 测试结果
雷丰阳课件

视频跟学
springboot的强大在于,有很多的场景启动器,也就是starters。

但是无论如何springboot都没有办法,囊括开发当中的所有的场景。
所以说呢,我们往往需要自定义这些starters,简化springboot的使用。
我们写好了这些starters的时候,别的开发人员,可以使用这些starters。
就不需要做过多的配置了。
如何自定义starters
第一:依赖
starter,场景启动器,我们要确定,这个场景需要使用到的依赖是什么东西?、
也就是说,我们要导入哪些jar包。
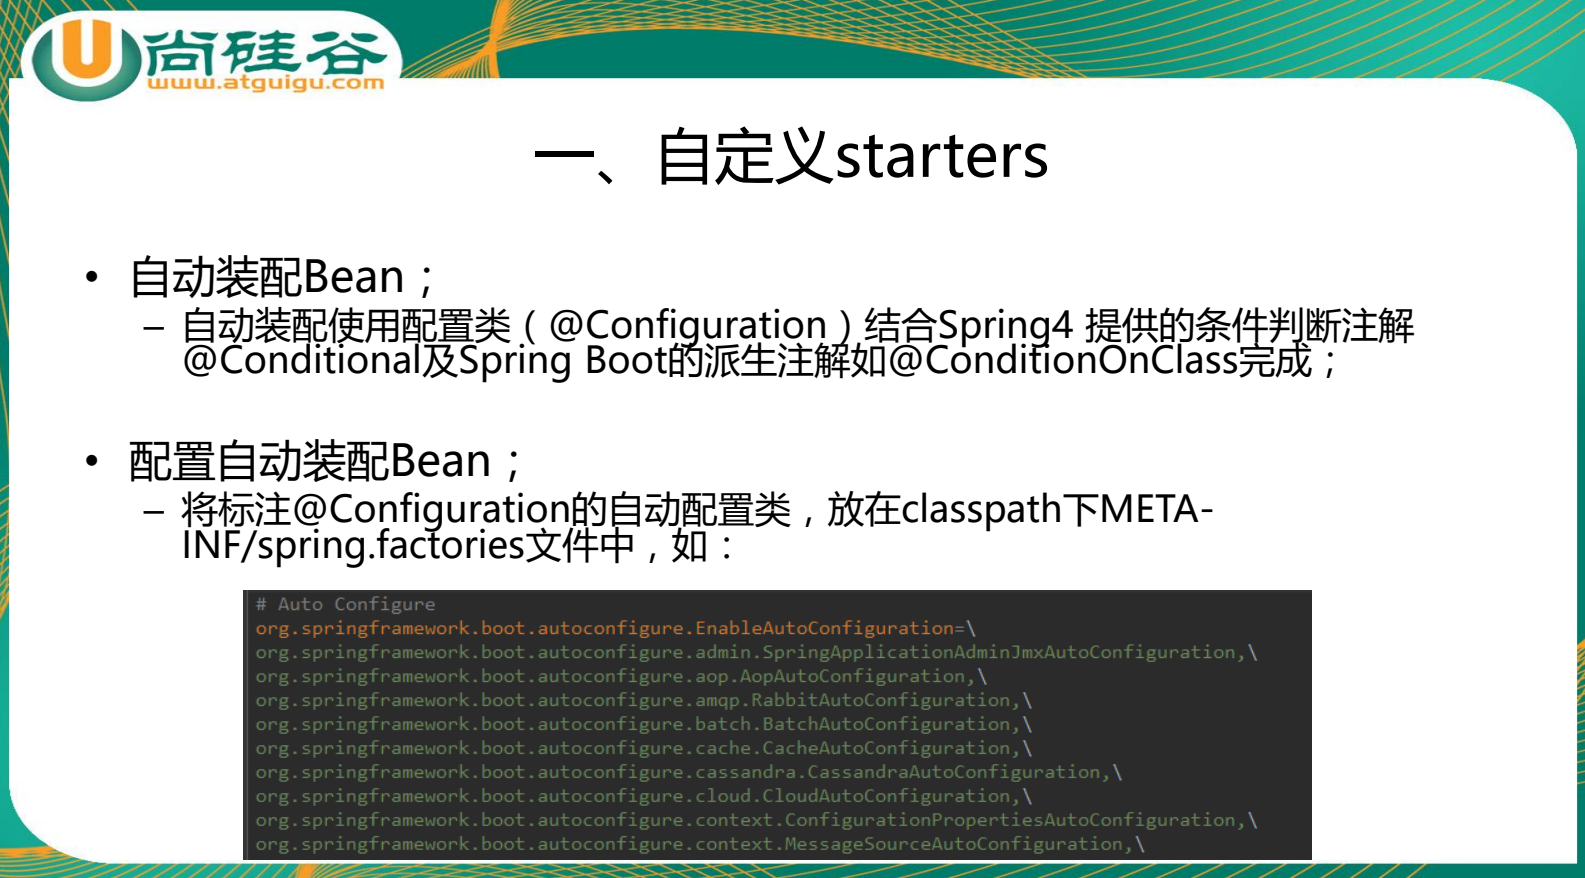
第二:自动配置
如何编写自动配置。
我们之前已经看过非常多的自动配置的源码了,我们可以提取一些经验。
1.
@Configuration // 指定一个类,是一个自动配置类

2.
@ConditionalOnXXX //在指定条件成立的情况下,自动配置类生效。
@ConditionalOnWebApplication
@ConditionalOnClass({ Servlet.class, DispatcherServlet.class,WebMvcConfigurerAdapter.class })
@ConditionalOnMissingBean(WebMvcConfigurationSupport.class)

3.
@AutoConfigureOrder //可以指定自动配置类的顺序
@AutoConfigureOrder(Ordered.HIGHEST_PRECEDENCE + 10)

4.
@Bean //给容器中添加组件

5.
@ConfigurationProperties结合相关的xxxProperties类来绑定,我们相关的配置
@EnableConfigurationProperties 让我们的xxxProperties类生效,并且加入到容器中,别人就能够自动装配了。

6.
自动配置类要能够加载,有一个要求,必须把自动配置类放在类路径下的META-INF/spring.factories
将需要启动就加载的自动配置类,配置在META-INF/spring.factories

# Auto Configure
org.springframework.boot.autoconfigure.EnableAutoConfiguration=\
org.springframework.boot.autoconfigure.admin.SpringApplicationAdminJmxAutoConfiguration,\
org.springframework.boot.autoconfigure.aop.AopAutoConfiguration,\
org.springframework.boot.autoconfigure.amqp.RabbitAutoConfiguration,\
第三:模式
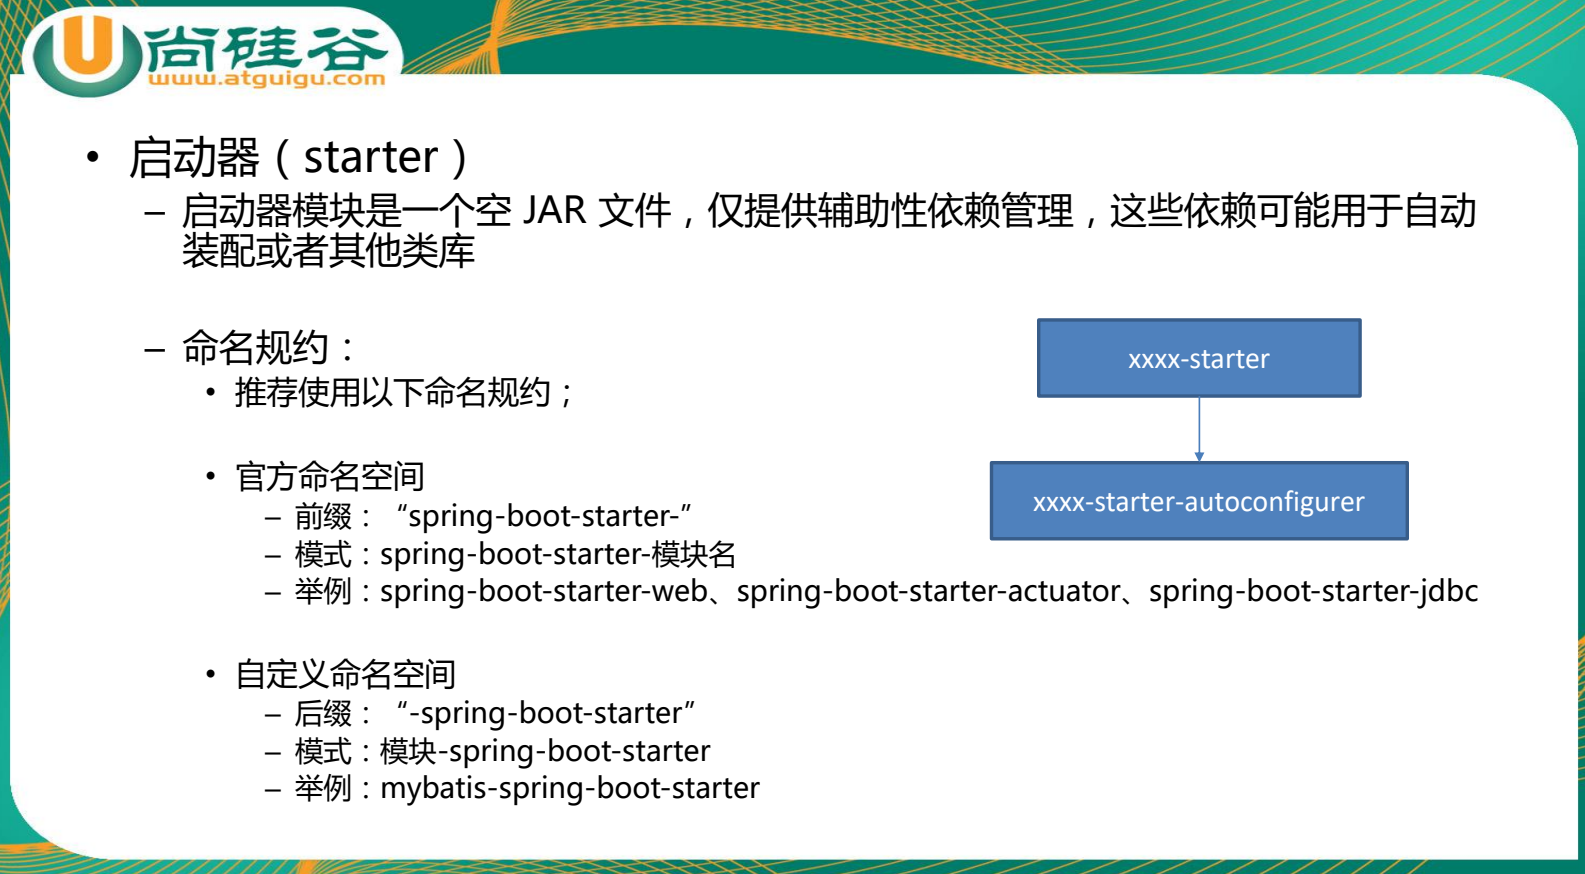
启动器模块只是一个空的jar文件,用来做辅助性的依赖管理的。

这个jar包只是用来做辅助性的依赖管理的。
我们的模式应该是,我们先来编写一个xxx-starter的启动器。
我们的自动配置应该再来写一个模块,叫做xxx-starter-autoconfigurer。
我们的启动器,依赖我们的自动配置。
别人要使用的时候,就引入我们的启动器,自动引入我们的自动配置就看可以了。
这就是一个模式,我们希望大家这么来设计。
启动器:只用来做相关的依赖导入。
专门来写一个自动配置模块,启动器依赖自动配置模块。
springboot官方的命名都是前缀都是spring-boot-starter
模式一般都是:spring-boot-starter-模块名
如果是我们自定义的starter,我们推荐使用后缀:spring-boot-starter
模式一般都是采用:模块名-sping-boot-starter
举例:mybatis-spring-boot-starter
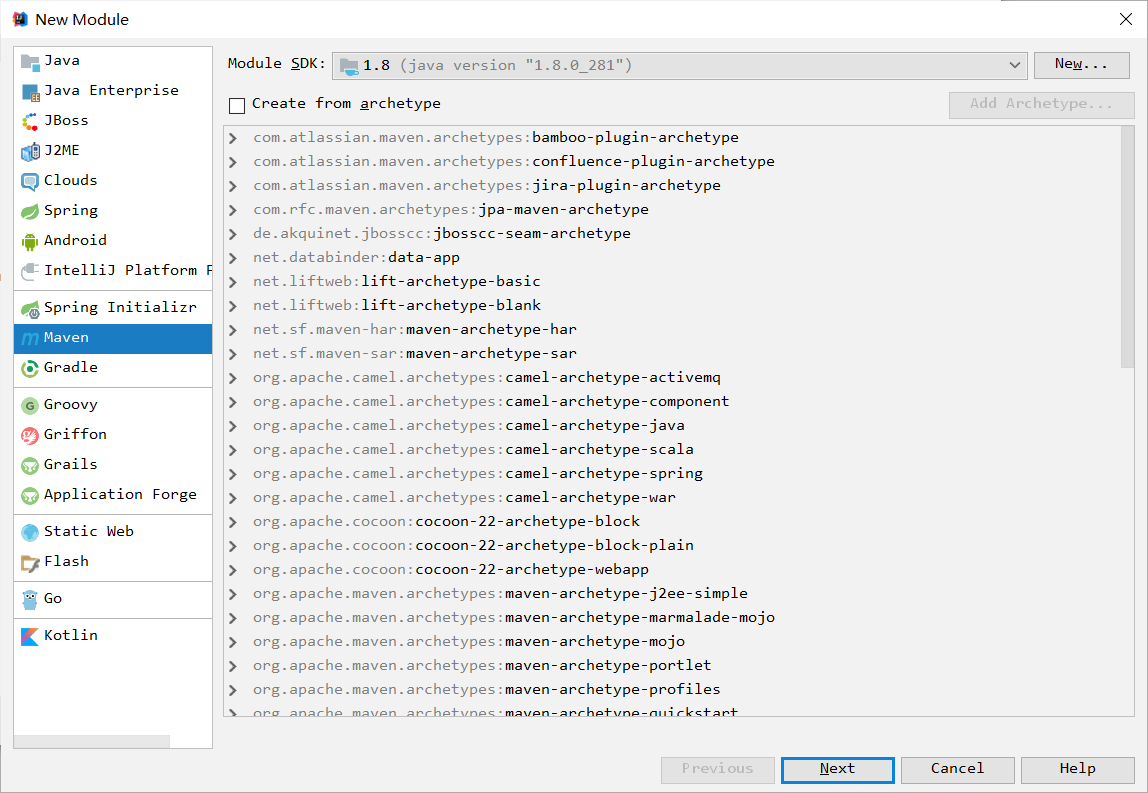
创建项目




修改autoconfigurer的pom文件
<?xml version="1.0" encoding="UTF-8"?>
<project xmlns="http://maven.apache.org/POM/4.0.0" xmlns:xsi="http://www.w3.org/2001/XMLSchema-instance"
		 xsi:schemaLocation="http://maven.apache.org/POM/4.0.0 http://maven.apache.org/xsd/maven-4.0.0.xsd">
	<modelVersion>4.0.0</modelVersion>

	<groupId>com.atguigu.starter</groupId>
	<artifactId>atguigu-spring-boot-starter-autoconfigurer</artifactId>
	<version>0.0.1-SNAPSHOT</version>
	<packaging>jar</packaging>

	<name>atguigu-spring-boot-starter-autoconfigurer</name>
	<description>Demo project for Spring Boot</description>

	<parent>
		<groupId>org.springframework.boot</groupId>
		<artifactId>spring-boot-starter-parent</artifactId>
		<version>1.5.10.RELEASE</version>
		<relativePath/> <!-- lookup parent from repository -->
	</parent>

	<properties>
		<project.build.sourceEncoding>UTF-8</project.build.sourceEncoding>
		<project.reporting.outputEncoding>UTF-8</project.reporting.outputEncoding>
		<java.version>1.8</java.version>
	</properties>

	<dependencies>

		<!--引入spring-boot-starter;所有starter的基本配置-->
		<dependency>
			<groupId>org.springframework.boot</groupId>
			<artifactId>spring-boot-starter</artifactId>
		</dependency>

	</dependencies>
</project>
修改starter的pom文件
<?xml version="1.0" encoding="UTF-8"?>
<project xmlns="http://maven.apache.org/POM/4.0.0"
         xmlns:xsi="http://www.w3.org/2001/XMLSchema-instance"
         xsi:schemaLocation="http://maven.apache.org/POM/4.0.0 http://maven.apache.org/xsd/maven-4.0.0.xsd">
    <modelVersion>4.0.0</modelVersion>

    <groupId>com.atguigu.starter</groupId>
    <artifactId>atguigu-spring-boot-starter</artifactId>
    <version>1.0-SNAPSHOT</version>

    <!--启动器-->
    <dependencies>
        <!--引入自动配置模块-->
        <dependency>
            <groupId>com.atguigu.starter</groupId>
            <artifactId>atguigu-spring-boot-starter-autoconfigurer</artifactId>
            <version>0.0.1-SNAPSHOT</version>
        </dependency>
    </dependencies>
</project>
只是在starter当中引入autoconfigurer的模块
编写helloService
package com.atguigu.starter;

public class HelloService {

    HelloProperties helloProperties;

    public HelloProperties getHelloProperties() {
        return helloProperties;
    }

    public void setHelloProperties(HelloProperties helloProperties) {
        this.helloProperties = helloProperties;
    }

    public String sayHelloAtguigu(String name) {
        return helloProperties.getPrefix() + "-" + name + helloProperties.getSuffix();
    }
}
编写HelloProperties
package com.atguigu.starter;


import org.springframework.boot.context.properties.ConfigurationProperties;

@ConfigurationProperties(prefix = "atguigu.hello")
public class HelloProperties {

    private String prefix;
    private String suffix;

    public String getPrefix() {
        return prefix;
    }

    public void setPrefix(String prefix) {
        this.prefix = prefix;
    }

    public String getSuffix() {
        return suffix;
    }

    public void setSuffix(String suffix) {
        this.suffix = suffix;
    }
}
使用@ConfigurationProperties(prefix = "atguigu.hello")把这个类,变成了一个是和配置文件绑定的类。
编写自动配置类
编写自动配置类的目的,是为了把我们写的服务service自动注入到我们的IOC容器当中的。
package com.atguigu.starter;

import org.springframework.beans.factory.annotation.Autowired;
import org.springframework.boot.autoconfigure.condition.ConditionalOnWebApplication;
import org.springframework.boot.context.properties.EnableConfigurationProperties;
import org.springframework.context.annotation.Bean;
import org.springframework.context.annotation.Configuration;

@Configuration
@ConditionalOnWebApplication //web应用才生效的哦
@EnableConfigurationProperties(HelloProperties.class)
public class HelloServiceAutoConfiguration {

    @Autowired
    HelloProperties helloProperties;

    /*给IOC容器当中,添加了一个HelloService组件*/
    @Bean
    public HelloService helloService(){
        HelloService service = new HelloService();
        service.setHelloProperties(helloProperties);
        return service;
    }
}
自动配置类生效的配置

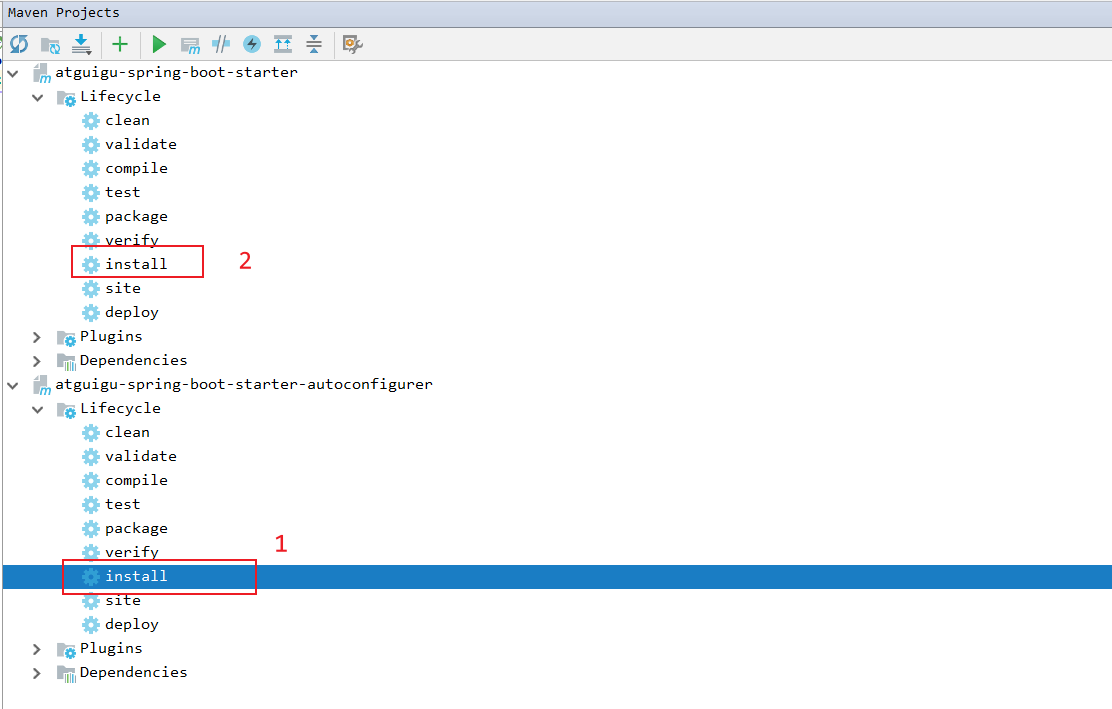
maven install
写一个测试项目
第一步,pom文件当中引入自定义的starter

第二步,编写了一个测试的controller

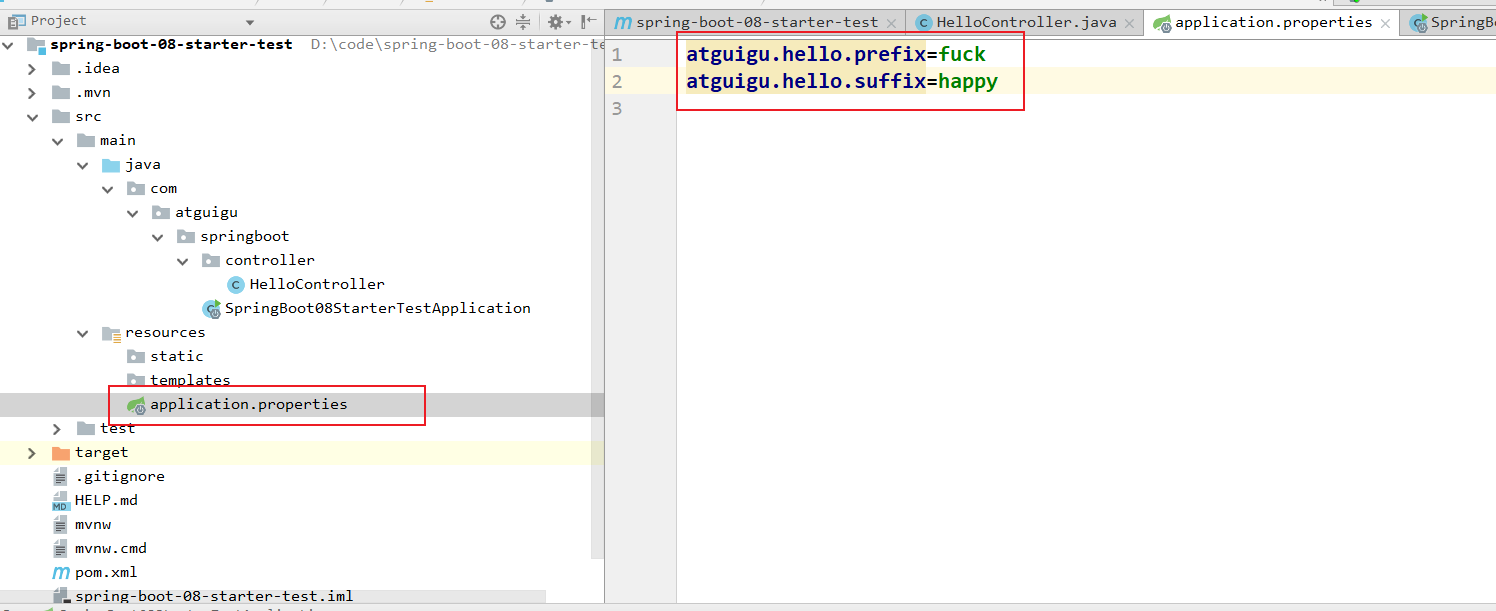
第三步,编写了相应的配置文件
测试结果
运行程序,然后使用hello请求一下:

测试成功。自定义starter生效了哦。
标签:springboot,自定义,配置,boot,springframework,starters,自动,atguigu,starter 来源: https://www.cnblogs.com/gnuzsx/p/14726660.html