282 Android基本布局之4—网格布局实现计算器布局
作者:互联网
282 Android基本布局之4—网格布局实现计算器布局
说明:因为时间紧张,本人很多博客的写作过程中只是对知识点的关键步骤进行了截图记录,没有对截图步骤进行详细的文字说明(后面博主时间充裕了,会对目前的博客编辑修改,补充上详细的文字说明);有些步骤和相关知识点缺乏文字描述,可能会难以理解。读者如有不明之处,欢迎博客私信或者微信(本人微信在博客下方的“关于博主”处)与本人交流,共同进步。
另有一些博客没有来得及记录内容,但为了保证博客内容的连贯性,所以按照学习路径的顺序先发布了标题,后续时间充裕了会更新内容,望博友和读者朋友们谅解!
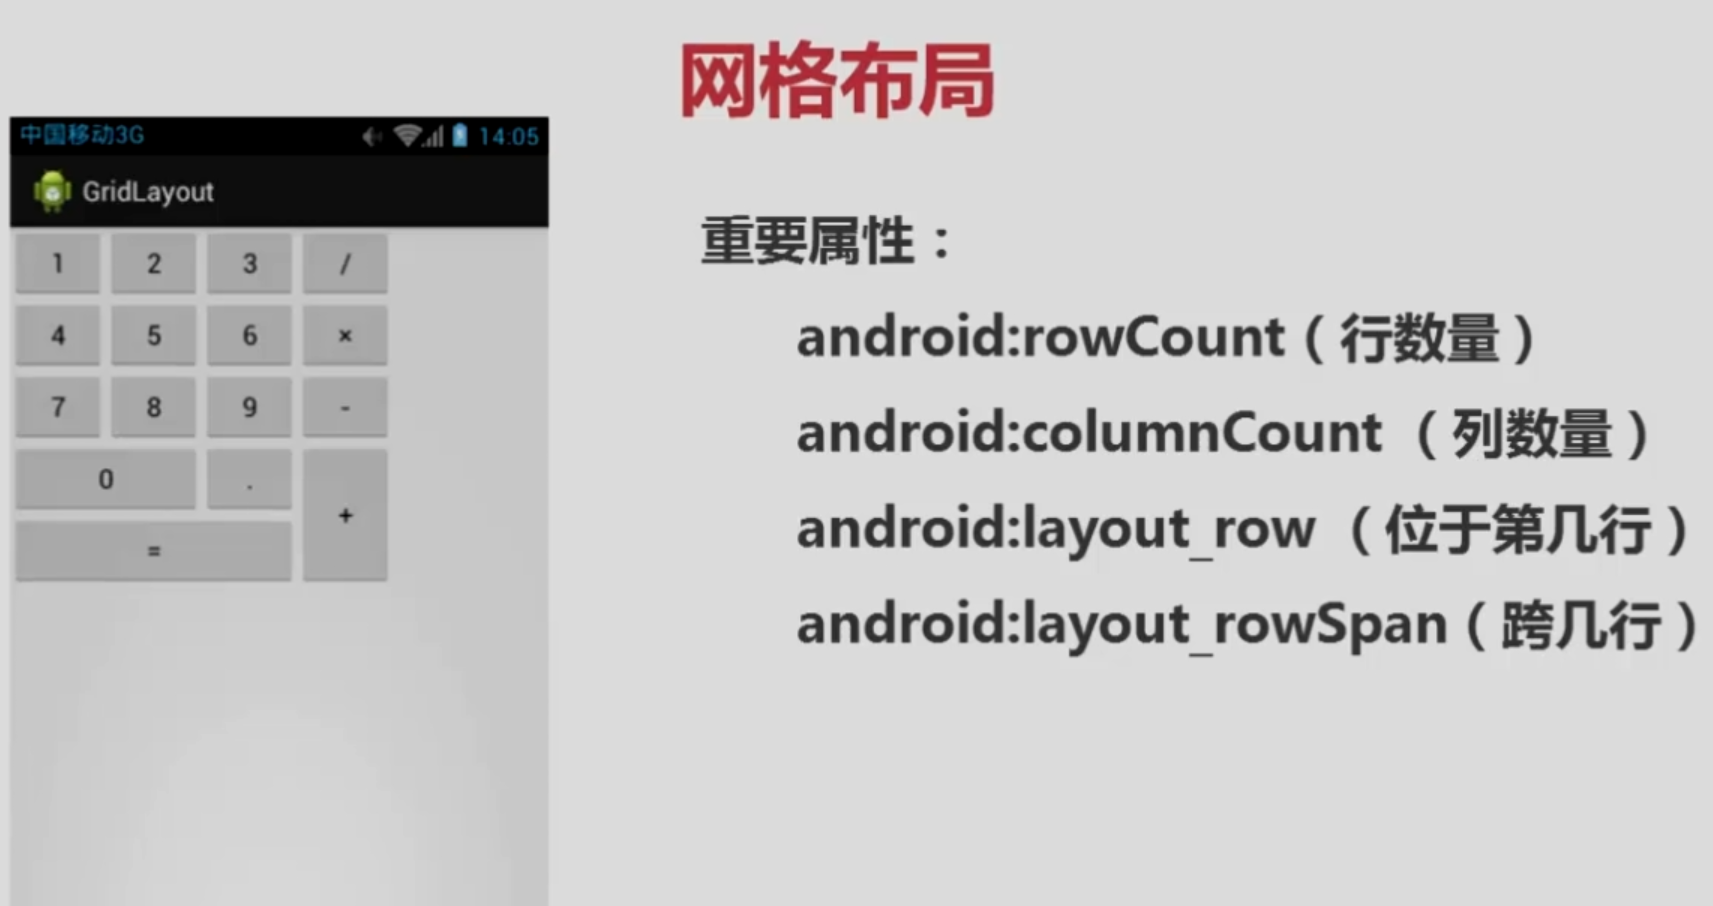
目标案例实现效果:

<?xml version="1.0" encoding="utf-8"?>
<GridLayout xmlns:android="http://schemas.android.com/apk/res/android"
    android:layout_width="wrap_content"
    android:layout_height="wrap_content"
    android:rowCount="5"
    android:columnCount="4">

    <Button android:text="1"/>
    <Button android:text="2"/>
    <Button android:text="3"/>
    <Button android:text="/"/>
    <Button android:text="4"/>
    <Button android:text="5" />
    <Button android:text="6"/>
    <Button android:text="*"/>
    <Button android:text="7"/>
    <Button android:text="8"/>
    <Button android:text="9"/>
    <Button android:text="-"/>
    <Button android:text="0"
        android:layout_columnSpan="2"
        android:layout_gravity="fill"/>
    <Button android:text="."/>
    <Button android:text="+"
        android:layout_rowSpan="2"
        android:layout_gravity="fill"
        />
    <Button android:text="="
        android:layout_columnSpan="3"
        android:layout_gravity="fill"/>
</GridLayout>
标签:知识点,布局,博客,博主,Android,282 来源: https://www.cnblogs.com/xlfcjx/p/14003275.html