wildfly(JBoss)如何部署SSL证书
作者:互联网
0.前言
项目用的wildfly。需要用到SSL证书,把部署过程记录下来,以供参考。
本文的证书申请都来自阿里云。
1.windows版部署
1.首先把你的域名做好解析。
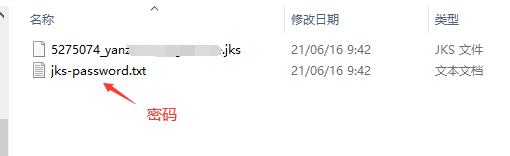
2.从阿里云上下载申请的SSL证书,类型选择JKS。

下载后的文件夹打开,可以看到下面两个文件,一个是证书,后缀是jks。另一个是密码文件。
我们打开wildfly/standalone/configuration。
新建一个文件夹,命名为cert。把刚才下载的后缀为jks的证书放进去。
然后打开wildfly/standalone/configuration/standalone.xml。
搜索 ”<security-realms> </security-realms>“。在这中间添加一个 <security-realm></security-realm> 。
参考:
<security-realm name="SslRealm"> <server-identities> <ssl> <keystore path="./cert/xxxx.xxxxx.xxxx.jks" relative-to="jboss.server.config.dir" keystore-password="Yn48h0Ej"/> </ssl> </server-identities> </security-realm>其中,xxx是下载下来后缀为jks的前面的名字(有的带数字)。keystore-password后面是你下载文件中的密码。
然后继续搜索类似下面代码:
<https-listener name="https" socket-binding="https"把下面的security-realm设置为SslRealm。参考:
<server name="default-server"> <http-listener name="default" socket-binding="http" redirect-socket="https" enable-http2="true"/> <https-listener name="https" socket-binding="https" security-realm="SslRealm" enable-http2="true"/> <host name="default-host" alias="localhost"> <location name="/upload" handler="upload"/> <location name="/ueditor" handler="ueditor"/> <filter-ref name="x-powered-by-header"/> <http-invoker security-realm="ApplicationRealm"/> </host> </server>然后重启wildfly。
访问域名或者https://localhost:8443。如果网址旁边是绿色的说明配置成功。
注:如果存在其他端口映射关系,请提前配置好端口映射。
标签:wildfly,证书,standalone,jks,JBoss,SSL,下载 来源: https://www.cnblogs.com/longkui-site/p/15859457.html