ceph-ansible(host)
作者:互联网
检查环境
-
ansible主机
-
ansible安装
yum install ansible -y -
设置host
# vim /etc/ansible/hosts
[mons]
node01
node02
node03

[mgrs]
node01
node02
node03

[osds]
node01
node02
node03

[rgws]
node01
node02
node03

[mdss]
node01
node02
node03

[grafana-server]
node01
-
-
ceph集群
- 配置IP
- 配置主机名
- 配置HOSTS文件
- 配置加速源(EPEL)
- 配置时钟同步
- 关闭 SELinux
- 关闭Firewalld
- 设置免密登录
选择ceph-ansible
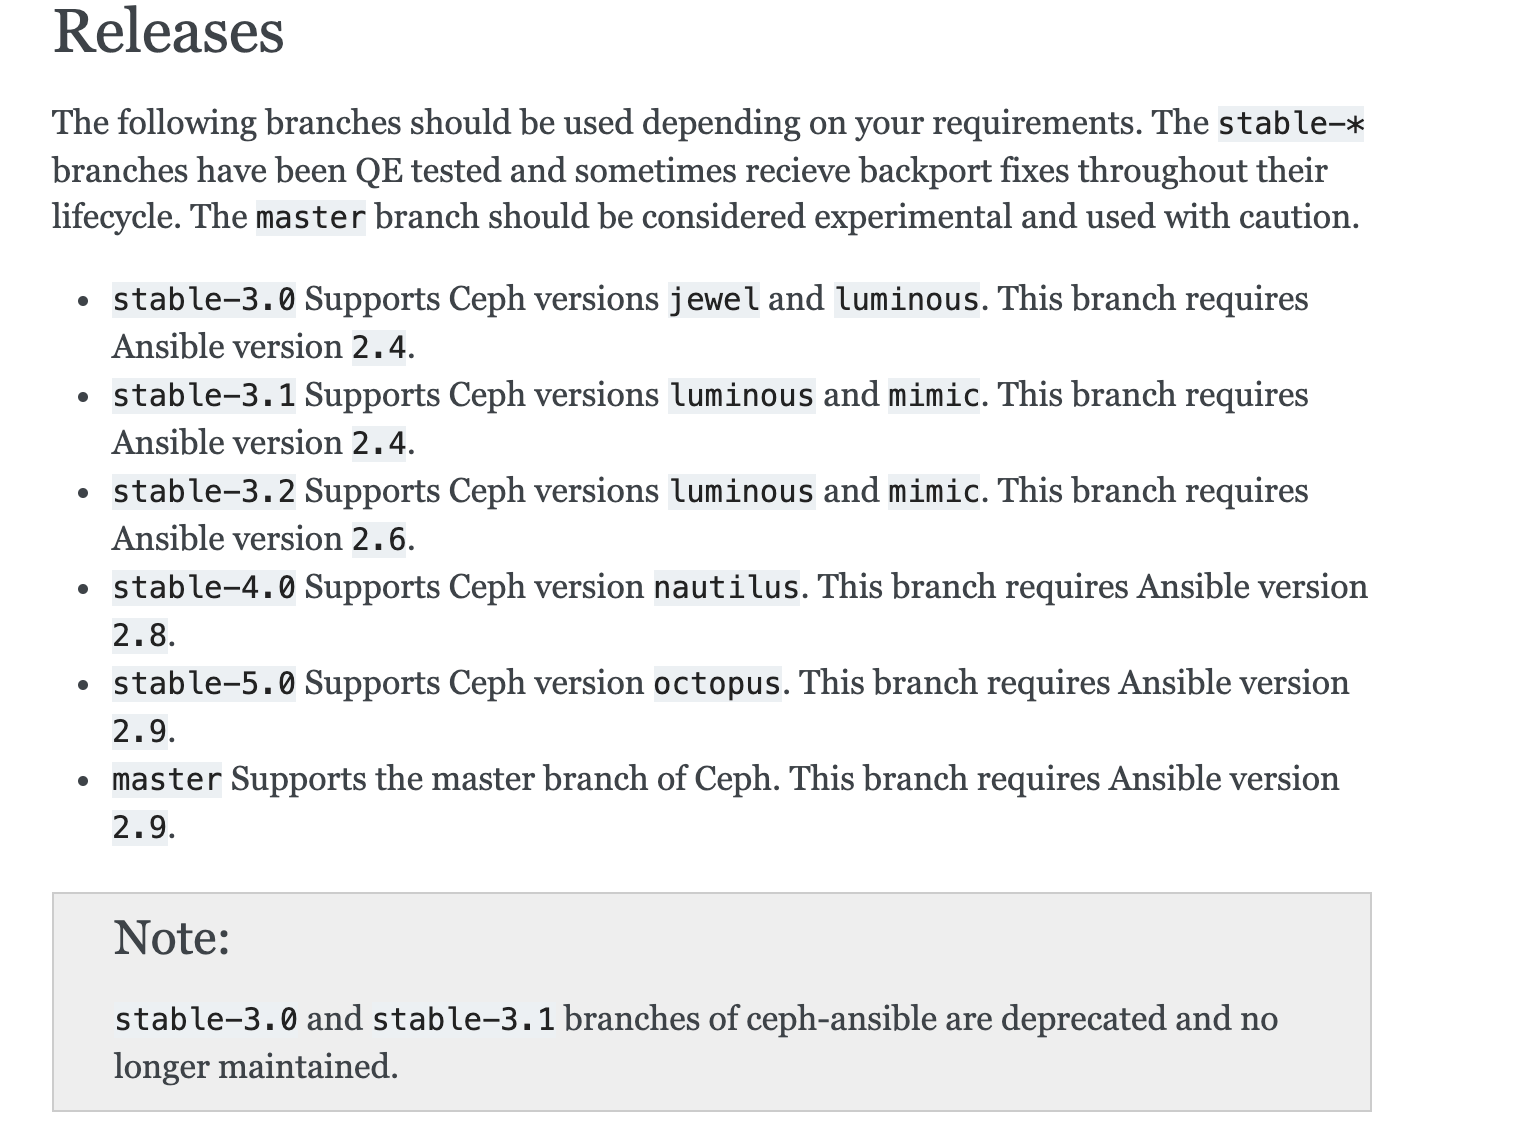
安装不同的ceph版本需要选择不同的ceph-ansible,一般来说ansible不需要替换
按下图进行选择:
例如选择nautilus
wget -q -O ceph-ansible-stable-4.0.zip https://codeload.github.com/ceph/ceph-ansible/zip/stable-4.0
unzip ceph-ansible-stable-4.0.zip
mv ceph-ansible-stable-4.0.zip ceph-ansible
设置ymal文件
-
修改ceph配置
# cd ceph-ansible/group_vars/ # mv all.yml.sample all.yml # grep -Ev '^#|^$' all.yml --- dummy: ceph_repository_type: repository ceph_origin: repository ceph_repository: community ceph_mirror: https://mirrors.tuna.tsinghua.edu.cn/ceph/ ceph_stable_key: https://mirrors.tuna.tsinghua.edu.cn/ceph/keys/release.asc ceph_stable_release: octopus ceph_stable_repo: https://mirrors.tuna.tsinghua.edu.cn/ceph/rpm-15.2.7/el7/ monitor_interface: eth0 public_network: 192.168.198.0/24 cluster_network: 172.20.1.0/24 osd_objectstore: bluestore radosgw_civetweb_port: 8080 radosgw_interface: eth0 dashboard_enabled: True #此处需要注意一下 centos7不能无法自动设置dashboard,需要置为false dashboard_admin_user: admin dashboard_admin_password: [email protected] grafana_admin_user: admin grafana_admin_password: [email protected] -
osd配置
# cp osds.yml.sample osds.yml
# grep -Ev '^#|^$' osds.yml
---
dummy:
devices:
  - /dev/sdb
  - /dev/sdc
此处需要特别注意下:
devices这里的"#"也需要注释掉,否则无法识别到盘
-
其他配置
# cp clients.yml.sample clients.yml # cp mons.yml.sample mons.yml # cp mgrs.yml.sample mgrs.yml # cp rgws.yml.sample rgws.yml # cd ../ # cp site.yml.sample site.yml -
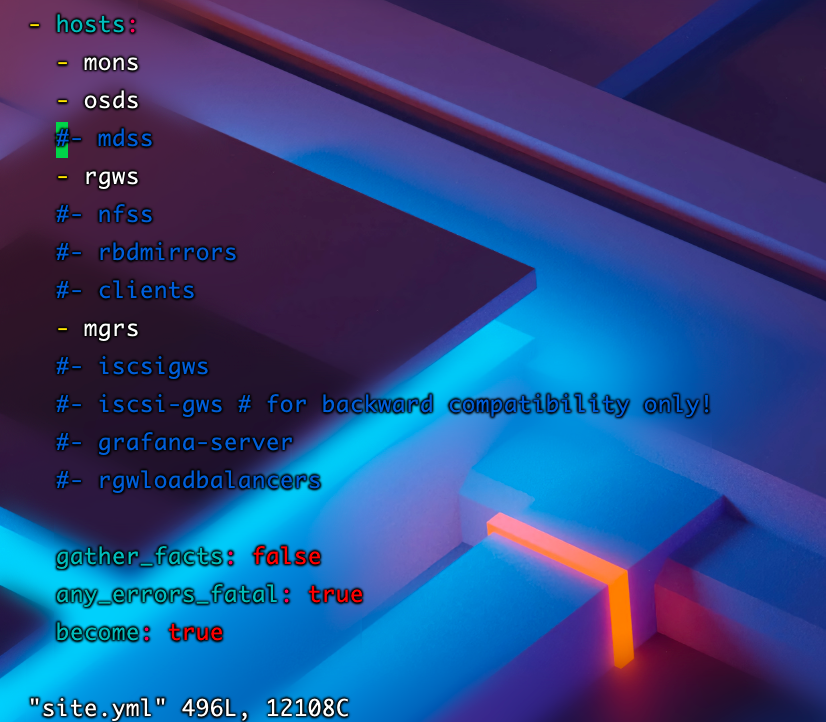
安装文件配置(site.yaml)

不需要的功能注释掉
-
安装
ansible-playbook site.yml -
安装完成

-
重置ceph集群
-
需要先将group_vars/下的内容复制到/etc/ansible/group_vars/下面(group_vars/需要自己创建),如果不这样做,会找不到ceph集群
-
执行命令
ansible-playbook infrastructure-playbooks/purge-cluster.yml
-
遇到的坑
-
安装mon的时候报错
依赖没有装,装上就可以了
-
安装mgr遇到无法安装
直接在ceph集群中的机器上面测试
yum install ceph-mgr -y测试ceph源是否有问题
-
重置集群之后可能会导致安装包产生冲突
Transaction Check Error:
conflicts with file from package
解决方案:卸载后面一个包
标签:sample,ceph,host,ansible,stable,cp,yml 来源: https://blog.csdn.net/weixin_42340926/article/details/122407926
