Configure the test environment to trust the connection - RSAT with Dynamics 365
作者:互联网
Configure the test environment to trust the connection
If your AOS allows for Remote Desktop connections
After creating the certificate, configure AOS to trust the test automation connection. On a multi-AOS environment, repeat the following steps for all AOS machines.
-
Open a Remote Desktop connection to the AOS machine.
-
Open IIS and find AOSService in the list of sites.
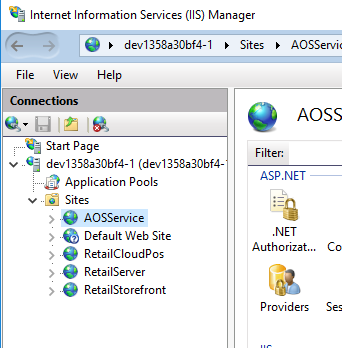
-
Right-click AOSService, then select Explore.
-
Open and find the file wif.config.

-
Update the wif.config file by adding a new authority entry, as shown in the following example. Use 127.0.0.1 for the authority name and paste your certificate thumbprint.
XML<issuerNameRegistry type="Microsoft.Dynamics.AX.Security.SharedUtility.AxIssuerNameRegistry, Microsoft.Dynamics.AX.Security.SharedUtility"> <authority name="CN=127.0.0.1"> <keys> <add thumbprint="ccbc124d0a119xxxxxxxxxxxxxxxxxxxx841e797" /> </keys> <validIssuers> <add name="CN=127.0.0.1" /> </validIssuers> </authority>
If you have no Remote Desktop access to the server
In cases where your Remote Desktop Protocol (RDP) access is removed, such as Microsoft-managed or self-service type sandboxes, Microsoft will generate the certificate for your environment and have it pre-configured. Follow these steps to retrieve the RSAT certificate and use it using the LCS user interface. For automation, there is information on the Fetch an environment's RSAT certificate in a zip file API reference page.
-
Under Maintain on your environment details page in Lifecycle Services you'll see two new options.
- Download RSAT certificate
- Regenerate RSAT certificate
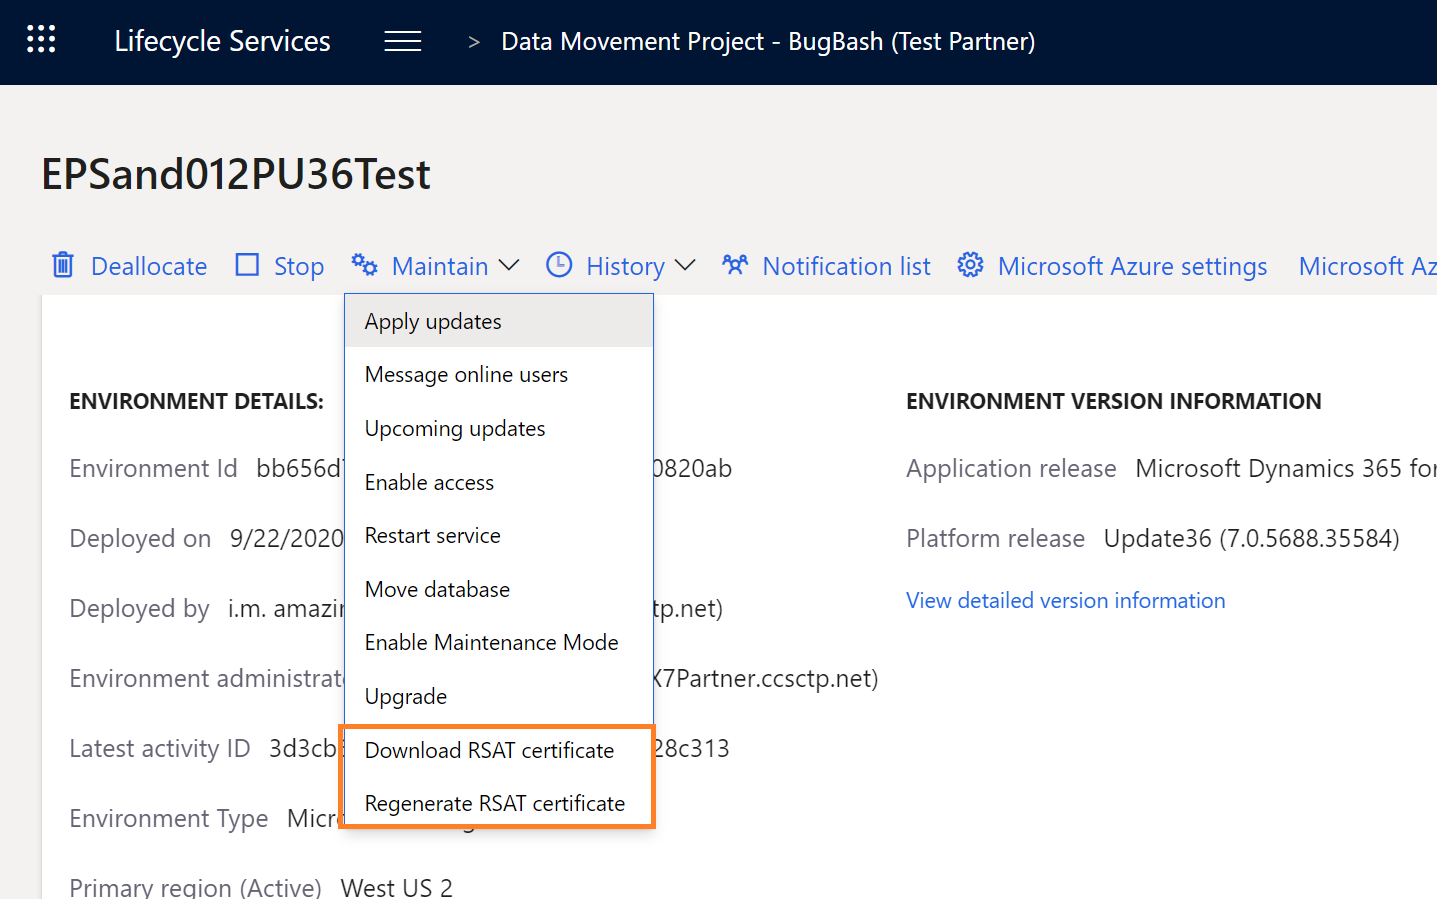
Use the Download button to retrieve the certificate bundle as a .zip file.
-
You'll receive a warning that a clear-text password will be displayed on your screen. You will need the password in subsequent steps. Select Yes to continue.
-
Copy the clear-text password for later use. You'll see the .zip file has been downloaded. Inside the .zip file is a certificate (.cer) and a personal information exchange (.pfx) file. Unzip the file.
-
Install the certificate in the local machine's trusted root store:
- Double-click the certificate (.cer) to open it, and then select Install Certificate.
- Select local machine, and then browse to the Trusted Root Certification Authorities store to install it in the trusted root store.
-
Install the pfx file in the local machine's personal store:
- Double-click the personal information exchange (.pfx) file to open it, and select Local Machine.
- Enter the password saved in step 2, and browse to the Personal store.
-
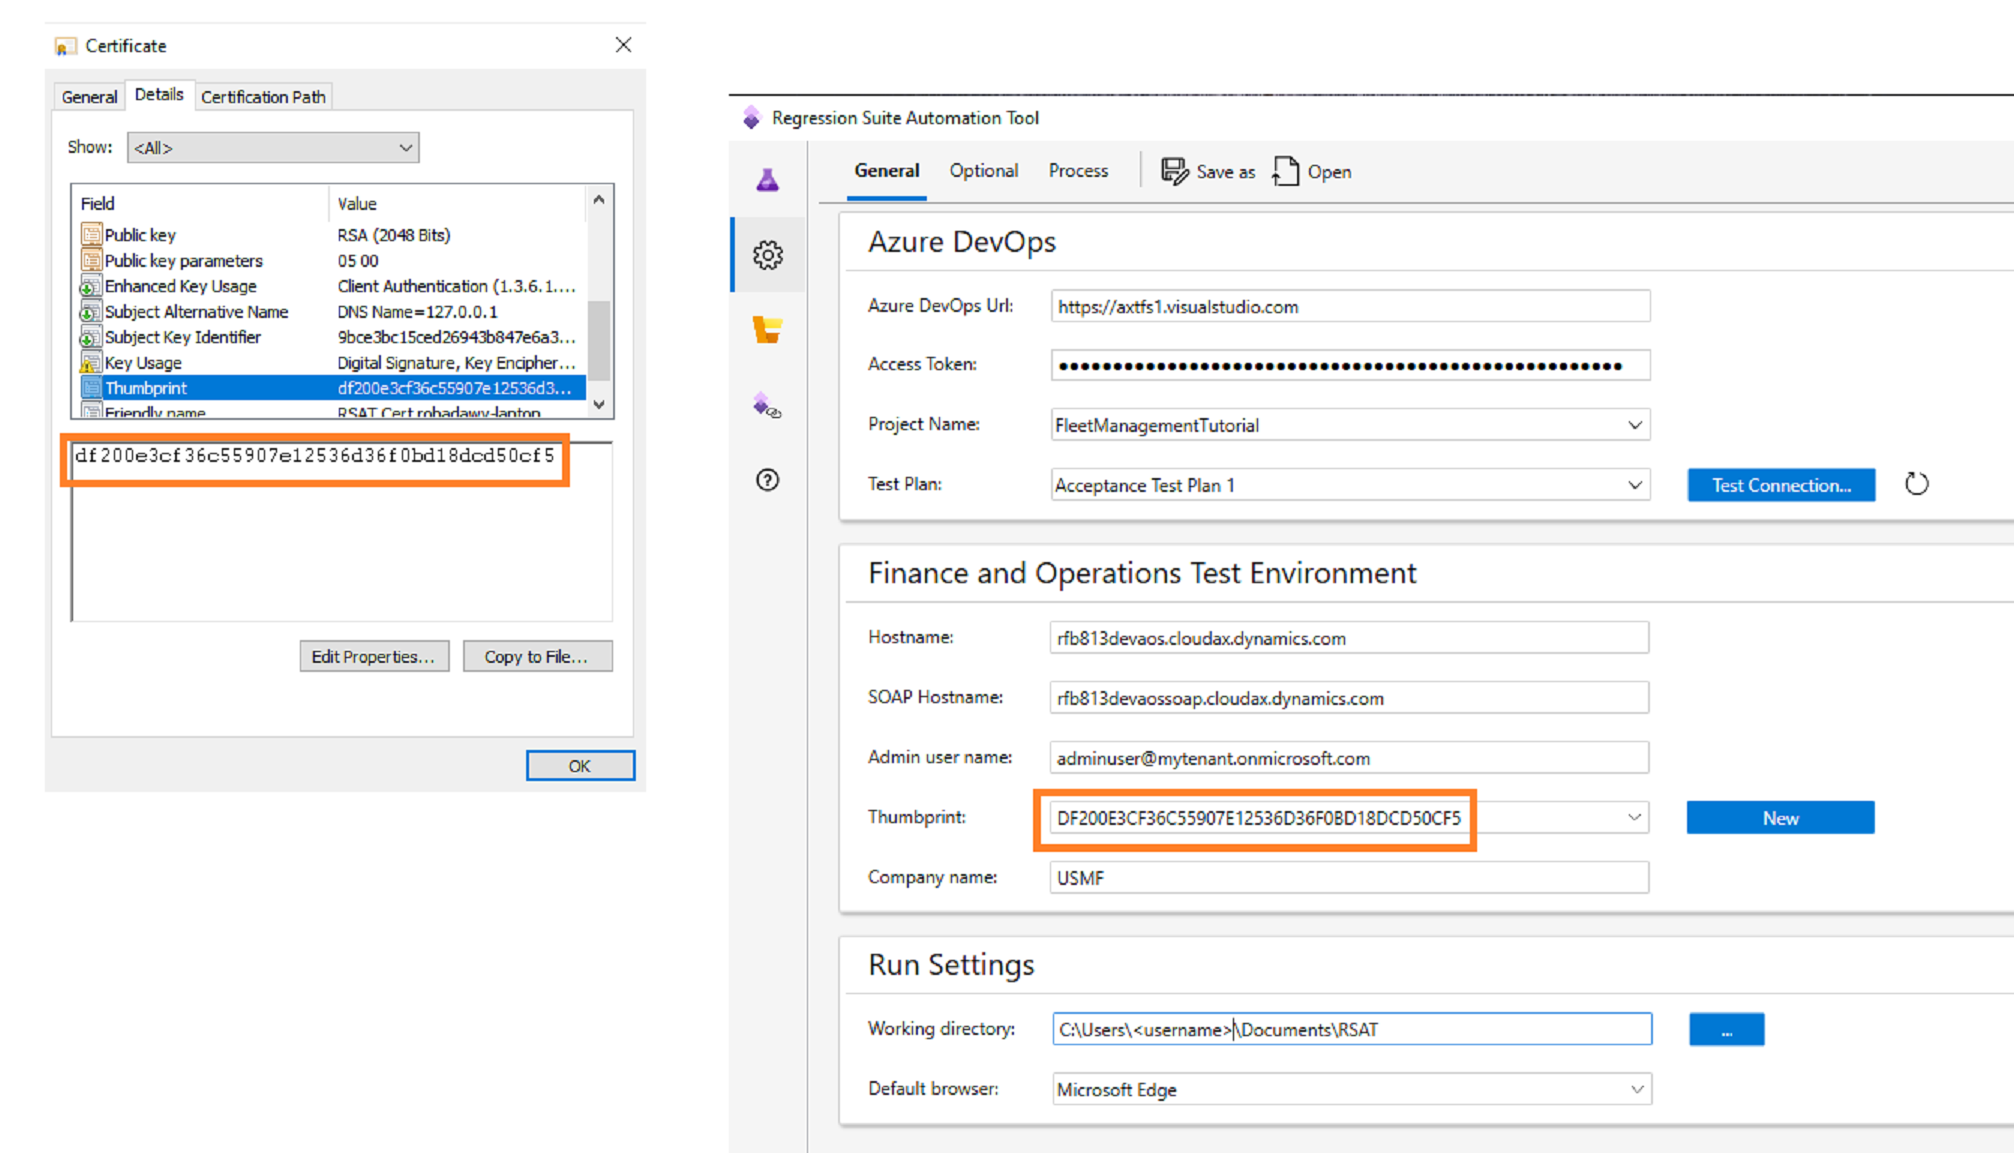
Double-click the certificate file to open it. Browse to the Details tab, and scroll down until you see the Thumbprint section. Select Thumbprint, and note the ID in the text box. Select or paste this thumbprint in RSAT settings.
You can now run your tests against the environment using this certificate. The certificate will be autorotated by Microsoft before it expires, at which time you will need to download a new version of this certificate starting from step 1 above. For self-service environments, this will be rotated every 60 days during a downtime window that is closest to the expiry. These downtime windows include customer initiated package deployment, and database movement operations that target the environment.
标签:will,Configure,certificate,environment,file,RSAT,365,your 来源: https://www.cnblogs.com/lingdanglfw/p/15636843.html