EKS 训练营-vue 项目实战(16)
作者:互联网
# 介绍
我演示的这个项目使用 vue-element-admin 模版编写,是一个前端项目,相对来说比较简单。
官方地址为:https://panjiachen.github.io/vue-element-admin-site/

代码不过多介绍,我们直接部署 CI/CD 流程。
# Continuous Integration
## 编写 Dockerfile
因为是前端项目,我们只需要 nginx 提供 web 服务即可,并且只需要把打包好的文件 dist 放入镜像就行,所以 Dockerfile 可以这样编写。
```dockerfile
# Version 0.0.1
FROM nginx
MAINTAINER wzlinux "admin@wzlinux.com"
COPY ["backend.wzlinux.com.conf","/etc/nginx/conf.d/default.conf"]
COPY ["dist/","/usr/share/nginx/html/"]
EXPOSE 80
```
## 编写 nginx conf
默认的 nginx 配置文件不满足我们的代码需要,我们需要定制自己的 conf 文件 `backend.wzlinux.com.conf`
```nginx
server
{
listen 80 default_server;
listen [::]:80 default_server;
server_name _;
index index.html index.htm index.php default.html default.htm default.php;
root /usr/share/nginx/html;
#关键解决vue路由丢失问题
location / {
try_files $uri $uri/ /index.html;
}
location ~ .*\.(gif|jpg|jpeg|png|bmp|swf)$
{
expires 30d;
}
location ~ .*\.(js|css)?$
{
expires 12h;
}
location ~ /.well-known {
allow all;
}
location ~ /\.
{
deny all;
}
#access_log /var/log/nginx/access.log;
#error_log /var/log/nginx/error.log;
access_log /dev/stdout;
error_log /dev/stderr;
}
```
以上两个文件放在代码根目录即可。
## 编写 Jenkins pipeline
我们的 jenkins 已经配置过 EKS,这里不再介绍,可以查看前面的文档,这里直接贴出 pipeline,其他项目都可以按照这个结构,更好自己需要的镜像或者命令即可。
```json
podTemplate(
containers: [
containerTemplate(name: 'node', image: 'wangzan18/node:12-slim', ttyEnabled: true, command: 'cat'),
containerTemplate(name: 'docker', image: 'docker:latest', ttyEnabled: true, command: 'cat'),
containerTemplate(name: 'awscli', image: 'amazon/aws-cli:latest', ttyEnabled: true, command: 'cat')
],
volumes: [
hostPathVolume(mountPath: '/var/run/docker.sock', hostPath: '/var/run/docker.sock'),
hostPathVolume(mountPath: '/usr/bin/docker', hostPath: '/usr/bin/docker')
],
serviceAccount: 'jenkins-agent'
)
{
node(POD_LABEL) {
stage('Clone and Build') {
git branch: 'master', credentialsId: 'd38f927d-9152-4083-9e48-c312a07d230e', url: 'http://git.wzlinux.net/BMC/backend.wzlinux.com.git'
container('node') {
sh 'npm install'
sh 'npm run build:prod'
}
}
stage('Build Docker image') {
container('docker') {
sh 'docker build -t backend:v${BUILD_NUMBER} .'
sh 'docker tag backend:v${BUILD_NUMBER} 921283538843.dkr.ecr.eu-west-1.amazonaws.com/backend:v${BUILD_NUMBER}'
}
}
stage('Push') {
container('awscli') {
sh 'aws sts get-caller-identity'
sh 'aws ecr get-login-password --region eu-west-1 | docker login --username AWS --password-stdin 921283538843.dkr.ecr.eu-west-1.amazonaws.com'
sh 'docker push 921283538843.dkr.ecr.eu-west-1.amazonaws.com/backend:v${BUILD_NUMBER}'
}
}
}
}
```
在 podTemplate 里面定义整个过程需要的镜像,针对这个 vue,我们使用到 node 镜像,因为 vue 里面一些资源需要 git 命令下面,我自己在 node:12-slim 里面安装了 git,重新制作了一个公共镜像,大家可以使用。
在 node 里面的 stage 就是我们真正的构建过程,第一个 stage 主要是拉取代码,已经进行 build 打包,打包完成之后会生成一个 dist 目录,我们 Dockerfile 里面会把这个 dist 目录文件复制到 nginx 的文件目录。
第二个 stage 就是制作镜像,并且给镜像加一个 `BUILD_NUMBER` 的版本,然后改为我们 ECR 的标签,这里应该注意到我们里面有一个 `serviceAccount` 的参数,因为后面上传镜像到 ECR 需要权限,我们根据 EKS IRSA 的功能,为这个 `serviceAccount` 赋予了 ECR 上传代码的权限。
第三个 stage 就是上传镜像了,在上传镜像之前,首先需要登录 ECR,可以直接使用 awscli 提供的指令进行登录,然后使用 docker push 进行镜像上传。
然后就可以直接指向 Jenkins task,查看镜像上传。
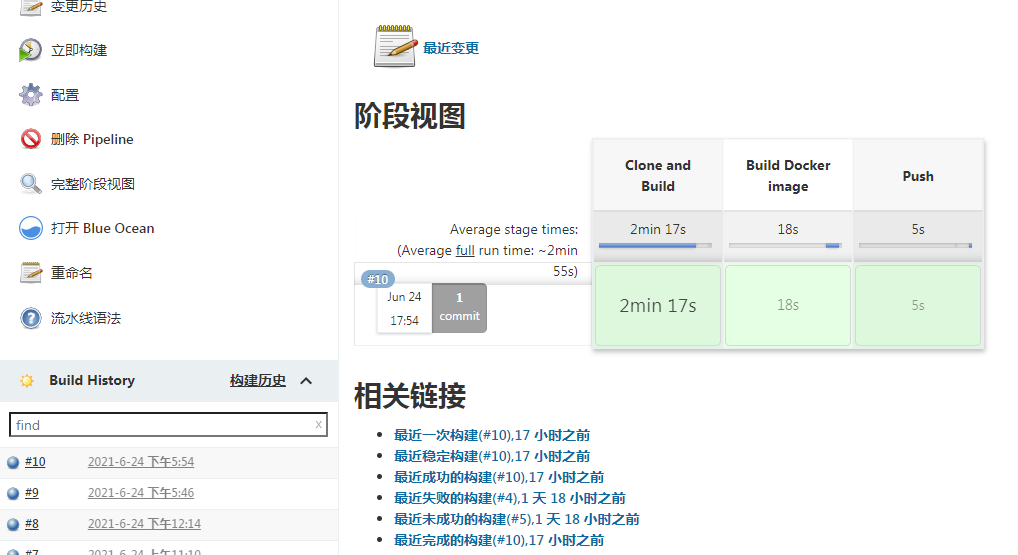
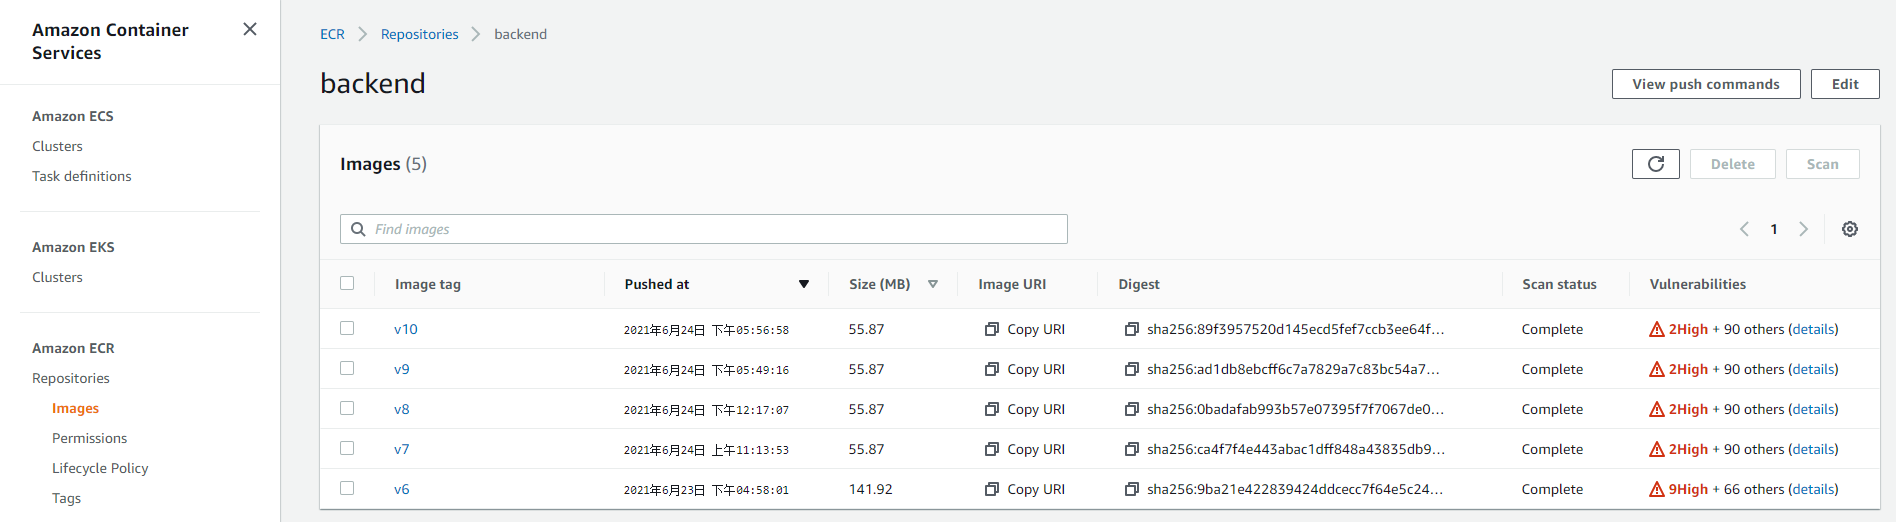
查看我们上传的镜像。
到此为止,我们整个 CI 流程已经完成,后面我们进行 CD 的演示。
# Continuous Deployment
## 编写 k8s 清单文件
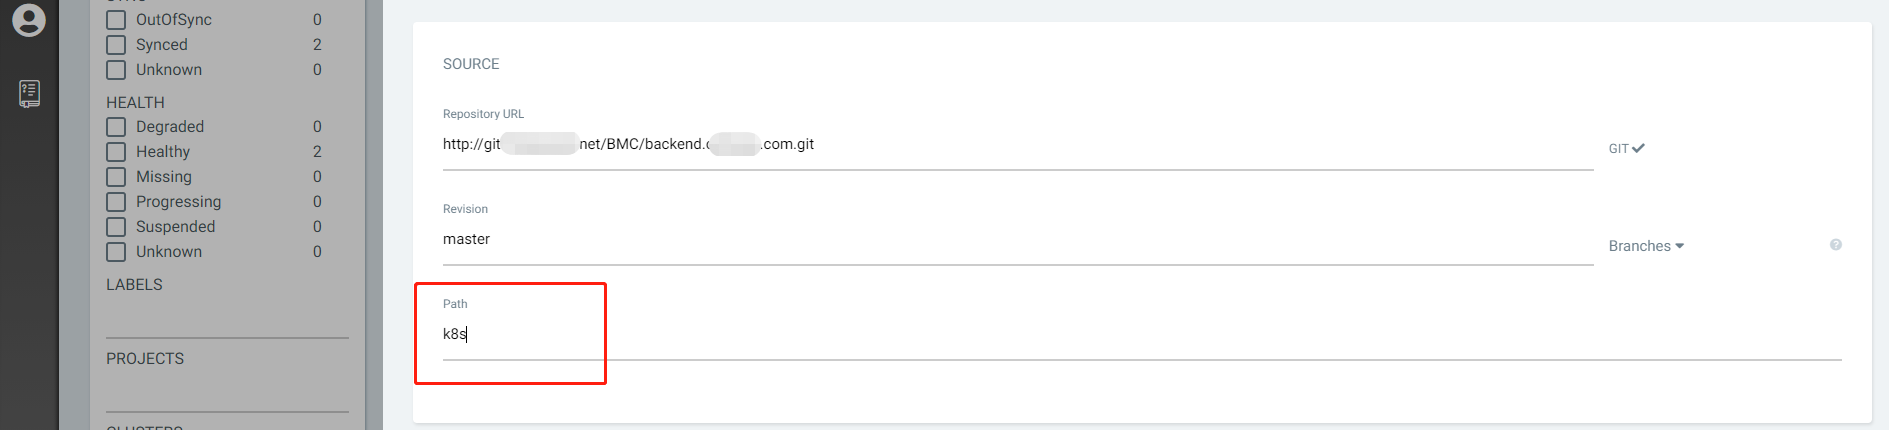
在 EKS 中,node 节点所赋予的 Role 默认有 ECR 镜像的拉取,这里我们不需要再单独授权。在代码的根目录,我们创建一个`k8s`文件夹,然后创建两个清单:
**deployment.yaml**
```yaml
apiVersion: apps/v1
kind: Deployment
metadata:
name: backend-wzlinux
labels:
k8s-app: backend-wzlinux
namespace: default
spec:
replicas: 3
selector:
matchLabels:
k8s-app: backend-wzlinux
strategy:
rollingUpdate:
maxSurge: 25%
maxUnavailable: 25%
type: RollingUpdate
template:
metadata:
labels:
k8s-app: backend-wzlinux
annotations:
fluentbit.io/parser: nginx
spec:
containers:
- image: 921283538843.dkr.ecr.eu-west-1.amazonaws.com/backend:v10
imagePullPolicy: Always
name: backend-wzlinux
env:
- name: TZ
value: Asia/Shanghai
resources:
limits:
cpu: 500m
memory: 500Mi
requests:
cpu: 100m
memory: 200Mi
ports:
- containerPort: 80
protocol: TCP
```
**service.yaml**
```yaml
apiVersion: v1
kind: Service
metadata:
name: backend-wzlinux
spec:
selector:
k8s-app: backend-wzlinux
ports:
- protocol: TCP
port: 80
targetPort: 80
type: ClusterIP
---
apiVersion: networking.k8s.io/v1
kind: Ingress
metadata:
namespace: default
name: backend-ingress
annotations:
kubernetes.io/ingress.class: alb
alb.ingress.kubernetes.io/listen-ports: '[{"HTTP": 80}, {"HTTPS": 443}]'
alb.ingress.kubernetes.io/target-group-attributes: stickiness.enabled=true,stickiness.lb_cookie.duration_seconds=600
alb.ingress.kubernetes.io/scheme: internet-facing
alb.ingress.kubernetes.io/conditions.backend-wzlinux: >
[{"field":"host-header","hostHeaderConfig":{"values":["backend.wzlinux.com"]}}]
alb.ingress.kubernetes.io/group.name: wzlinux
alb.ingress.kubernetes.io/ssl-redirect: '443'
alb.ingress.kubernetes.io/certificate-arn: arn:aws:acm:eu-west-1:921283538843:certificate/e55a72ae-d9b5-4f77-bf6d-242691105231
alb.ingress.kubernetes.io/target-type: ip
spec:
rules:
- http:
paths:
- path: /
pathType: Prefix
backend:
service:
name: backend-wzlinux
port:
number: 80
```
在 service 里面,我使用了 Ingress,为了使用 ALB,并且添加证书,具体的 annotations 含义,请查看下面的文档:https://kubernetes-sigs.github.io/aws-load-balancer-controller/v2.2/guide/ingress/annotations/
上面的 ingress 清单,可以使用 Headless Service,也可以写成下面这样:
```yaml
apiVersion: v1
kind: Service
metadata:
name: backend-wzlinux
spec:
selector:
k8s-app: backend-wzlinux
ports:
- protocol: TCP
port: 80
targetPort: 80
type: ClusterIP
clusterIP: None
---
apiVersion: networking.k8s.io/v1
kind: Ingress
metadata:
namespace: default
name: backends-ingress
annotations:
kubernetes.io/ingress.class: alb
alb.ingress.kubernetes.io/listen-ports: '[{"HTTP": 80}, {"HTTPS": 443}]'
alb.ingress.kubernetes.io/target-group-attributes: stickiness.enabled=true,stickiness.lb_cookie.duration_seconds=600
alb.ingress.kubernetes.io/scheme: internet-facing
alb.ingress.kubernetes.io/group.name: wzlinux
alb.ingress.kubernetes.io/ssl-redirect: '443'
alb.ingress.kubernetes.io/certificate-arn: arn:aws:acm:eu-west-1:921283538843:certificate/e55a72ae-d9b5-4f77-bf6d-242691105231
alb.ingress.kubernetes.io/target-type: ip
spec:
rules:
- host: backends.wzlinux.com
http:
paths:
- pathType: ImplementationSpecific
backend:
service:
name: backend-wzlinux
port:
number: 80
```
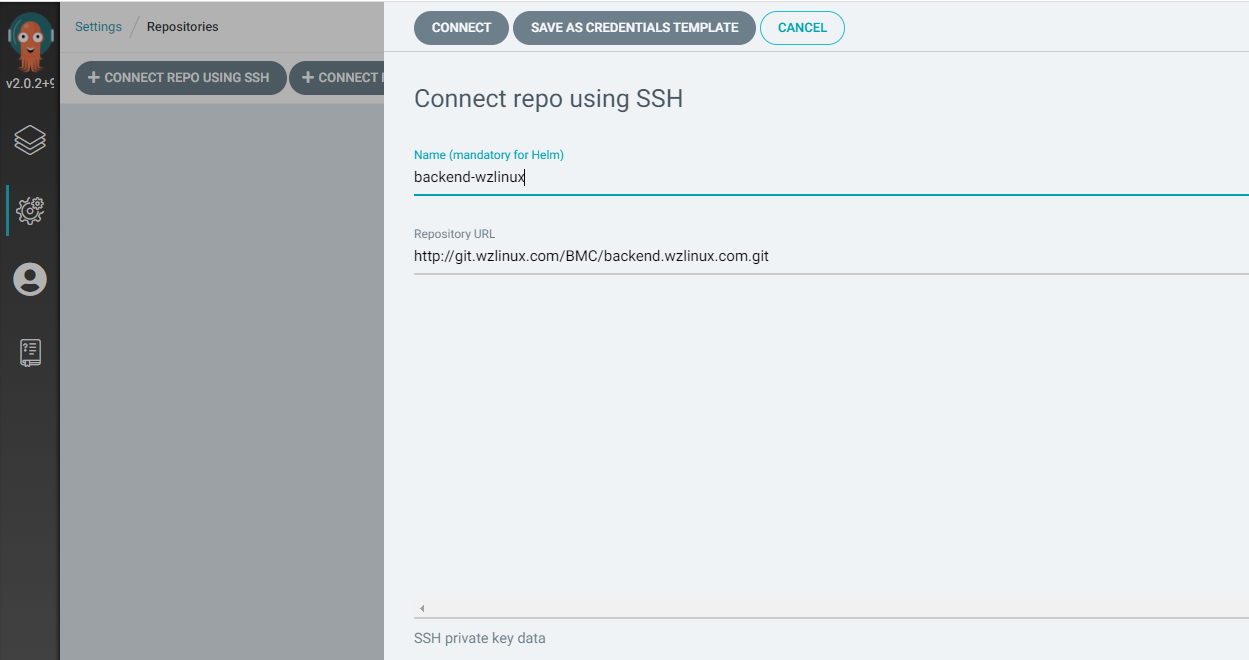
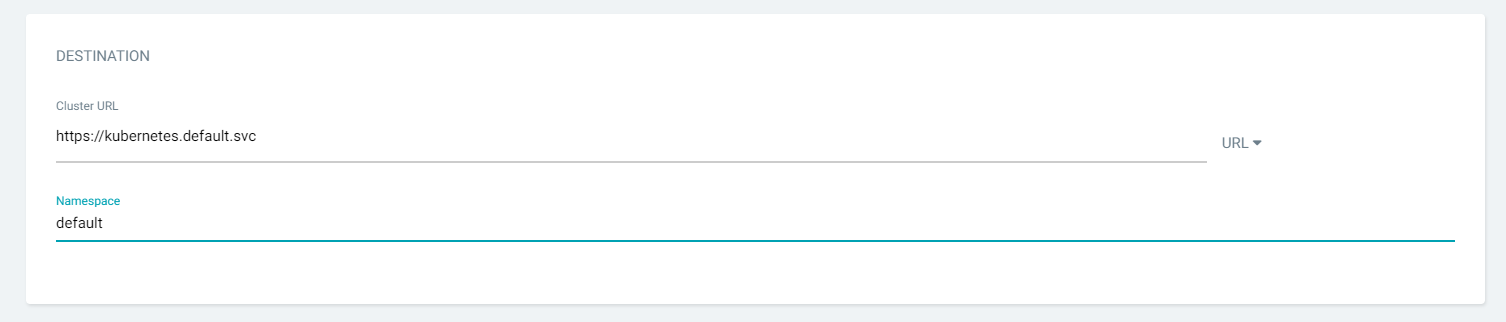
## 配置 argocd
首先为 argocd 配置 Repositories。
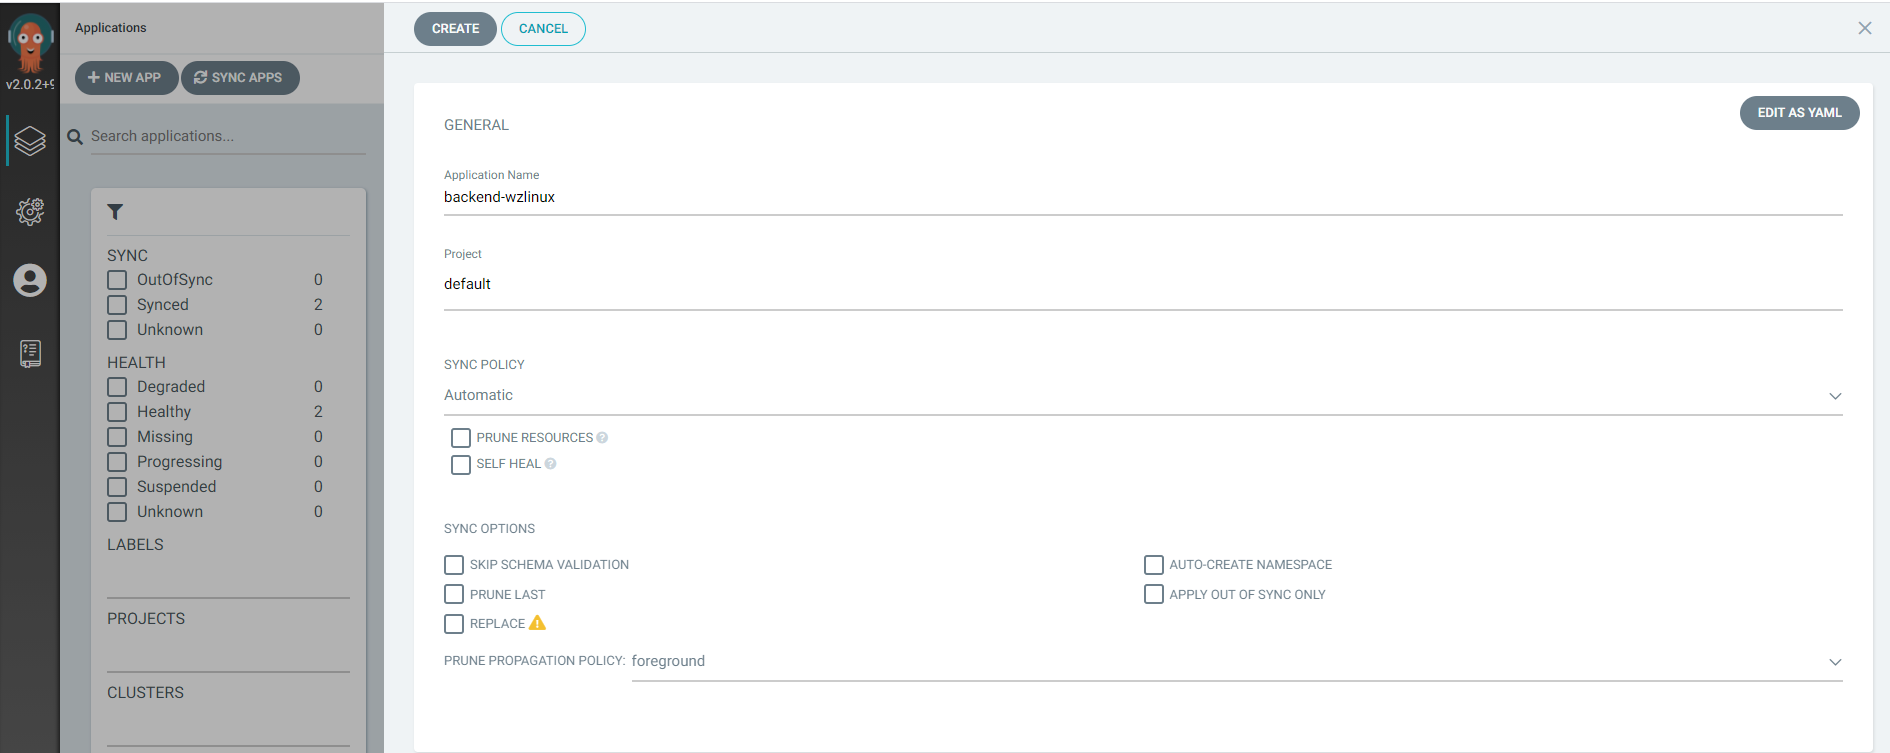
创建 app。
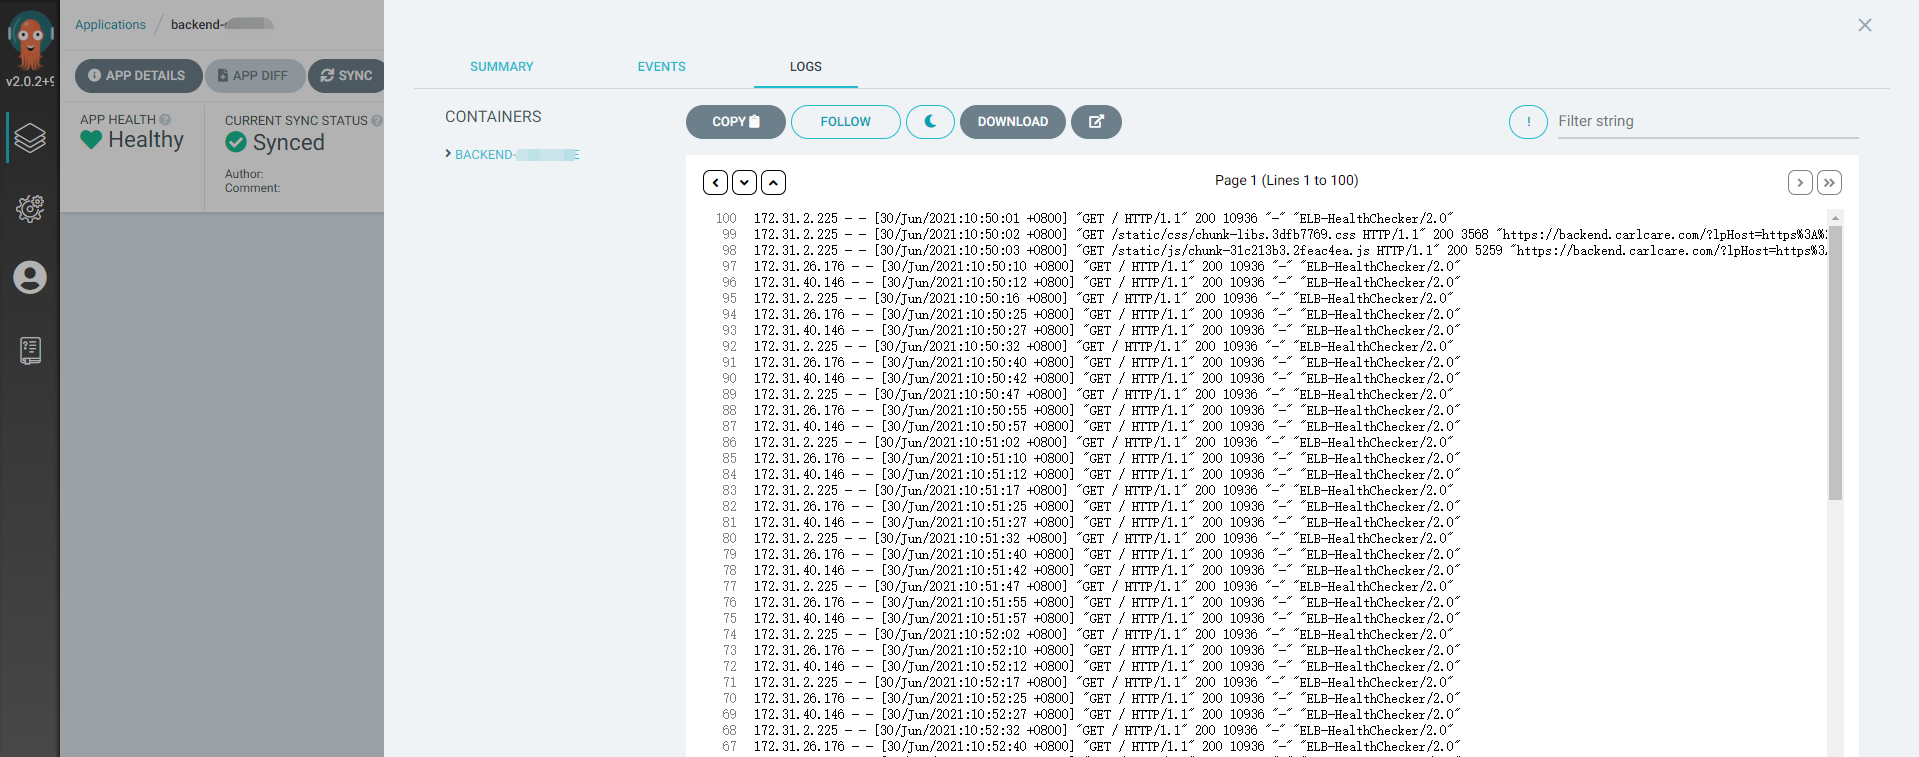
当然在 Argo CD 里面也可以查看日志,也是很方便的。
这样设置的话,当我们更新清单就会自动发布。
整个流程大概就是这样。
# 日志查看
登陆到我们的 Kibana,可以看到相关 Pod 的日志信息,因为我们把 nginx 访问日志和错误日志都输出到终端了。
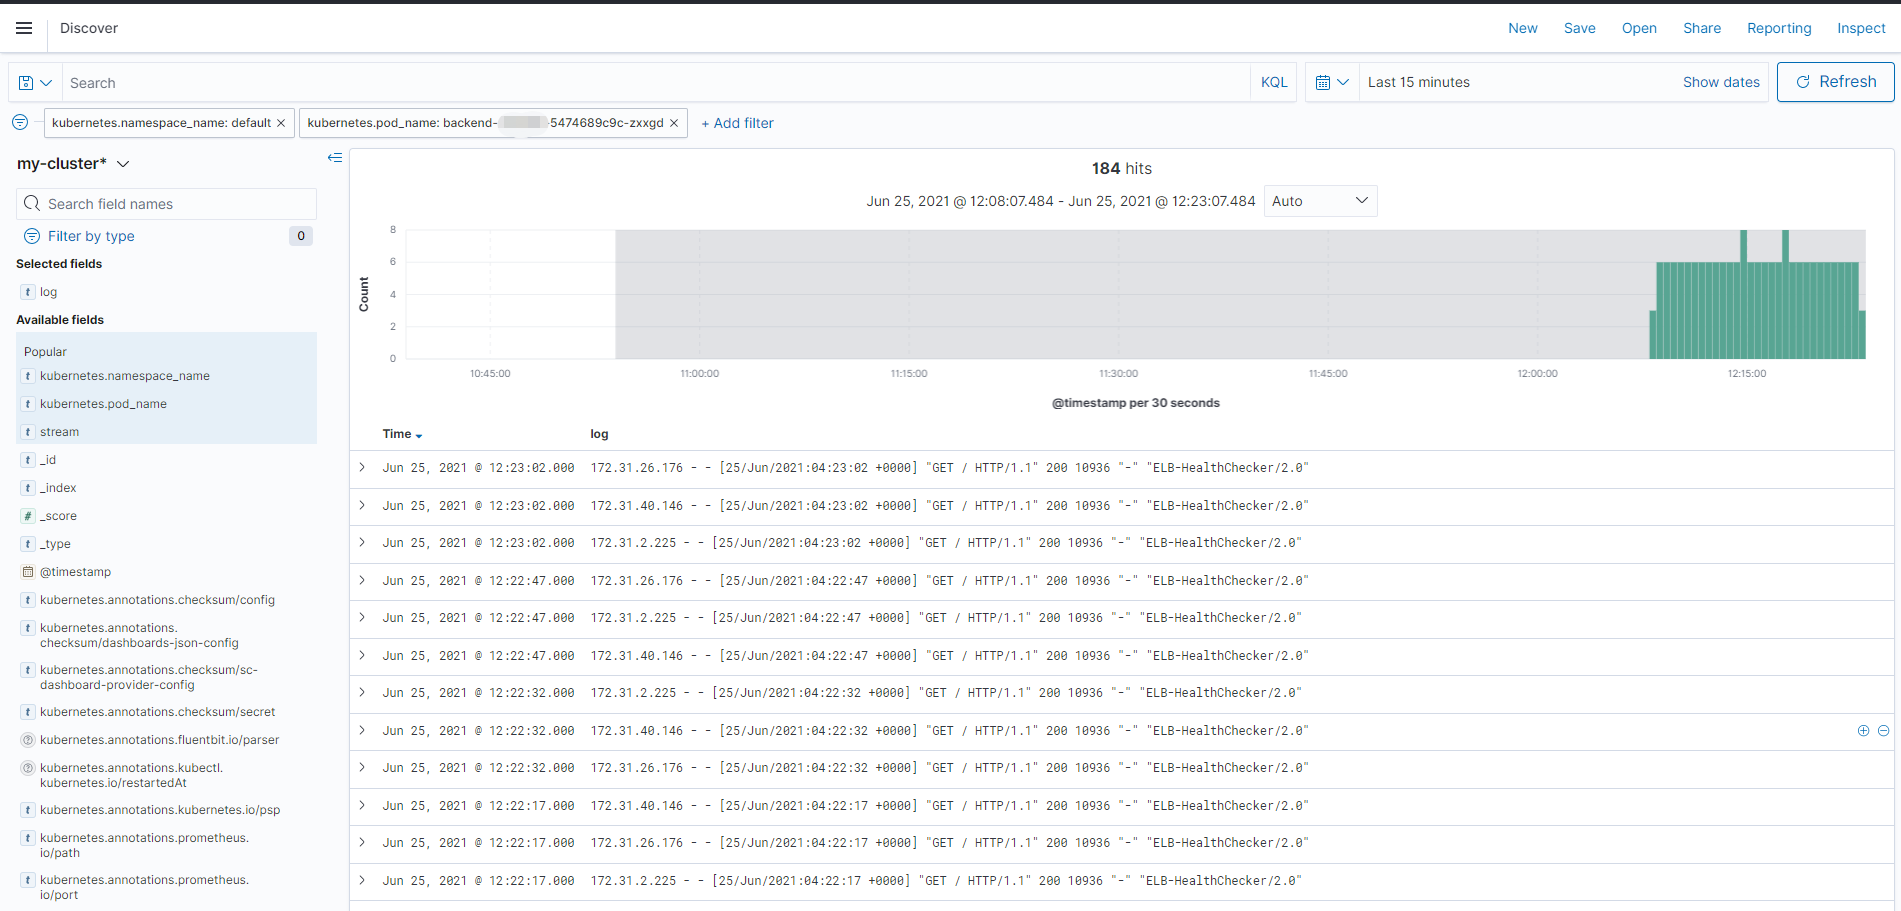
目前还没有什么访问量,基本都是 ALB 健康检查的日志。
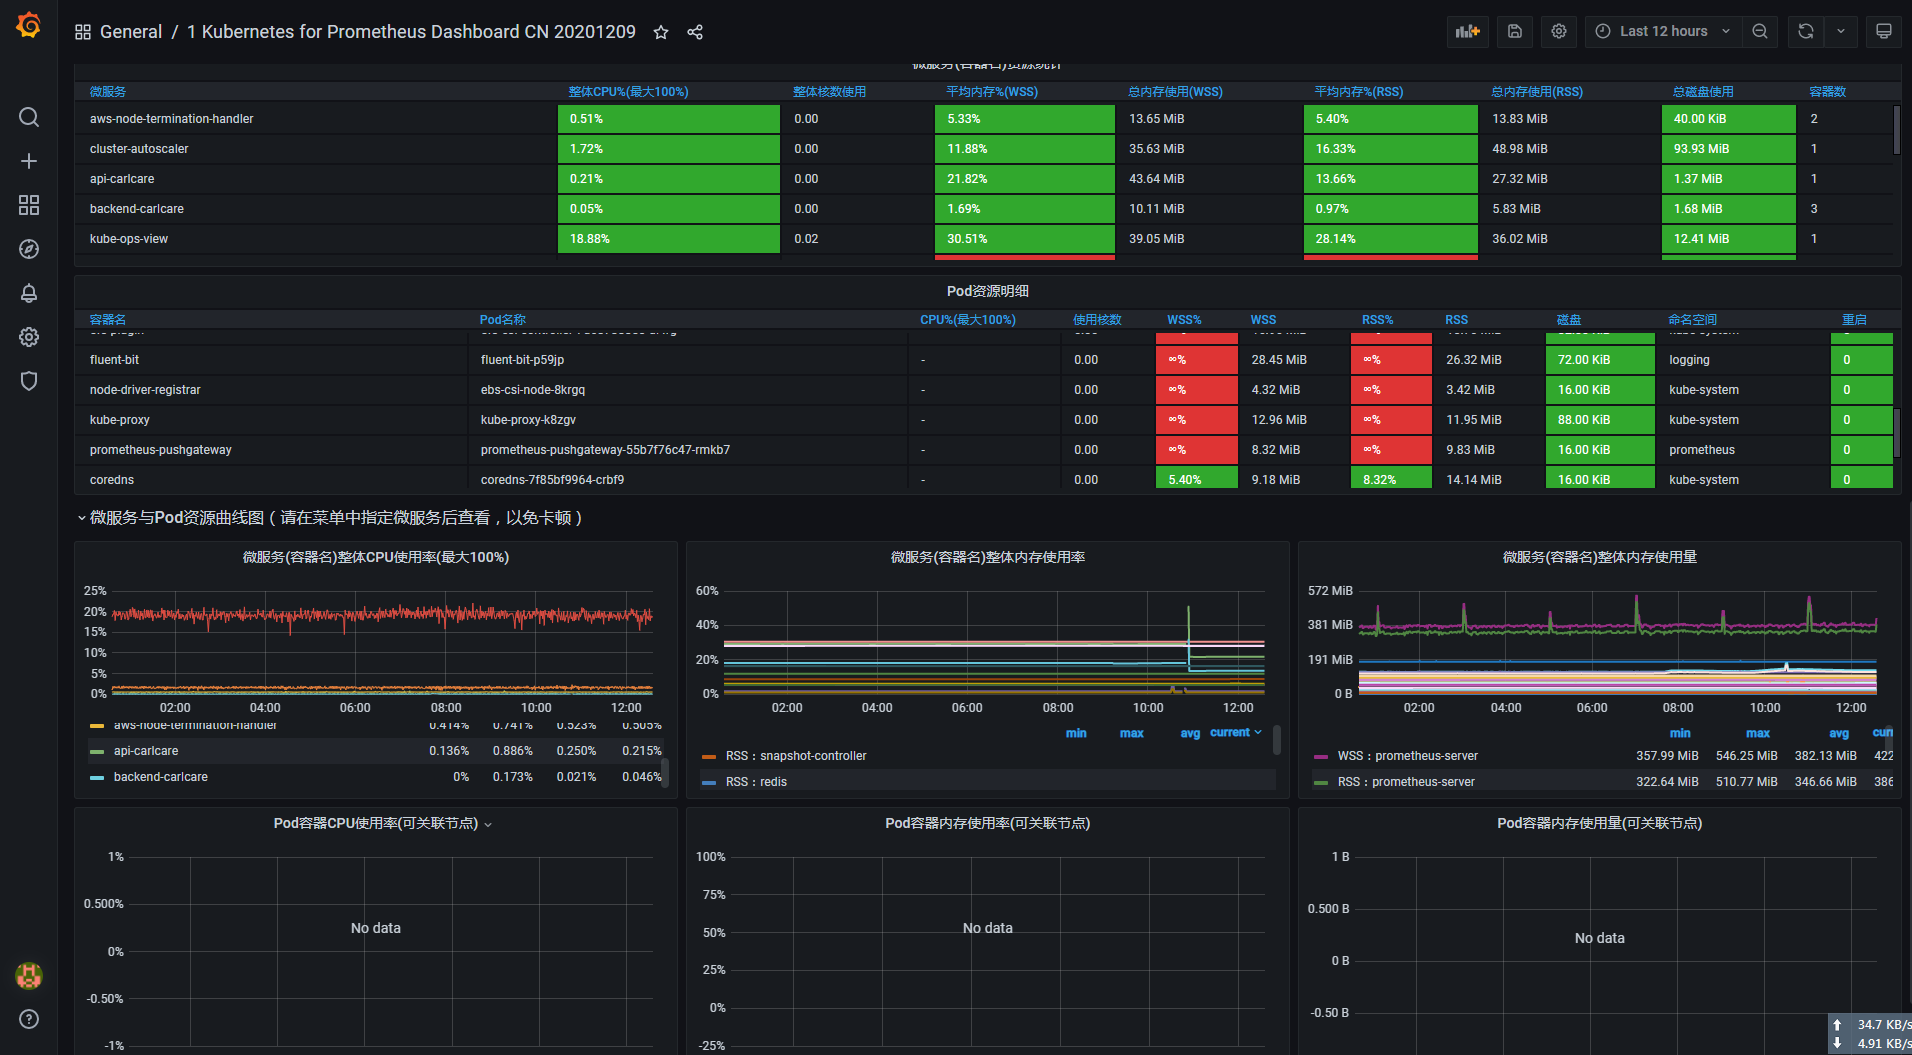
# 监控查看
# 欢迎大家扫码关注,获取更多信息

标签:wzlinux,ingress,vue,kubernetes,16,com,io,EKS,backend 来源: https://blog.51cto.com/wzlinux/2957427