shell脚本 阿里云基线检查一键配置
作者:互联网
一.简介
日期:2017/9/1
介绍:安全加固脚本,会符合阿里云基线检查。有幂等性,可重复执行

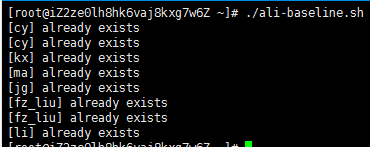
效果图:

二.使用
适用:centos6/7
语言:中文
注意:脚本是符合阿里云基线检查的配置,请查看条目后再执行,也可以修改脚本选择需要的项目执行
下载
wget https://raw.githubusercontent.com/goodboy23/shell/master/jobs/ali_baseline.sh
执行
bash ali_baseline.sh
三.基线检查条目
Centos7
#开启地址空间布局随机化
#它将进程的内存空间地址随机化来增大入侵者预测目的地址难度,从而降低进程被成功入侵的风险
sysctl -w kernel.randomize_va_space=2

#禁止SSH空密码用户登录
#编辑文件/etc/ssh/sshd_config,将PermitEmptyPasswords配置为no
PermitEmptyPasswords no

#检查密码重用是否受限制
#在/etc/pam.d/password-auth和/etc/pam.d/system-auth中password sufficient pam_unix.so 这行的末尾配置remember参数为5-24之间,在末尾添加
remember=5

#设置密码失效时间
#使用非密码登陆方式如密钥对,请忽略此项。在 /etc/login.defs 中将 PASS_MAX_DAYS 参数设置为 60-180之间,如 PASS_MAX_DAYS 90。需同时执行命令设置root密码失效时间
chage --maxdays 90 root

#设置密码修改最小间隔时间
#在 /etc/login.defs 中将 PASS_MIN_DAYS 参数设置为7-14之间,建议为7: PASS_MIN_DAYS 7 需同时执行命令为root用户设置
chage --mindays 7 root

#确保密码到期警告天数为7或更多
#在 /etc/login.defs 中将 PASS_WARN_AGE 参数设置为7-14之间,建议为7: PASS_WARN_AGE 7 同时执行命令使root用户设置生效
chage --warndays 7 root

#确保SSH MaxAuthTries设置为3到6之间
#在/etc/ssh/sshd_config中取消MaxAuthTries注释符号#,设置最大密码尝试失败次数3-6
MaxAuthTries 4

#SSHD强制使用V2安全协议
#编辑 /etc/ssh/sshd_config 文件以按如下方式设置参数
Protocol 2

#设置SSH空闲超时退出时间
#编辑/etc/ssh/sshd_config,将ClientAliveInterval 设置为300到900,即5-15分钟,将ClientAliveCountMax设置为0-3
ClientAliveCountMax 2

#确保rsyslog服务已启用
systemctl enable rsyslog
systemctl start rsyslog

#确保SSH LogLevel设置为INFO,记录登录和注销活动
#编辑 /etc/ssh/sshd_config 文件以按如下方式设置参数(取消注释)
LogLevel INFO

#访问控制配置文件的权限设置
chown root:root /etc/hosts.allow
chown root:root /etc/hosts.deny
chmod 644 /etc/hosts.deny
chmod 644 /etc/hosts.allow

#设置用户权限配置文件的权限
chown root:root /etc/passwd /etc/shadow /etc/group /etc/gshadow
chmod 0644 /etc/group
chmod 0644 /etc/passwd
chmod 0400 /etc/shadow
chmod 0400 /etc/gshadow

#除root以外其他UID为0的用户都应该删除,或者为其分配新的UID
cat /etc/passwd | awk -F: '($3 == 0) { print $1 }'|grep -v '^root$'

#密码复杂度检查
#编辑/etc/security/pwquality.conf,把minlen(密码最小长度)设置为9-32位,把minclass(至少包含小写字母、大写字母、数字、特殊字符等4类字符中等3类或4类)设置为3或4。
minlen=10 minclass=3

#检查系统空密码账户
#为用户设置一个非空密码
Centos6
#强制用户不重用最近使用的密码,降低密码猜测攻击风险
#在/etc/pam.d/password-auth和/etc/pam.d/system-auth中password sufficient pam_unix.so 这行的末尾配置remember参数为5-24之间,在末尾加
remember=5

#设置SSH空闲超时退出时间,可降低未授权用户访问其他用户ssh会话的风险
#编辑/etc/ssh/sshd_config,将ClientAliveInterval 设置为300到900,即5-15分钟,将ClientAliveCountMax设置为0-3
ClientAliveCountMax 2

#设置较低的Max AuthTrimes参数将降低SSH服务器被暴力攻击成功的风险。
#在/etc/ssh/sshd_config中取消MaxAuthTries注释符号#,设置最大密码尝试失败次数3-6
MaxAuthTries 4

#设置密码修改最小间隔时间,限制密码更改过于频繁
#在 /etc/login.defs 中将 PASS_MIN_DAYS 参数设置为7-14之间,建议为7: PASS_MIN_DAYS 7 需同时执行命令为root用户设置
chage --mindays 7 root

#设置密码失效时间,强制定期修改密码,减少密码被泄漏和猜测风险,使用非密码登陆方式(如密钥对)请忽略此项。
#使用非密码登陆方式如密钥对,请忽略此项。在 /etc/login.defs 中将 PASS_MAX_DAYS 参数设置为 60-180之间,如 PASS_MAX_DAYS 90。需同时执行命令设置root密码失效时间
chage --maxdays 90 root

#检查密码长度和密码是否使用多种字符类型
#编辑/etc/pam.d/password-auth 和 /etc/pam.d/system-auth配置文件中包含password requisite pam_cracklib.so 这一行。增加配置minlen(密码最小长度)设置为9-32位,minclass(至少包含小写字母、大写字母、数字、特殊字符等4类字符中等3类或4类)设置为3或4
password requisite pam_cracklib.so try_first_pass retry=3 minlen=11 minclass=3

#确保SSH LogLevel设置为INFO,记录登录和注销活动
#编辑 /etc/ssh/sshd_config 文件以按如下方式设置参数(取消注释)
LogLevel INFO

#除root以外其他UID为0的用户都应该删除,或者为其分配新的UID
cat /etc/passwd | awk -F: '($3 == 0) { print $1 }'|grep -v '^root$'

#它将进程的内存空间地址随机化来增大入侵者预测目的地址难度,从而降低进程被成功入侵的风险
sysctl -w kernel.randomize_va_space=2

#设置用户权限配置文件的权限
chown root:root /etc/passwd /etc/shadow /etc/group /etc/gshadow
chmod 0644 /etc/group
chmod 0644 /etc/passwd
chmod 0400 /etc/shadow
chmod 0400 /etc/gshadow

#访问控制配置文件的权限设置
chown root:root /etc/hosts.allow
chown root:root /etc/hosts.deny
chmod 644 /etc/hosts.deny
chmod 644 /etc/hosts.allow

#确保rsyslog服务已启用,记录日志用于审计
service rsyslog start

#SSHD强制使用V2安全协议
#编辑 /etc/ssh/sshd_config 文件以按如下方式设置参数
Protocol 2

#确保密码到期警告天数为7或更多
#在 /etc/login.defs 中将 PASS_WARN_AGE 参数设置为7-14之间,建议为7: PASS_WARN_AGE 7 同时执行命令使root用户设置生效
chage --warndays 7 root

#禁止SSH空密码用户登录
#编辑文件/etc/ssh/sshd_config,将PermitEmptyPasswords配置为no
PermitEmptyPasswords no

#检查系统空密码账户
#为用户设置一个非空密码
标签:shell,密码,一键,chmod,etc,基线,设置,PASS,root 来源: https://www.cnblogs.com/rxysg/p/15670877.html