[转]Jira Issues Macro
作者:互联网
本文转自:https://confluence.atlassian.com/doc/jira-issues-macro-139380.html
Add the Jira Issues macro to a page to display information from Jira. You can display a single issue, a list of issues, or a count, based on a JIRA Query Language (JQL) search, filter, or URL.
This is great for:
- team meetings and retrospectives
- project status updates
- release notes and customer communications
- sharing updates with people in your organization who don't use Jira regularly.
The macro can display issues from any connected Jira Server, Data Center, or Cloud application, including Jira Software and Jira Service Management.
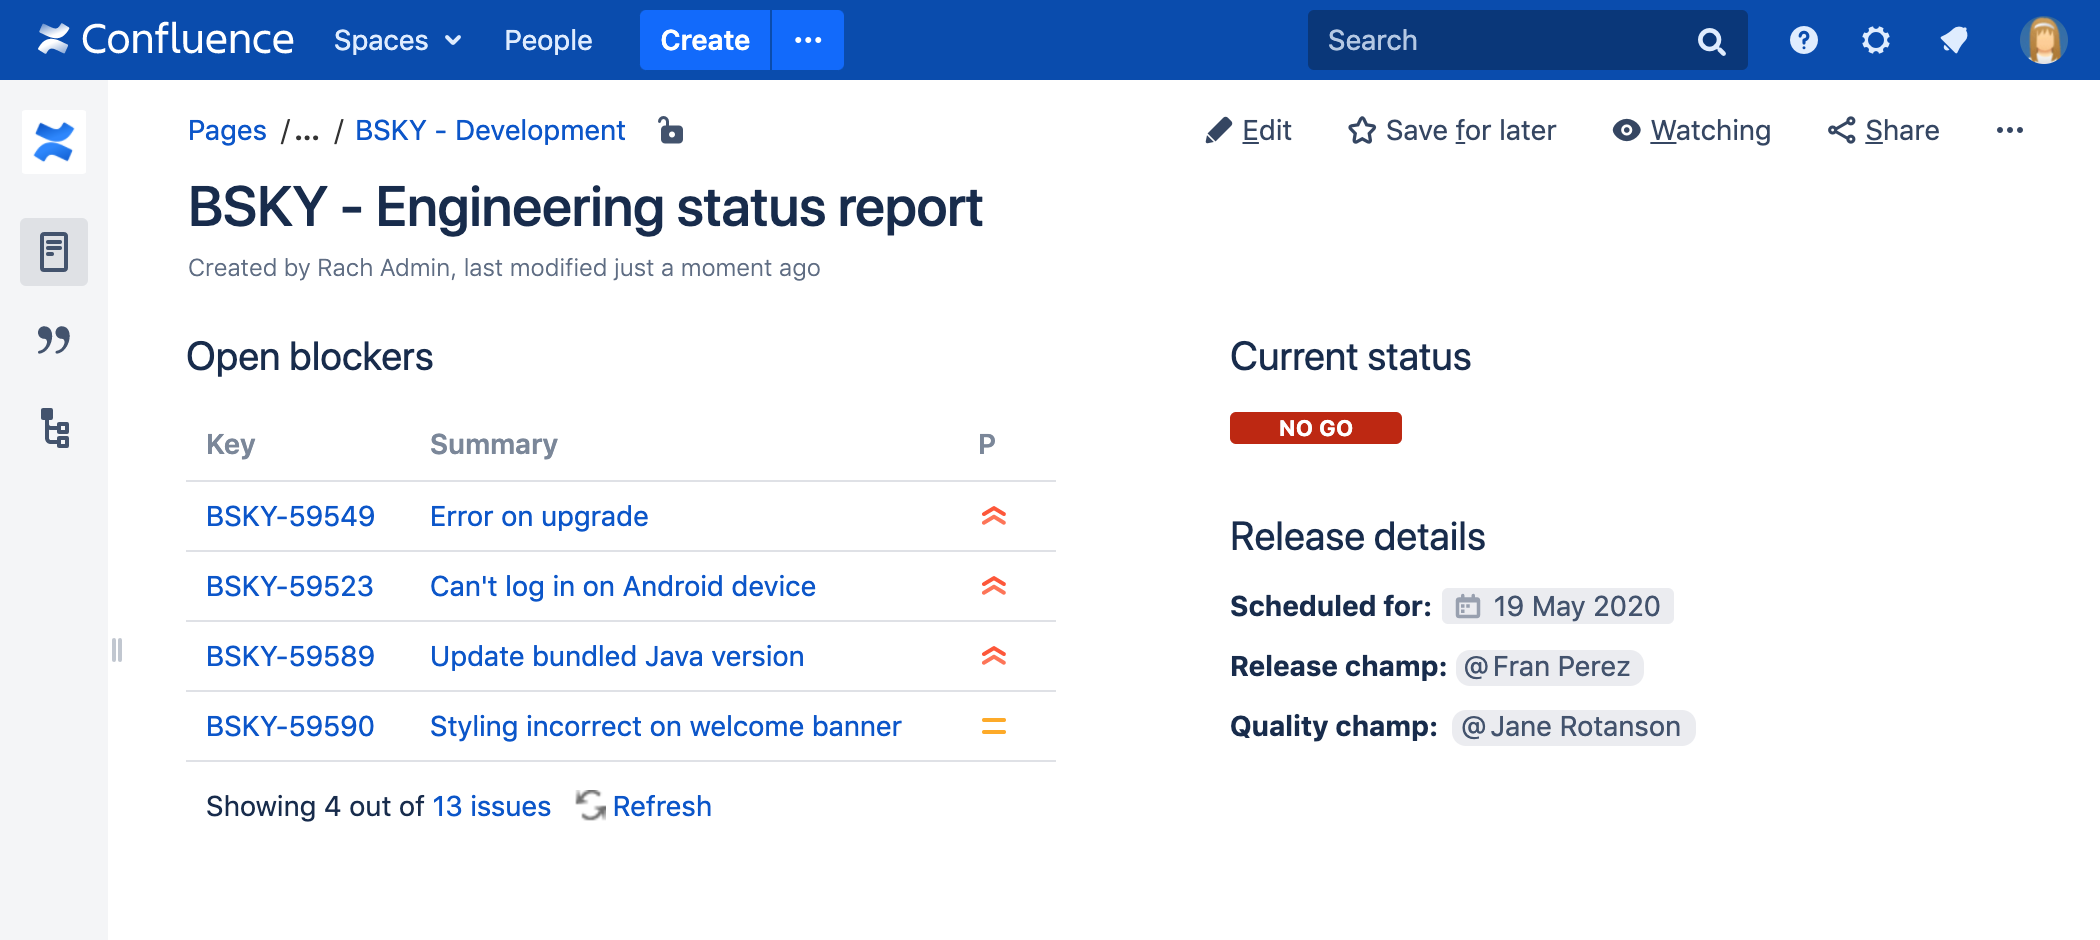
Screenshot: Project status page with a Jira issues macro showing issues that must be resolved before release.
Connect Confluence and Jira
Before you can use this macro, your Confluence and Jira application must be connected via Application Links. People viewing the page will see the publicly accessible issues from the Jira site. If your Jira site has restricted viewing (that is, people need permission to view issues) then they will need to authenticate before seeing the restricted issues.
See Use Jira applications and Confluence together for more information.
Add this macro to your page
To add the Jira macro to a page:
-
From the editor toolbar, choose Insert
 > Other Macros.
- Choose Jira from the Development category.
- Enter a filter or search for a Jira issue.
- Choose Insert.
You can then publish your page to see the macro in action.
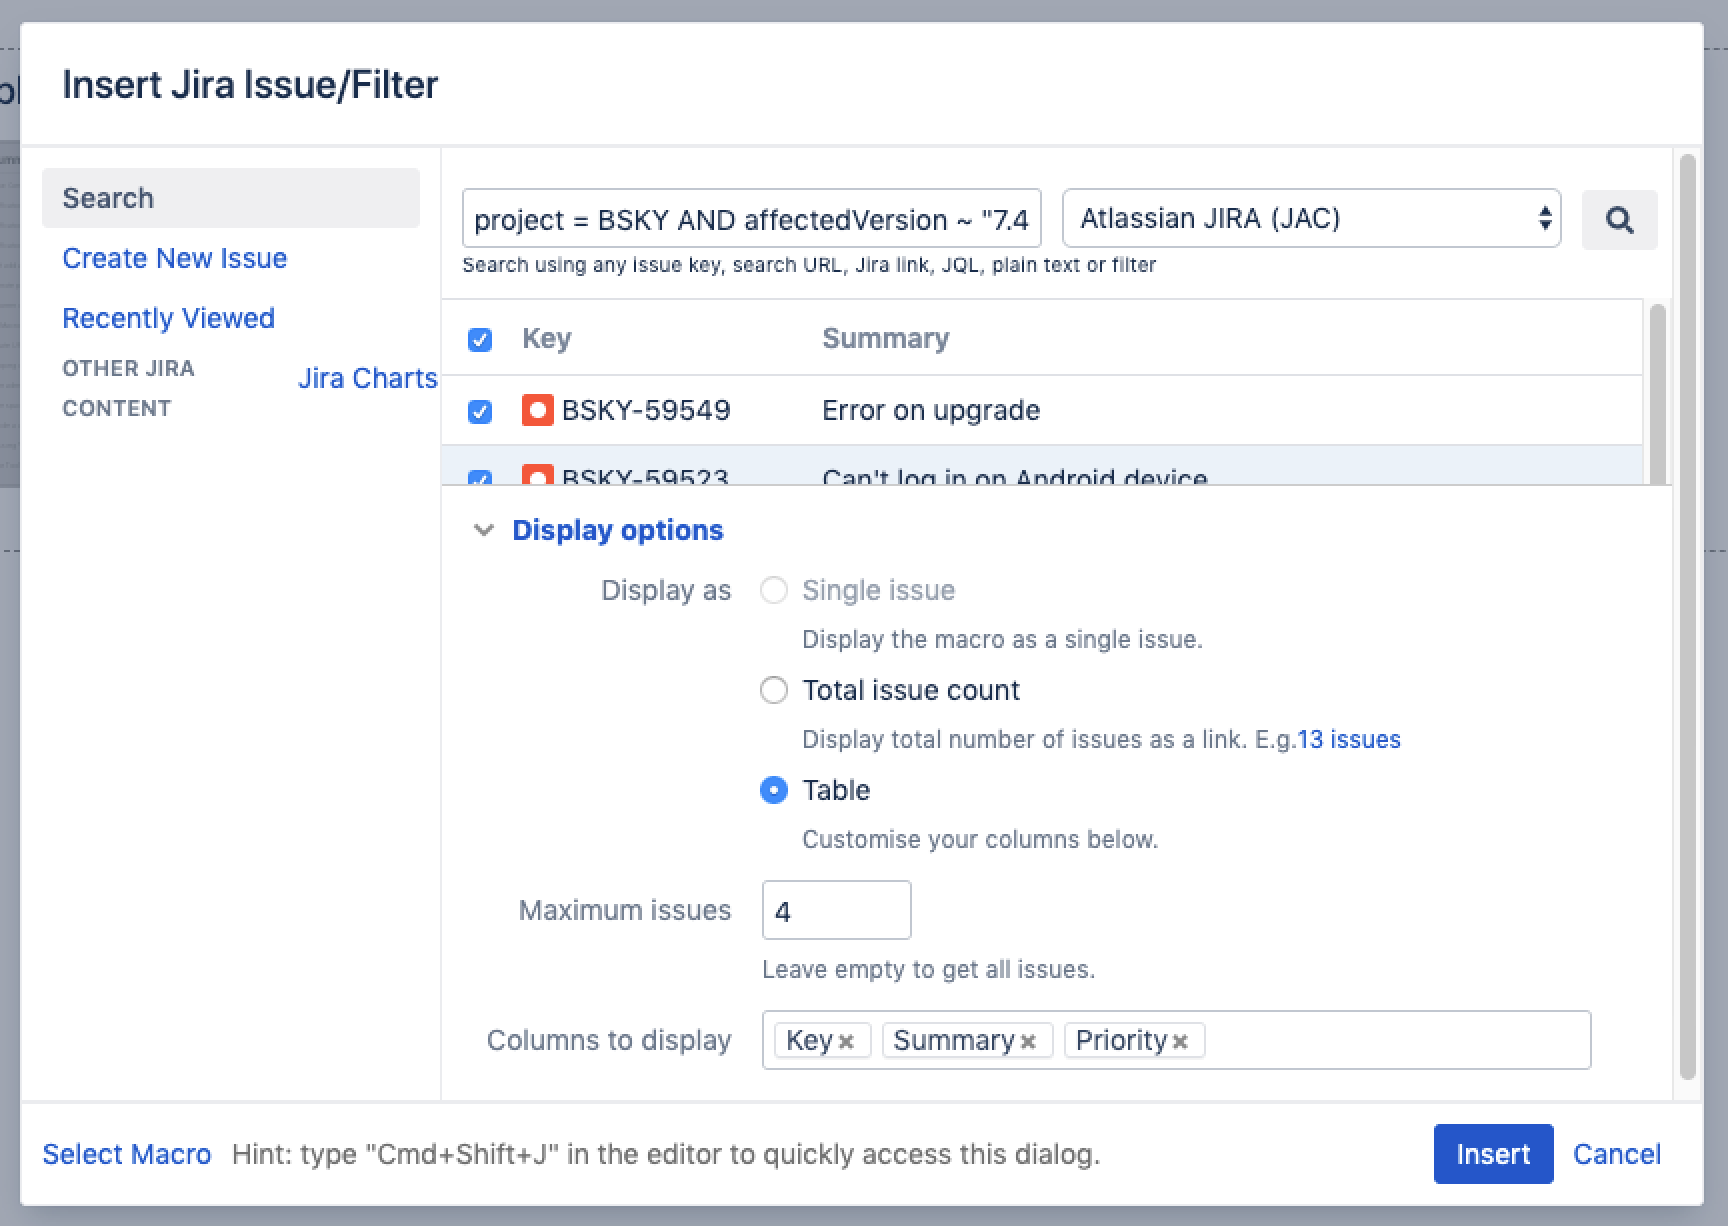
Screenshot: Configuring the Jira Issues Macro to show a list of issues.
Displaying issues via a Jira Query Language (JQL) search
You can use the macro to display a table of issues on your page, based on the results of a search using JIRA Query Language (JQL).
JQL is a simple query language that is similar to SQL. A basic JQL query consists of a field, followed by an operator (such as = or >), followed by one or more values or functions.
Examples:
-
The following query will find all issues in the 'TEST' project:
project = "TEST" -
The following query will find all issues in the 'documentation' component of the 'CONF' project:
project = CONF and component = documentation
For more information about JQL syntax, see Advanced searchingin the Jira Software documentation.
To display a table of issues based on a JQL search:
- Insert the Jira Issues macro onto your Confluence page, as described above.
- Choose a Jira server next to the Search button.
- If prompted, log in to the Jira server.
- Enter the JQL query into the Search box.
- Choose Search.
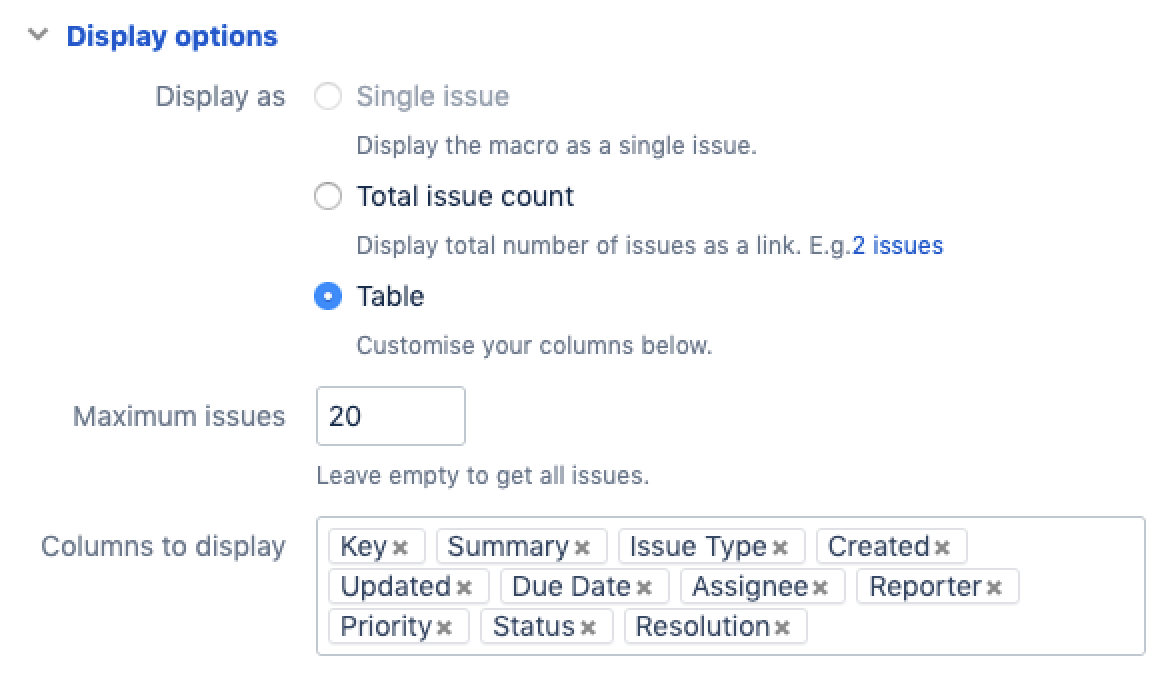
- If you want to customize the display, choose Display options and adjust the columns and number of issues that will appear in your table of issues.
- Choose Insert.
Screenshot: Display options in the Jira Issues macro browser.
Displaying issues via a Jira URL
You can paste any of the following Jira application URLs into the Jira Issues macro. Confluence will immediately convert the URL to a JQL search.
- Any URL for an issue search or filter.
- A URL for a single issue.
- The URL of the XML view of a search.
Auto-convert: You can paste URLs directly into the Confluence editor (without calling up the macro browser). Confluence will automatically convert the URL into a Jira Issues macro.
Displaying a single issue, or selected issues
To display a single Jira issue, choose one of the following methods:
- Paste the URL of the issue directly onto the Confluence page. (There is no need to use the macro browser.) Confluence will auto-convert the link to a Jira Issues macro.
- Or: Add the Jira issues macro to the page as described above, and choose Recently Viewed to see the issues you have visited recently. Select an issue and choose Insert.
- Or: Add the Jira issues macro to the page as described above, and paste the issue URL into the search box in the macro browser.
- Or: Add the Jira issues macro to the page, define your search criteria in the macro browser via JQL as described above, then select the check box next to the issue in the search results, within the macro browser.
You can choose to show just the issue key, or the issue key and a summary. Select the macro placeholder and choose Show Summary or Hide Summary.
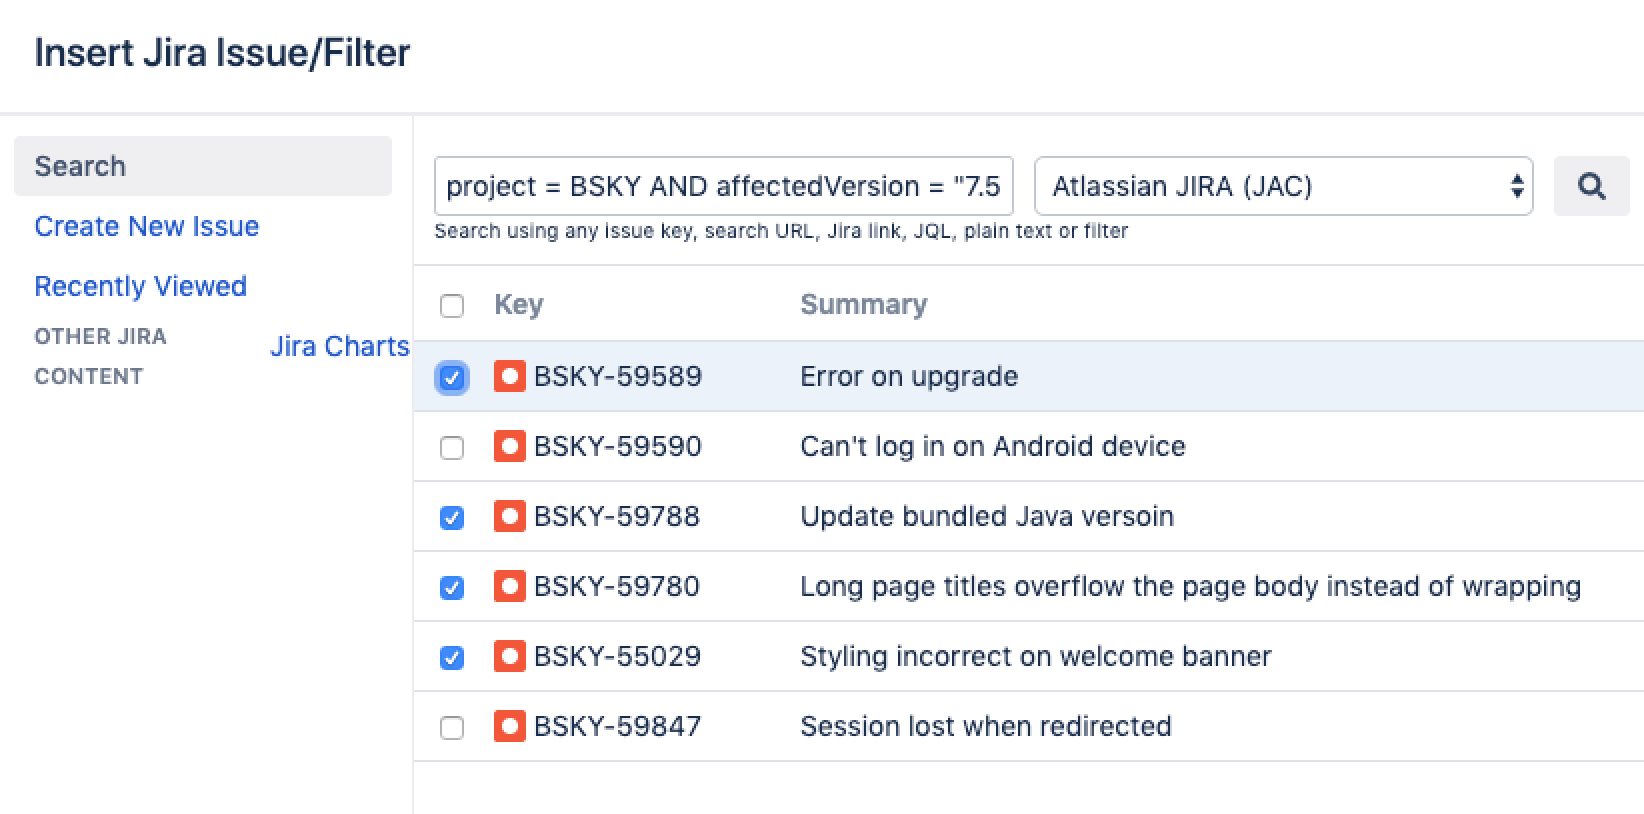
To display a subset of Jira issues from your search results:
- Add the Jira issues macro to the page.
- Define your search criteria in the macro browser via JQL, as described above.
- Select the check boxes next to the required issues in the search results, within the macro browser.
Screenshot: Selecting a subset of issues to display
Displaying a count of issues
You can choose to display the number of issues returned by your search, rather than a table of issues. The Jira Issues macro will display a count of issues, linked to the search in your Jira application.
Screenshot: The Jira Issues macro displaying an issue count.

To display an issue count:
- Add the Jira Issues macro to the page.
- Define your search criteria in the macro browser via JQL, as described above.
- Choose Display options, then choose Total issue count next to 'Display options' in the macro browser.
- Choose Insert.
Creating a new issue
While editing a Confluence page, you can create an issue in Jira and display it on your Confluence page, without leaving the Confluence editor.
To create an issue and add it to your page:
- Add the Jira Issues macro to the page, as described above.
- Choose Create New Issue.
- Supply the information about your Jira server, project, and issue, as prompted.
- Choose Insert.
Confluence will send a request to your Jira application, to create the issue, then display the newly created issue on your page.
Limitations
The Jira Issues macro will notify you if it is unable to create an issue in the selected project. This may be because the project has a required field, field configuration or other customization that is not supported by the Jira Issues macro. In this situation you will need to create the issue directly in your Jira application.
Configuring application links to display restricted issues
Before you can use this macro, your Confluence and Jira sites must be connected via Application Links.
If the Jira site allows anonymous users to view issues, you must configure an application link, but there's no need to configure any incoming or outgoing authentication between the Jira application and Confluence. People viewing the Confluence page will see the publicly accessible issues.
If your Jira site has restricted viewing, or if some projects or issues are restricted to viewing by certain people, then people will be prompted to Log in & Approve before seeing the restricted issues.
Rendering HTML from Jira applications
Formatted fields from Jira can be displayed in Confluence if you set up a Confluence-to-Jira application link. Otherwise, such formatted fields will be escaped within the output of the Jira issues macro. This is to prevent the possibility of malicious HTML being served by an untrusted Jira server. The most likely field where you will notice this is in the description field.
This example shows how a description column may be displayed in Jira:
Description
This is
- the description
- of my issue
If there is no application link between Jira and Confluence, the description will appear in the Jira issues macro like this:
Description
<p>This is<ul><li>the description</li><li>of my issue</li></ul></p>
Disabling the Jira Issues macro
The functionality is provided by a system app called 'Jira Macros'. To make the macro unavailable on your site, you can disable the app. See Disabling and enabling apps.
Notes
HTTPS: The Jira Issues macro can access a Jira application running under SSL provided the Confluence server is configured to accept the Jira SSL certificate. See Connecting to LDAP or Jira applications or Other Services via SSL.
Custom
fields can be added as columns to the table simply by using the name of
the field with no quotes. Earlier versions of the macro required you to
use the custom field id, e.g. customfield_10100.
Other ways to add this macro
Add this macro as you type
Type { followed by the start of the macro name, to see a list of macros.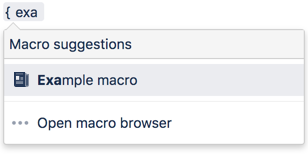
Add this macro using wiki markup
This is useful when you want to add a macro outside the editor, for example as custom content in the sidebar, header or footer of a space.
Macro name: jiraissues
Macro body: None.
This example uses a Jira filter.
{jiraissues:anonymous=true|url=https://jira.atlassian.com/issues/?filter=41225}A number of additional parameters that are not available via the macro browser are available in storage format and wiki markup.
标签:Jira,Macro,Confluence,Issues,macro,issue,your,issues 来源: https://www.cnblogs.com/freeliver54/p/15881233.html