android12.0(S) Pixel 3XL (QCOM 845) 编译刷机
作者:互联网
androidS 发布已经有一段时间了,作为一名搞机人,咱也不能落后,今天就来开盘 12 代码。
下载这个 S 代码前前后后搞了快一个月,哈哈我不愧是树懒本懒。唉,其实是中间遇到了不少问题,
环境都搞废了,还得重装系统,今天就来总结一下吧。
编译环境
1、Ubuntu16.04.5 系统
2、三星500G SSD EVO系列
3、内存8G,cpu 4核,I5(8年老本了凑合着用用)
4、二手 Pixel 3 XL一台
坑位集锦
1、磁盘大小
如果你是在虚拟机来盘这套代码的话,磁盘大小至少200G以上(血泪教训),中间扩容了三次最终还是不够大
仅仅 repo 文件夹就有 70G 左右
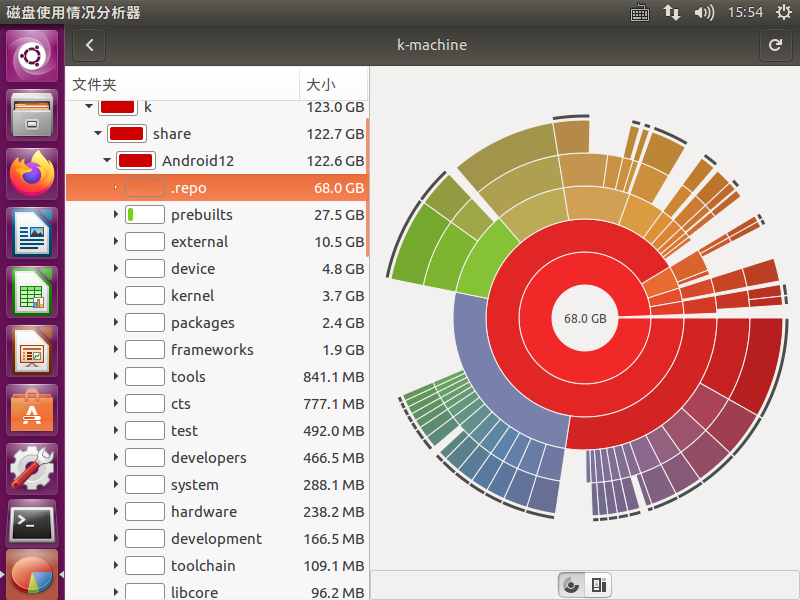
磁盘空间一定要大,一定要大,一定要大
不是虚拟机的请忽略这步
2、Python 版本要求
这次下载 aosp 的 S 代码时,repo init 就出现了问题,提示要求 Python 版本 3.6 以上
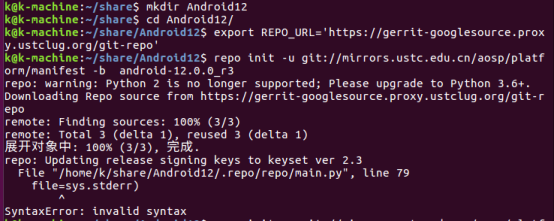
在这也是费了好长时间才解决这个问题,具体可参考 Linux python升级
从官网下载最新版本 Python-3.9.8 解压,解压完成后先不要着急 make install
还有个小坑,会报
ModuleNotFoundError: No module named ‘_ctypes’ 这个错误
以及 ModuleNotFoundError: No module named ‘_ssl’ 这个错误
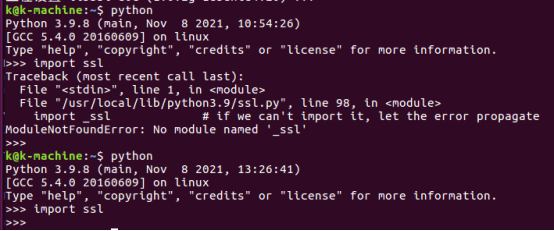
解决办法,执行如下两条指令
sudo apt-get install libssl-dev openssl
sudo apt-get install libffi-dev
成功后,再参考 python3虚拟环境中解决 ModuleNotFoundError: No module named ‘_ssl’
修改源码 vim Modules/Setup
取消 _socket socketmodule.c 和下面的 SLL 注释
然后执行 make install 安装重新配置环境变量。
3、HTTP SSL 证书问题
执行 git config --global http.sslverify false 关闭
cczheng@ubantu:~/google$ cd Android12/
cczheng@ubantu:~/google/Android12$ export REPO_URL='https://gerrit-googlesource.proxy.ustclug.org/git-repo'
cczheng@ubantu:~/google/Android12$ repo init -u git://mirrors.ustc.edu.cn/aosp/platform/manifest -b  android-12.0.0_r3
Downloading Repo source from https://gerrit-googlesource.proxy.ustclug.org/git-repo
fatal: unable to access 'https://gerrit-googlesource.proxy.ustclug.org/git-repo/': server certificate verification failed. CAfile: /etc/ssl/certs/ca-certificates.crt CRLfile: none
repo: error: "git" failed with exit status 128
  cwd: /home/cczheng/google/Android12/.repo/repo
  cmd: ['git', 'fetch', '--quiet', '--progress', 'origin', '+refs/heads/*:refs/remotes/origin/*', '+refs/tags/*:refs/tags/*']
fatal: cloning the git-repo repository failed, will remove '.repo/repo'
cczheng@ubantu:~/google/Android12$ git config --global http.sslverify false
cczheng@ubantu:~/google/Android12$ repo init -u git://mirrors.ustc.edu.cn/aosp/platform/manifest -b  android-12.0.0_r3
Downloading Repo source from https://gerrit-googlesource.proxy.ustclug.org/git-repo

... A new version of repo (2.17) is available.
... You should upgrade soon:
    cp /home/cczheng/google/Android12/.repo/repo/repo /home/cczheng/bin/repo

Downloading manifest from git://mirrors.ustc.edu.cn/aosp/platform/manifest
remote: Enumerating objects: 92903, done.
remote: Counting objects: 100% (92903/92903), done.
remote: Compressing objects: 100% (41747/41747), done.
remote: Total 92903 (delta 31091), reused 92896 (delta 31088)

Your identity is: yangtao <yangtao@innovatech.net.cn>
If you want to change this, please re-run 'repo init' with --config-name

repo has been initialized in /home/cczheng/google/Android12
做完这些步骤后,repo init 终于可以成功了。
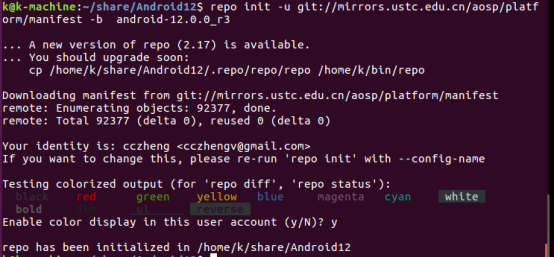
准备工作
1、设置 git 账户
git config --global user.email "xxxxxxx@gmail.com"
git config --global user.name "xxxxx"
2、配置PATH环境变量
mkdir ~/bin
echo "PATH=~/bin:\$PATH" >> ~/.bashrc
source ~/.bashrc
3、安装 curl 库,并设置权限
sudo apt-get install curl
curl -sSL  'https://gerrit-googlesource.proxy.ustclug.org/git-repo/+/master/repo?format=TEXT' |base64 -d > ~/bin/repo
chmod a+x ~/bin/repo
下载源码
1、建立工作目录
mkdir Android12
cd Android12
2、添加科大镜像源
export REPO_URL='https://gerrit-googlesource.proxy.ustclug.org/git-repo'
3、初始化仓库,并指定要下载android版本
repo init -u git://mirrors.ustc.edu.cn/aosp/platform/manifest -b android-12.0.0_r3
4、同步源码
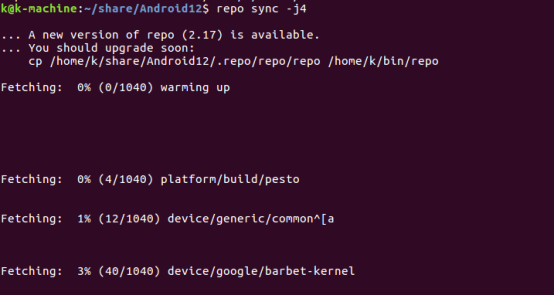
repo sync -j4
编译源码
1、安装 openjdk8
sudo add-apt-repository ppa:openjdk-r/ppa
sudo apt-get update
sudo apt-get install openjdk-8-jdk
如果电脑里面存在多个java 版本,则通过如下命令选择openjdk-8即可
sudo update-alternative --config java
sudo update-alternative --config javac
2、安装依赖库
sudo apt-get install libx11-dev:i386 libreadline6-dev:i386 libgl1-mesa-dev g++-multilib
sudo apt-get install -y git flex bison gperf build-essential libncurses5-dev:i386
sudo apt-get install tofrodos python-markdown libxml2-utils xsltproc zlib1g-dev:i386
sudo apt-get install dpkg-dev libsdl1.2-dev libesd0-dev
sudo apt-get install git-core gnupg flex bison gperf build-essential
sudo apt-get install zip curl zlib1g-dev gcc-multilib g++-multilib
sudo apt-get install libc6-dev-i386
sudo apt-get install lib32ncurses5-dev x11proto-core-dev libx11-dev
sudo apt-get install libgl1-mesa-dev libxml2-utils xsltproc unzip m4
sudo apt-get install lib32z-dev ccache
sudo apt-get install libssl-dev
3、下载对应闭源驱动文件合入源码
可以到下面的地址下载 pixel 对应驱动文件或者完整 rom 包
4、开始编译
通过 lscpu 命令查看当前cpu的详细信息

执行命令
source build/envsetup.sh
lunch 25  (aosp_crosshatch-userdebug 版本)
make -j8
lunch 根据上面cpu的类型,make -j cpu核数*2
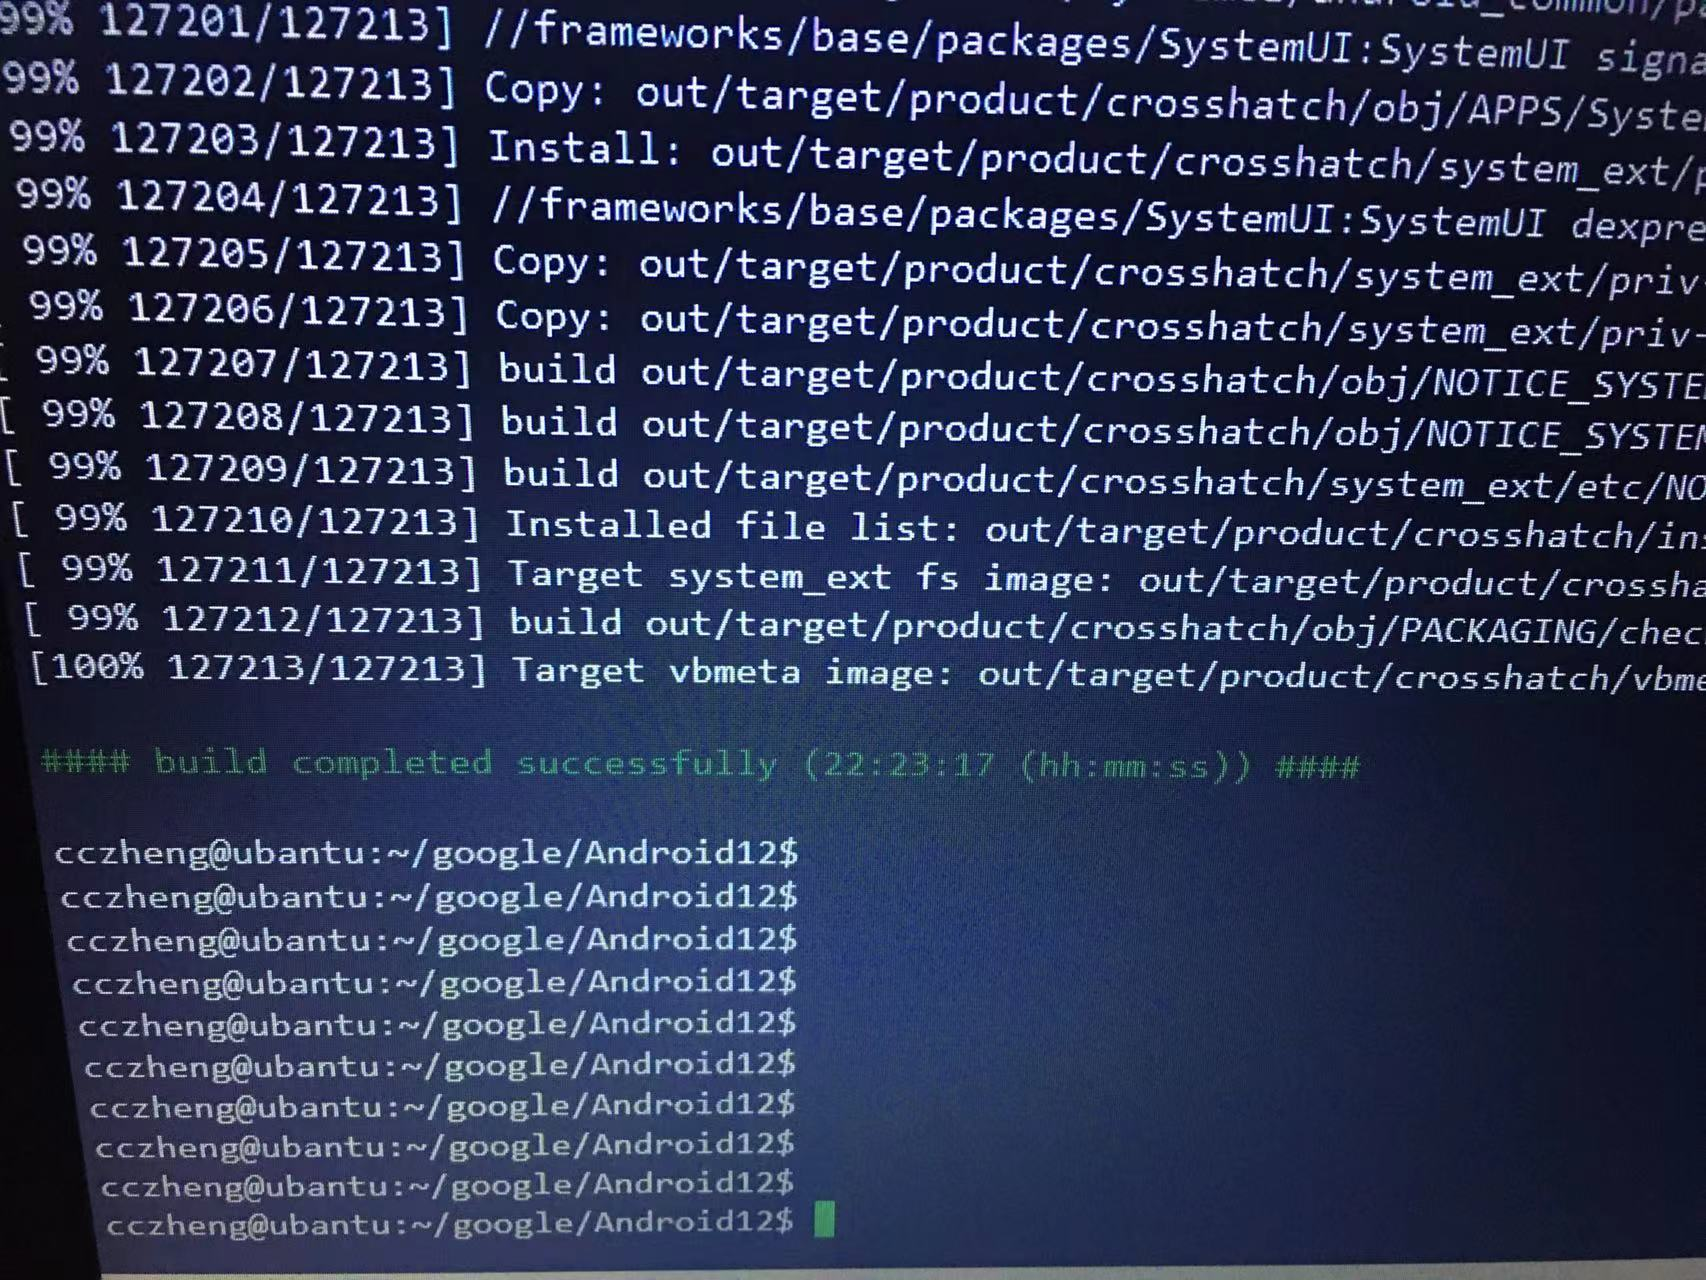
编译完成23小时,哈哈哈哈哈哈
刷机,参考官方包自己写个刷机脚本,将你编译后out目录下得到的如下文件
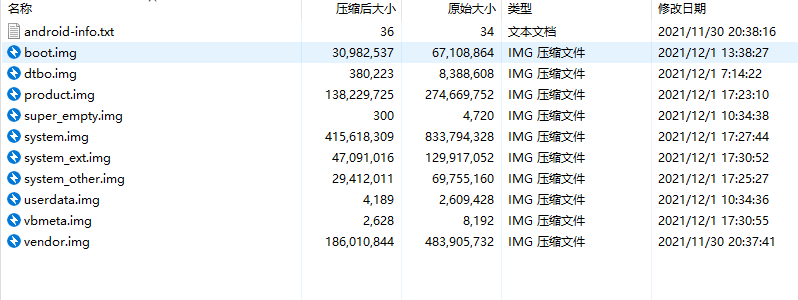
copy出来,全部添加到压缩文件 aosp12.zip
然后依次执行
adb reboot fastboot
fastboot -w update .\aosp12.zip
fastboot reboot
PS H:\rom12\aosp12> adb reboot fastboot
PS H:\rom12\aosp12> fastboot -w update .\aosp12.zip
--------------------------------------------
Bootloader Version...: b1c1-0.4-7617406
Baseband Version.....: g845-00194-210812-B-7635520
Serial Number........: 89BY05MBQ
--------------------------------------------
extracting android-info.txt (0 MB) to RAM...
Checking 'product'                                 OKAY [  0.001s]
Setting current slot to 'b'                        OKAY [  0.035s]
extracting boot.img (64 MB) to disk... took 0.317s
archive does not contain 'boot.sig'
Sending 'boot_b' (65536 KB)                        OKAY [  2.063s]
Writing 'boot_b'                                   OKAY [  0.393s]
extracting dtbo.img (8 MB) to disk... took 0.048s
archive does not contain 'dtbo.sig'
Sending 'dtbo_b' (8192 KB)                         OKAY [  0.257s]
Writing 'dtbo_b'                                   OKAY [  0.066s]
archive does not contain 'dt.img'
archive does not contain 'recovery.img'
extracting vbmeta.img (0 MB) to disk... took 0.004s
archive does not contain 'vbmeta.sig'
Sending 'vbmeta_b' (8 KB)                          OKAY [  0.001s]
Writing 'vbmeta_b'                                 OKAY [  0.003s]
archive does not contain 'vbmeta_system.img'
archive does not contain 'vendor_boot.img'
extracting super_empty.img (0 MB) to disk... took 0.004s
Sending 'system_b' (4 KB)                          OKAY [  0.001s]
Updating super partition                           OKAY [  0.006s]
Resizing 'product_b'                               OKAY [  0.006s]
Resizing 'system_b'                                OKAY [  0.006s]
Resizing 'system_ext_b'                            OKAY [  0.006s]
Resizing 'vendor_b'                                OKAY [  0.006s]
archive does not contain 'boot_other.img'
archive does not contain 'odm.img'
extracting product.img (261 MB) to disk... took 2.240s
archive does not contain 'product.sig'
Resizing 'product_b'                               OKAY [  0.006s]
Sending sparse 'product_b' 1/2 (262140 KB)         OKAY [  8.237s]
Writing 'product_b'                                OKAY [  1.592s]
Sending sparse 'product_b' 2/2 (6092 KB)           OKAY [  0.210s]
Writing 'product_b'                                OKAY [  0.086s]
extracting system.img (795 MB) to disk... took 6.101s
archive does not contain 'system.sig'
Resizing 'system_b'                                OKAY [  0.006s]
Sending sparse 'system_b' 1/4 (262140 KB)          OKAY [  8.247s]
Writing 'system_b'                                 OKAY [  1.634s]
Sending sparse 'system_b' 2/4 (262140 KB)          OKAY [  8.788s]
Writing 'system_b'                                 OKAY [  1.685s]
Sending sparse 'system_b' 3/4 (262140 KB)          OKAY [  8.642s]
Writing 'system_b'                                 OKAY [  1.632s]
Sending sparse 'system_b' 4/4 (27832 KB)           OKAY [  0.935s]
Writing 'system_b'                                 OKAY [  0.199s]
extracting system_ext.img (123 MB) to disk... took 0.779s
archive does not contain 'system_ext.sig'
Resizing 'system_ext_b'                            OKAY [  0.004s]
Sending 'system_ext_b' (126872 KB)                 OKAY [  3.976s]
Writing 'system_ext_b'                             OKAY [  0.826s]
extracting system_other.img (66 MB) to disk... took 0.402s
archive does not contain 'system.sig'
Sending 'system_a' (68120 KB)                      OKAY [  2.129s]
Writing 'system_a'                                 OKAY [  0.410s]
extracting vendor.img (461 MB) to disk... took 3.112s
archive does not contain 'vendor.sig'
Resizing 'vendor_b'                                OKAY [  0.006s]
Sending sparse 'vendor_b' 1/2 (262140 KB)          OKAY [  8.233s]
Writing 'vendor_b'                                 OKAY [  1.651s]
Sending sparse 'vendor_b' 2/2 (210424 KB)          OKAY [  7.042s]
Writing 'vendor_b'                                 OKAY [  1.296s]
archive does not contain 'vendor_dlkm.img'
archive does not contain 'vendor_other.img'
Erasing 'userdata'                                 OKAY [  5.861s]
Erase successful, but not automatically formatting.
File system type raw not supported.
Erasing 'metadata'                                 OKAY [  0.111s]
Erase successful, but not automatically formatting.
File system type raw not supported.
Rebooting                                          OKAY [  0.000s]
Finished. Total time: 89.950s
PS H:\rom12\aosp12>
刷机结束,重启开始搞机啦。
Android 系统开发系列(1):Android 12 源代码下载、编译和刷机
在谷歌云上高速编译安卓AOSP ROM、驱动、内核并完成刷机
标签:845,git,OKAY,sudo,3XL,system,dev,repo,刷机 来源: https://blog.csdn.net/u012932409/article/details/122179814