Python爬取数据(基础,从0开始)
作者:互联网
1、技术概述
- 爬虫,就是给网站发起请求,并从响应中提取需要的数据的自动化程序,一般有三个步骤:
(1)发起请求,获取响应
(2)解析内容
(3)保存数据 - 当初学习该技术是因为要做疫情网页,需要准确的疫情数据。
- 技术难点:或许需要去了解一下爬虫的字典和列表。
2、技术详述
- 仅到爬取数据并存储数据到数据库阶段,需要安装Python 3.7,MySQL,Jupyte notebook(Python IDE)(安装方法自己百度),启动jupyter notebook(基础使用教程请自己百度,很简单的)
- 发起请求,获取响应
- 不少网站有反扒措施,为了避免这个,我们可以冒充各种浏览器去爬取,比如百度,谷歌。
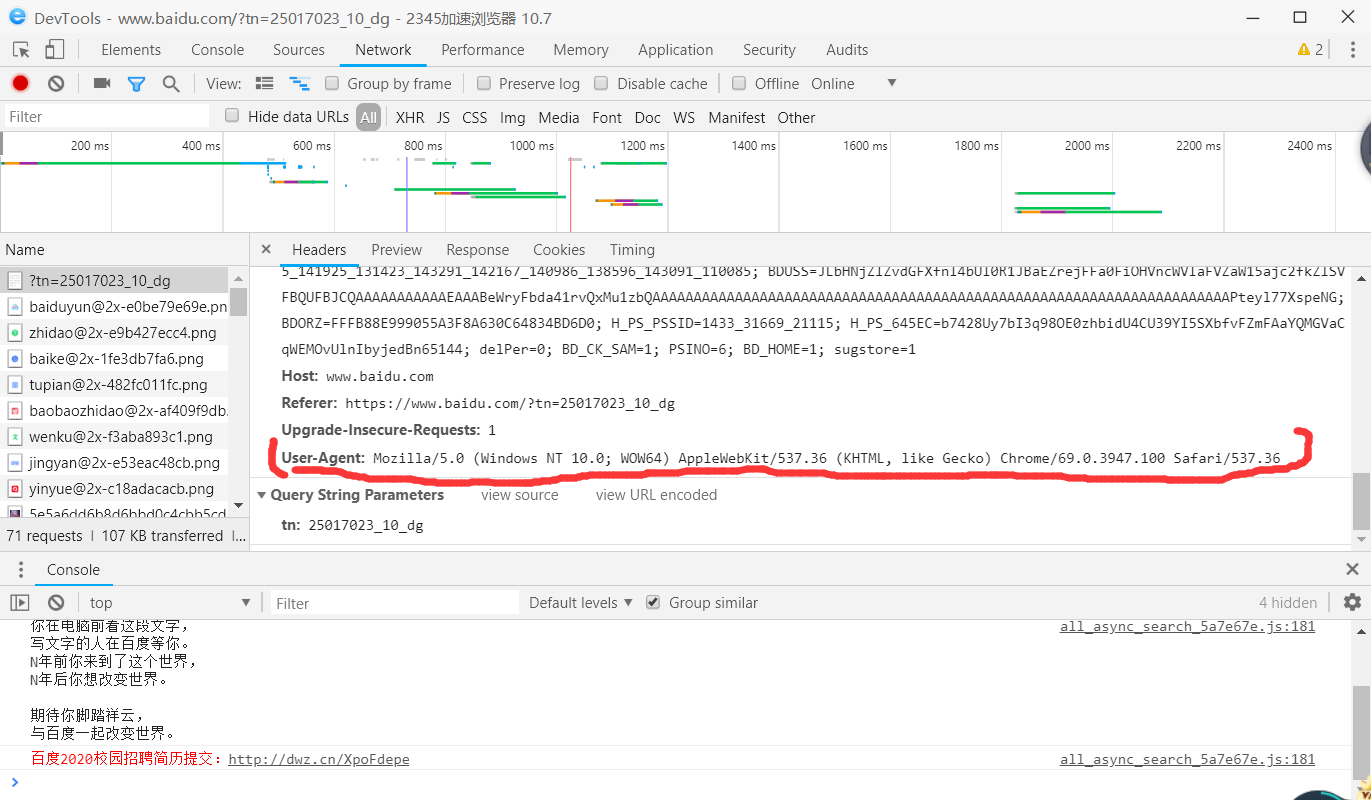
输入百度网址www.baidu.com,按下F12进入开发者页面(不同浏览器间可能不同),如图找到百度的User-Agent数据,这个数据用来标识访问者身份,这个就是咋们冒充百度的关键
- 有两种发起请求的方式,其一是用urllib,主要用的是其中的request.urlopen()方法
from urllib import request

url = "https://view.inews.qq.com/g2/getOnsInfo?name=disease_h5" #这是你想爬取数据的地址

header = {
    "User-Agent": "Mozilla/5.0 (Windows NT 10.0; WOW64) AppleWebKit/537.36 (KHTML, like Gecko) Chrome/69.0.3947.100 Safari/537.36"
} #就是上一点中得到的那个User-Agent,这一步我们冒充成百度

req = request.Request(url,headers = header)
res = request.urlopen(req) #访问url并获取响应

html = res.read()#获取的是字节形式的内容
html.decode("utf-8")#解码,如果是乱码的话
print(html)
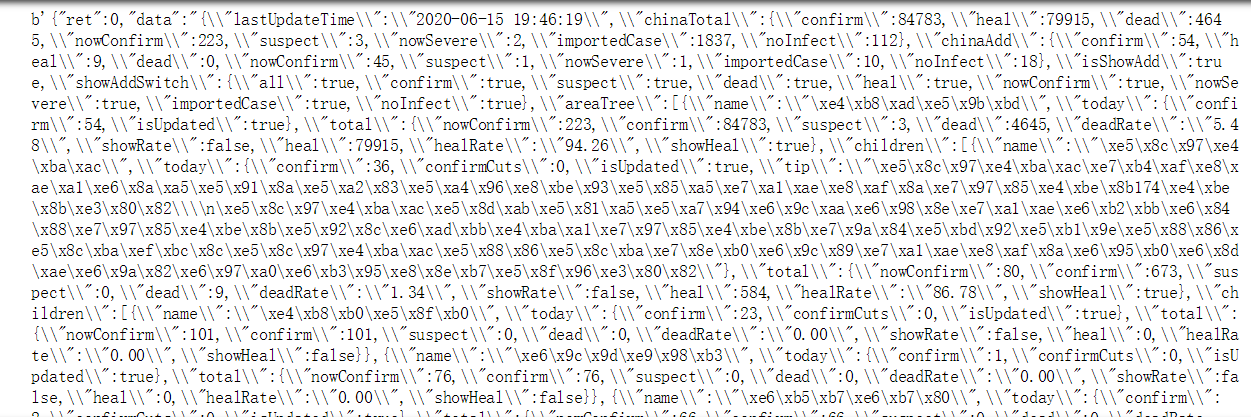
运行结果:

当初是从腾讯接口爬取疫情数据,数据持久化在本地数据库,完整代码(仅显示爬虫爬取数据部分):
import requests
import json
import pymysql
import time
import traceback
def getdata():#从腾讯接口爬取数据,并存到字典及列表中
    url = "https://view.inews.qq.com/g2/getOnsInfo?name=disease_h5"
    header = {
    "User-Agent": "Mozilla/5.0 (Windows NT 10.0; WOW64) AppleWebKit/537.36 (KHTML, like Gecko) Chrome/69.0.3947.100 Safari/537.36"
    }
    r1 = requests.get(url,headers = header)
    res1 = json.loads(r1.text)
    data_all = json.loads(res1["data"])

    url2 = "https://view.inews.qq.com/g2/getOnsInfo?name=disease_other"
    r2 = requests.get(url2,headers = header)
    res2 = json.loads(r2.text)
    odata_all = json.loads(res2["data"])

    country_history = {}#历史数据,全国
    for i in odata_all["chinaDayList"]:
        ds ="2020."+ i["date"]
        tup =time.strptime(ds,"%Y.%m.%d")
        ds =time.strftime("%Y-%m-%d",tup)
        confirm =i["confirm"]
        heal=i["heal"]
        dead=i["dead"]
        country_history[ds] ={"confirm":confirm, "heal":heal, "dead":dead}
    for i in odata_all["chinaDayAddList"]:
        ds ="2020."+ i["date"]
        tup =time.strptime(ds,"%Y.%m.%d")
        ds =time.strftime("%Y-%m-%d",tup)
        confirm =i["confirm"]
        country_history[ds].update({"confirm_add":confirm})

    details =[]#各省数据
    update_time=data_all["lastUpdateTime"]
    data_province=data_all["areaTree"][0]["children"]
    for pro_infos in data_province:
        province=pro_infos["name"]
        confirm=pro_infos["total"]["confirm"]
        confirm_add=pro_infos["today"]["confirm"]
        heal=pro_infos["total"]["heal"]
        dead=pro_infos["total"]["dead"]
        details.append([update_time,province,confirm,confirm_add,heal,dead])

    country_now =[]#全国如今数据
    update_time =data_all["lastUpdateTime"]
    nowConfirm =data_all["chinaTotal"]["nowConfirm"]
    suspect =data_all["chinaTotal"]["suspect"]
    nowSevere =data_all["chinaTotal"]["nowSevere"]
    confirm =data_all["chinaTotal"]["confirm"]
    heal =data_all["chinaTotal"]["heal"]
    dead =data_all["chinaTotal"]["dead"]
    nowConfirm_add =data_all["chinaAdd"]["nowConfirm"]
    suspect_add =data_all["chinaAdd"]["suspect"]
    nowSevere_add =data_all["chinaAdd"]["nowSevere"]
    confirm_add =data_all["chinaAdd"]["confirm"]
    heal_add =data_all["chinaAdd"]["heal"]
    dead_add =data_all["chinaAdd"]["dead"]
    country_now.append([update_time,nowConfirm,suspect,nowSevere,confirm,heal,dead,nowConfirm_add,suspect_add,nowSevere_add,confirm_add,heal_add,dead_add])

    province_history = []#历史数据,各省
    ds=time.strftime("%Y-%m-%d")
    data_province=data_all["areaTree"][0]["children"]
    for pro_infos in data_province:
        province=pro_infos["name"]
        confirm=pro_infos["total"]["confirm"]
        confirm_add=pro_infos["today"]["confirm"]
        heal=pro_infos["total"]["heal"]
        dead=pro_infos["total"]["dead"]
        province_history.append([ds,province,confirm,confirm_add,heal,dead])

    return country_history,details,country_now,province_history
3、技术使用中遇到的问题和解决过程
1.notebook下载超时

2.如图

4、进行总结。
步骤:
- 1)发起请求,获取响应(urllib、requests)
- 2)解析内容(re、beautifulsoup4)
- 3)保存数据(保存在本地库或云数据库)
5、列出参考文献、参考博客(标题、作者、链接)。
标签:confirm,Python,data,heal,dead,爬取,add,infos,数据 来源: https://www.cnblogs.com/chenyi-maysky/p/13137772.html
